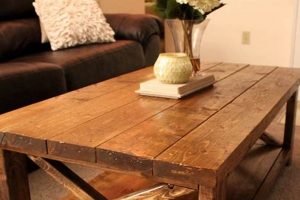
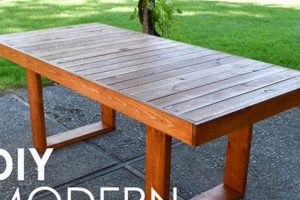
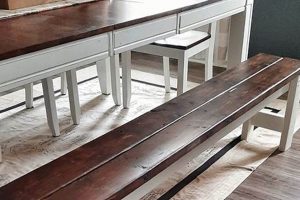
A do-it-yourself project involving the construction of a surface designed for woodworking activities constitutes a significant undertaking for both amateur and professional woodworkers. This type of project typically involves assembling a sturdy structure using materials such as wood, metal, or a combination thereof, to create a stable and functional platform for cutting, shaping, and assembling wood components. For example, an individual might choose to construct a workbench featuring integrated storage, clamping systems, and a durable work surface, tailored to their specific woodworking needs.
The construction of such a workspace offers several advantages. It allows for customization to suit individual preferences, spatial constraints, and budgetary considerations. Furthermore, undertaking this project fosters a deeper understanding of woodworking principles, material properties, and construction techniques. Historically, the creation of personalized workspaces has been integral to the craft of woodworking, enabling artisans to optimize their workflow and enhance precision.
Subsequent sections will detail crucial aspects of designing and building a personalized woodworking area. This includes considerations for material selection, structural integrity, surface finish, and integration of essential features such as clamping mechanisms and storage solutions.
Essential Considerations for Constructing a Woodworking Surface
The following recommendations aim to provide guidance on building a durable and functional surface intended for woodworking tasks. Proper planning and execution are critical for achieving a successful outcome.
Tip 1: Material Selection: Choose hardwood species such as maple, oak, or beech for the tabletop to ensure resilience against dents and scratches. Softwoods like pine are suitable for the frame but require reinforcement at stress points.
Tip 2: Structural Integrity: Employ mortise-and-tenon or dovetail joinery for maximum strength and stability in the frame. These joints distribute stress effectively and minimize the risk of racking or collapse.
Tip 3: Surface Planarity: Ensure the tabletop surface is perfectly flat and level. Use a hand plane or a power planer to achieve this. A flat surface is crucial for accurate woodworking.
Tip 4: Clamping Solutions: Integrate dog holes or T-tracks into the tabletop to accommodate clamps securely. These features facilitate efficient workpiece holding during various operations.
Tip 5: Work Height Considerations: Determine the optimal work height based on individual stature and preferred woodworking techniques. A height that minimizes strain and promotes ergonomic posture is ideal.
Tip 6: Incorporate Storage: Design integrated storage solutions such as drawers or shelves to keep tools and materials organized and accessible. Efficient storage enhances workflow and workspace safety.
Tip 7: Consider Mobility: If workspace is limited, consider adding heavy-duty casters to the base. Ensure they are lockable to provide stability during use.
Implementing these recommendations will result in a sturdy, functional, and customized workspace that enhances precision and efficiency in woodworking endeavors. The lifespan of the surface will be extended and the results improved by the application of these techniques.
The following section will cover the most common mistakes when attempting to build a custom woodworking surface.
1. Dimensions
Dimensional considerations are paramount in the context of constructing a bespoke woodworking area. These parameters directly influence its usability, efficiency, and integration within the available workspace. Appropriate sizing ensures suitability for intended woodworking projects and user ergonomics.
- Tabletop Area
Tabletop area dictates the maximum workpiece size manageable on the surface. Smaller surfaces may restrict larger projects, while excessively large surfaces may compromise accessibility and maneuverability. Dimensions should accommodate frequently undertaken tasks and potential future project expansions. For example, a surface for furniture assembly necessitates larger dimensions than one primarily used for smaller craft projects.
- Height
Table height is a critical ergonomic factor. An improperly sized surface can lead to musculoskeletal strain and reduced work efficiency. Optimal height corresponds to the user’s stature and typical working posture, allowing for comfortable arm positioning and minimizing the need for excessive bending or reaching. Common recommendations suggest matching table height to the distance between the floor and the user’s bent elbow.
- Depth
Table depth affects the reach and accessibility of tools and materials during project execution. Insufficient depth can limit the ability to arrange components effectively, while excessive depth can create difficulties in accessing the rear portion of the surface. The optimal depth should balance accessibility with available space and project requirements. For instance, a shallower surface might be preferred in a constrained workshop setting.
- Overall Footprint
The overall footprint, including any base or leg structure, must be congruent with the available floor space within the designated workshop area. Careful measurements are crucial to ensure adequate room for movement around the surface and prevent obstruction of access to other tools or equipment. Compact designs, potentially incorporating folding or mobile features, are beneficial in smaller workspaces.
The careful consideration and precise specification of dimensions are fundamental to creating a personalized woodworking station. These parameters directly influence project capability, user comfort, and space utilization. Adjustments based on individual needs and spatial limitations are crucial for maximizing the utility of such a project.
2. Stability
Stability constitutes a critical factor in the design and construction of a bespoke woodworking surface. The inherent functionality and utility of this workspace are directly predicated on its ability to resist movement and maintain a consistent, level plane during woodworking operations. Absence of structural integrity undermines precision and user safety.
- Foundation Rigidity
The foundation, typically the base or legs of the surface, must provide a solid and unyielding platform. Insufficient rigidity in the foundation transmits vibrations and introduces instability during tasks such as planing or sawing. Examples of robust foundations include mortise-and-tenon joinery, reinforced bracing, and the use of heavy-gauge metal. The presence of leveling feet can compensate for minor floor irregularities and contribute to overall surface stability.
- Mass and Weight Distribution
The overall mass and distribution of weight across the structure impact its resistance to movement. A heavier surface possesses greater inertia and requires more force to displace. Uneven weight distribution can create tipping hazards or induce warping over time. Employing dense materials and ensuring balanced weight distribution across the base contribute to enhanced stability. Incorporating storage solutions, such as drawers or shelves, can further augment mass and promote even weight distribution.
- Joinery Integrity
The type and quality of joinery used to connect the various components of the structure directly influence its structural integrity. Weak or poorly executed joinery creates points of vulnerability, increasing the likelihood of racking or collapse under load. Employing robust joinery techniques, such as dovetails, mortise-and-tenon, or through bolts, maximizes structural integrity. Careful attention to joint alignment and secure fastening are essential for maintaining stability over extended use.
- Material Selection and Properties
The inherent properties of the materials used, such as stiffness, density, and resistance to warping, influence the overall stability of the structure. Softwoods, while cost-effective, may lack the necessary stiffness and density for demanding woodworking applications. Hardwoods, such as maple or oak, offer superior structural properties and resistance to deformation. The presence of internal stresses within the wood can contribute to instability over time; therefore, proper seasoning and acclimatization are crucial.
The considerations outlined above highlight the multifaceted nature of stability in the context of a custom woodworking surface. A holistic approach to design and construction, encompassing robust foundations, balanced weight distribution, high-quality joinery, and appropriate material selection, is paramount for creating a reliable and durable workspace. Compromises in any of these areas can lead to reduced precision, increased user fatigue, and potential safety hazards.
3. Material
Material selection is a foundational element in the design and fabrication of a do-it-yourself woodworking table. The choice of materials directly influences the table’s structural integrity, longevity, work surface characteristics, and overall cost-effectiveness. Prudent selection necessitates a comprehensive understanding of material properties and their suitability for the intended application.
- Tabletop Material
The tabletop material bears the brunt of woodworking activities, necessitating high durability and resistance to abrasion, impact, and moisture. Hardwoods such as maple, oak, and beech are frequently employed due to their inherent strength and density. Laminates, while less expensive, offer a smooth, easily cleanable surface but may be more susceptible to damage from heavy impact or prolonged moisture exposure. Particleboard or MDF, while budget-friendly, require a durable surface treatment to prevent moisture absorption and ensure long-term stability. Tabletop thickness is also an important consideration. Thicker tops will resist racking and provide a more solid surface for planing and other workholding operations.
- Frame and Leg Material
The material used for the frame and legs dictates the overall structural integrity of the table. Wood, metal, or a combination thereof are common choices. Wood frames, particularly those constructed from hardwoods, provide excellent strength and stability. Metal frames, often fabricated from steel or aluminum, offer superior load-bearing capacity and resistance to racking. Hybrid designs leverage the strengths of both materials, employing metal for critical load-bearing components and wood for aesthetic or functional elements. The selection process should include calculations for load capabilities based on anticipated weight.
- Fasteners and Adhesives
The selection of fasteners and adhesives is critical for ensuring secure and durable connections between components. Screws, bolts, and nails are commonly used for mechanical fastening, while wood glue, epoxy, and construction adhesives provide bonding strength. The type of fastener or adhesive should be appropriate for the materials being joined and the anticipated stress levels. For example, lag bolts may be necessary for securing heavy-duty legs to the tabletop, while wood glue may suffice for joining frame members. The longevity and strength of the DIY woodworking table will ultimately depend on the quality and proper application of these materials.
- Surface Finish
The surface finish applied to the tabletop and frame serves to protect the underlying materials from moisture, abrasion, and chemical damage, while also enhancing the aesthetic appeal. Options include varnishes, lacquers, polyurethanes, and oils. The choice of finish should be based on the desired level of protection, ease of application, and aesthetic preferences. For example, a polyurethane finish provides excellent durability and water resistance but may require multiple coats for optimal results. Oils, while offering a more natural appearance, may require more frequent reapplication. The selected finish must be compatible with the tabletop’s primary material and should be applied in a well-ventilated environment following the manufacturer’s instructions.
The integration of these considerations with individual requirements leads to a woodworking table that balances function and endurance, providing a workspace that meets needs over time. These specific material choices will impact the workspace, and are a large consideration in this DIY project.
4. Joinery
Joinery, the art and science of connecting pieces of wood, forms a cornerstone in the successful construction of a do-it-yourself woodworking table. The strength, stability, and longevity of such a table are intrinsically linked to the quality and appropriateness of the joinery techniques employed. Proper joinery distributes stress, prevents racking, and ensures the structural integrity of the finished piece.
- Mortise and Tenon Joints
Mortise and tenon joints, a classic woodworking technique, are frequently utilized in table construction for their exceptional strength and resistance to shear forces. The tenon, a protruding element, fits precisely into the mortise, a corresponding recess. This interlocking design creates a robust mechanical connection. In the context of a woodworking table, mortise and tenon joints are particularly well-suited for joining legs to the tabletop frame, ensuring a stable and durable support structure. Variations, such as wedged or pinned mortise and tenon joints, provide even greater resistance to separation.
- Dovetail Joints
Dovetail joints, characterized by their interlocking, fan-shaped tails and pins, offer exceptional tensile strength and resistance to pulling forces. These joints are commonly used in drawer construction and can also be employed to join table aprons to legs, providing a visually appealing and structurally sound connection. The mechanical interlock inherent in the dovetail design eliminates the need for fasteners in certain applications. While dovetail joints require precision and skill to execute, they represent a hallmark of quality craftsmanship.
- Butt Joints with Fasteners
Butt joints, where two pieces of wood are joined end-to-end, are the simplest form of joinery but often necessitate reinforcement with fasteners such as screws or dowels. While less inherently strong than mortise and tenon or dovetail joints, butt joints can be suitable for non-critical connections in a woodworking table, such as joining frame members. The effectiveness of a butt joint depends heavily on the type and placement of fasteners and the adhesive used. Careful alignment and clamping during assembly are essential for maximizing the strength and stability of butt joints.
- Lap Joints
Lap joints, where two pieces of wood overlap, provide a larger gluing surface and increased mechanical strength compared to butt joints. Half-lap joints, where material is removed from both pieces to maintain a consistent thickness, are often used in frame construction. Lap joints can be secured with screws, bolts, or adhesive, depending on the application. In the context of a woodworking table, lap joints can be used to connect frame members or to create a strong and stable base structure. The precision of the lap joint is crucial for ensuring a flush and aesthetically pleasing surface.
The selection of appropriate joinery techniques is paramount in the construction of a do-it-yourself woodworking table. The choice depends on factors such as the intended use of the table, the materials employed, and the skill level of the woodworker. Regardless of the specific techniques chosen, meticulous attention to detail and precise execution are essential for creating a robust and durable woodworking surface that can withstand the rigors of woodworking tasks.
5. Clamping
The integration of effective clamping mechanisms into a do-it-yourself woodworking table is paramount for secure workpiece holding during various woodworking operations. Clamping systems facilitate precision, safety, and efficiency, directly influencing the quality of the finished product.
- Surface-Mounted Clamps
Surface-mounted clamps, such as bench vises and holdfasts, provide direct and immediate clamping force to the workpiece. A bench vise, typically mounted on the edge of the table, allows for secure gripping of workpieces for operations such as planing or sawing. Holdfasts, inserted into dog holes on the table surface, exert downward pressure to hold workpieces flat. These clamping methods are versatile and adaptable to a wide range of workpiece sizes and shapes, offering immediate adjustability for dynamic woodworking tasks.
- Dog Hole Systems
Dog hole systems, consisting of a series of precisely spaced holes across the table surface, facilitate the use of bench dogs and clamping accessories. Bench dogs, inserted into the holes, act as stops or reference points for aligning workpieces. Combined with clamping accessories, such as parallel clamps or cam clamps, dog hole systems enable secure and consistent clamping pressure across the workpiece. This method is particularly useful for assembling large panels or frames, ensuring accurate alignment and uniform clamping force.
- T-Track Systems
T-track systems, consisting of embedded metal tracks with a T-shaped slot, offer a versatile platform for attaching clamping accessories and jigs. T-tracks allow for adjustable positioning of clamps, stops, and fences, enabling customized clamping setups for specific woodworking operations. This method is particularly useful for repetitive tasks or for securing complex workpiece geometries. The T-track system’s flexibility allows for easy repositioning and adjustment of clamping elements, enhancing efficiency and precision.
- Integrated Clamping Jigs
Integrated clamping jigs, custom-built fixtures that incorporate clamping mechanisms, provide a specialized solution for repetitive or complex woodworking tasks. These jigs can be designed to hold workpieces at specific angles, to align components precisely, or to apply consistent clamping pressure. Examples include miter sleds with integrated clamps for accurate angle cuts and assembly jigs for building identical components. Integrated clamping jigs enhance efficiency, repeatability, and precision, particularly in production woodworking environments.
The incorporation of appropriate clamping mechanisms into a custom woodworking table optimizes workpiece security, enhances precision, and promotes safety during woodworking operations. The choice of clamping methods depends on the specific woodworking tasks, the size and shape of the workpieces, and the desired level of flexibility and efficiency. Thoughtful integration of clamping systems is essential for maximizing the utility and effectiveness of a DIY woodworking table.
6. Ergonomics
Ergonomics, the science of designing and arranging workplaces, products, and systems so that they fit the people who use them, plays a crucial role in the construction of a do-it-yourself woodworking table. A woodworking table that neglects ergonomic principles can lead to musculoskeletal disorders, reduced productivity, and increased user fatigue. Conversely, a thoughtfully designed table that prioritizes ergonomics promotes comfort, efficiency, and long-term physical well-being. The primary ergonomic consideration revolves around optimizing the table’s dimensions to accommodate the user’s anthropometric measurements and preferred working posture. For instance, a work surface that is too low necessitates excessive bending, leading to lower back strain, while a surface that is too high requires elevated shoulder positioning, causing discomfort in the neck and upper back. Proper table height allows for a neutral wrist position, minimizing the risk of carpal tunnel syndrome. An example is a table designed for a user of average height (5’10”) typically ranging from 34 to 38 inches, but can vary based on the woodworking operations performed.
The integration of ergonomic principles extends beyond table height to encompass other design features. The inclusion of adjustable height mechanisms allows for customization to accommodate different users or varying tasks. The positioning of storage and tools within easy reach minimizes unnecessary reaching and bending, reducing the risk of strain injuries. A well-designed table surface should also provide adequate legroom, allowing for comfortable seating or standing postures. For example, a table with a recessed front edge allows the user to get closer to the workpiece, reducing strain on the back and shoulders. Furthermore, the incorporation of shock-absorbing materials or vibration dampening features can mitigate the impact of repetitive motions on the joints and muscles, providing comfort during longer work periods.
In conclusion, the application of ergonomic principles is not merely an optional consideration but an essential component of a well-designed do-it-yourself woodworking table. By prioritizing user comfort, minimizing physical strain, and promoting efficient workflow, ergonomic design significantly enhances the woodworking experience. The integration of adjustable features, thoughtful storage solutions, and vibration dampening materials contributes to a safer, more productive, and ultimately more enjoyable woodworking environment. The challenges associated with ergonomic woodworking can be mitigated through careful planning, attention to detail, and a commitment to prioritizing the user’s physical well-being. Understanding these concepts extends the longevity of the work and user, both resulting in better output and happier users.
7. Storage
Effective integration of storage within a do-it-yourself woodworking table directly impacts workflow efficiency and workspace organization. The presence of dedicated storage solutions minimizes clutter, facilitates easy access to tools and materials, and enhances overall productivity. Insufficient or poorly designed storage can lead to lost time searching for necessary items, increased risk of accidents due to disorganized workspaces, and reduced utilization of the available work surface. For example, a table lacking designated storage for frequently used hand tools may necessitate constant interruptions to retrieve them from distant locations, significantly hindering project completion time.
Practical applications of integrated storage are diverse and adaptable to individual woodworking needs. Drawers, shelves, and cabinets can be incorporated into the table’s design to accommodate a range of tools, hardware, and project components. Drawers are particularly well-suited for storing smaller items, such as measuring tools, fasteners, and hand planes, while shelves provide convenient access to larger tools and materials. Cabinets offer enclosed storage for items that require protection from dust or moisture, or for those requiring secure containment. In some instances, utilizing the space under the workbench is best. For instance, a rolling cart can be stored beneath the woodworking surface, then pulled out to access tools.
In summary, the thoughtful integration of storage solutions into a DIY woodworking table is crucial for maximizing efficiency, organization, and safety. Challenges associated with limited space can be addressed through innovative storage designs, such as incorporating vertical storage or utilizing modular components. The understanding of storage as an essential component of a woodworking table underscores the importance of considering both functional and ergonomic factors during the design and construction process, ultimately leading to a more productive and enjoyable woodworking experience.
Frequently Asked Questions
The following addresses common inquiries regarding the design, construction, and utilization of self-constructed woodworking surfaces. The information is intended to provide clarity and guidance based on established practices.
Question 1: What is the optimal height for a woodworking table?
The ideal table height depends on individual stature and intended use. A common recommendation involves matching the table height to the distance between the floor and the user’s bent elbow. This promotes ergonomic posture and minimizes strain. However, specific woodworking operations may necessitate adjustments. For example, detailed carving work may be more comfortable at a slightly higher surface.
Question 2: What materials are best suited for a woodworking table tabletop?
Hardwoods such as maple, oak, and beech are generally preferred for tabletops due to their durability and resistance to dents and scratches. These materials provide a stable and resilient work surface. Softwoods like pine are less suitable due to their susceptibility to damage. Alternative materials, such as laminated MDF, can provide a smooth surface but may lack the long-term durability of hardwoods.
Question 3: How can I ensure my woodworking table is stable and doesn’t wobble?
Stability is achieved through a combination of robust construction techniques, appropriate material selection, and careful attention to joinery. Employing techniques such as mortise-and-tenon or dovetail joints for the frame can significantly enhance stability. Ensuring the base is level and using leveling feet can compensate for uneven floors. Weight distribution and overall mass also contribute to stability.
Question 4: What are the benefits of integrating clamping solutions into a woodworking table?
Integrated clamping solutions, such as dog holes or T-tracks, facilitate secure workpiece holding during various woodworking operations. These features enhance precision, efficiency, and safety by preventing workpiece movement. Consistent and secure clamping also allows for more controlled and accurate cuts, shaping, and assembly.
Question 5: How important is storage in a woodworking table design?
Integrated storage significantly enhances the functionality of a woodworking table. Drawers, shelves, and cabinets provide organized storage for tools and materials, minimizing clutter and improving workflow. Efficient storage also reduces the time spent searching for necessary items and promotes a safer working environment.
Question 6: Can a woodworking table be easily moved around the workspace?
Mobility can be incorporated through the addition of heavy-duty casters to the base. However, casters should be lockable to provide stability during use. The choice of casters depends on the weight of the table and the type of flooring. A mobile table can be advantageous in smaller workspaces, allowing for flexible arrangement and efficient utilization of available space.
These responses offer a general overview of common considerations related to crafting a woodworking table. The specificity of any design will depend on unique workshop needs and user requirements.
Proceeding onward, the article details common errors that hinder woodworking efforts.
Conclusion
The preceding discussion has explored critical aspects of designing and constructing a “diy woodworking table”. Key considerations encompass material selection, structural integrity, clamping solutions, ergonomic principles, and integrated storage. Adherence to established techniques in these areas is paramount for creating a functional and durable workspace tailored to individual woodworking needs.
Careful planning and execution are essential for realizing the full potential of a self-constructed woodworking surface. The investment in thoughtful design and meticulous craftsmanship will yield a valuable asset that enhances efficiency, precision, and safety in woodworking endeavors. The long-term benefits of a well-crafted “diy woodworking table” will far outweigh the initial effort.


