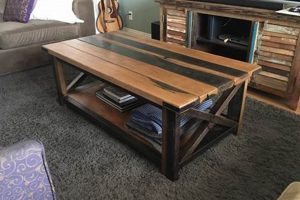
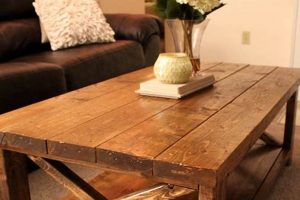
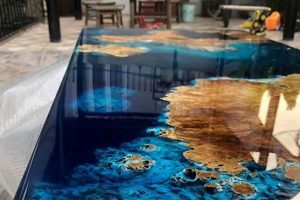
A do-it-yourself project involving the construction of a low, horizontal surface, typically found in living rooms, where the surface is covered with ceramic or similar hard-wearing squares. An example includes a repurposed wooden pallet enhanced with a mosaic design, providing a customized and durable furniture piece.
The significance of crafting such an item resides in its ability to blend functionality with personalized aesthetics. The project offers cost savings compared to purchasing manufactured alternatives, allows for creative expression through pattern and color choices, and often utilizes recycled materials, promoting sustainability. Historically, surface embellishment using small, durable components dates back to ancient civilizations, finding modern expression in adaptable home improvement endeavors.
The following sections will address essential considerations for successful execution, including material selection, surface preparation techniques, tiling methods, and necessary finishing procedures, ensuring a durable and visually appealing result.
Essential Considerations for Tiled Low Table Construction
This section provides crucial guidelines for achieving a durable and aesthetically pleasing tiled surface on a low, horizontal table.
Tip 1: Material Selection: Prioritize dense, non-porous tiles appropriate for horizontal surfaces. Porcelain or ceramic options offer durability and resistance to staining. Consider the thickness of the material to ensure structural integrity. A thicker surface material will withstand more weight and potential impact.
Tip 2: Substrate Preparation: The base must be structurally sound and level. Apply a cement backer board or waterproof membrane to prevent moisture damage and ensure proper adhesion. Ensure the substrate is clean and free of debris or contaminants.
Tip 3: Accurate Measurement and Layout: Precisely measure the table surface and plan the surface material layout before application. Employ a dry run to visualize the final design and identify any necessary cuts. Symmetry and balanced distribution of tiles contribute to a professional finish.
Tip 4: Adhesive Application: Use a thin-set mortar specifically designed for surface materials. Apply the adhesive evenly using a notched trowel, creating consistent ridges for optimal bonding. Follow the manufacturer’s instructions regarding mixing ratios and curing times.
Tip 5: Grouting Techniques: Choose a grout color that complements or contrasts with the surface material. Apply the grout evenly, forcing it into the spaces between the surfaces. Remove excess grout with a damp sponge, and polish with a dry cloth after the recommended curing period.
Tip 6: Sealing and Protection: Apply a sealant to the grout lines to prevent staining and moisture penetration. Consider applying a sealant to the tiled surface to enhance its resistance to scratches and wear. Regular cleaning and maintenance will prolong the lifespan of the tiled surface.
Tip 7: Edge Treatment: Protect the edges of the table with edge banding or metal trim to prevent chipping and damage. Mitered corners provide a seamless and professional appearance. Secure the edge treatment with appropriate adhesive or fasteners.
Adherence to these guidelines will contribute to a durable, visually appealing, and functional tiled surface, enhancing the longevity and aesthetic value of the constructed table.
The subsequent section will explore common challenges encountered during construction and provide troubleshooting strategies.
1. Substrate Preparation
Substrate preparation forms a critical foundation for the success of a tiled low table project. The substrate, or base, directly influences the longevity and aesthetic quality of the finished surface. Inadequate preparation can lead to tile cracking, grout failure, and overall structural instability. For instance, if a plywood substrate is not properly sealed and waterproofed, moisture absorption can cause warping and subsequent surface material detachment. A level and stable substrate is essential for even distribution of weight and stress across the tiled surface. The cause-and-effect relationship is clear: improper preparation leads to premature failure, while meticulous attention to the base ensures lasting durability. The absence of appropriate underlayment or a poorly constructed frame can lead to costly repairs and a compromised final product.
Effective substrate preparation includes several key steps. First, the selection of appropriate materials is paramount. Cement backer board, designed for wet environments, provides a stable and moisture-resistant base. Second, proper sealing and waterproofing prevent moisture penetration, a common cause of substrate degradation. Third, ensuring a level surface through shimming or self-leveling compounds guarantees even tile adhesion. A real-world example demonstrates the importance of these steps: consider a table built with untreated lumber and directly tiled. Over time, seasonal changes in humidity cause the wood to expand and contract, resulting in cracked tiles and displaced grout. In contrast, a table with a properly prepared cement backer board and sealed seams will withstand environmental fluctuations, maintaining its integrity for years.
In summary, the seemingly understated process of substrate preparation is, in fact, a cornerstone of any successful tiled low table construction. Addressing potential challenges through careful material selection, meticulous sealing, and precise leveling contributes directly to the project’s long-term stability and aesthetic appeal. Neglecting this critical phase can lead to premature failure and necessitate costly repairs, underscoring its practical significance. By understanding and implementing proper preparation techniques, the resulting tiled low table will provide years of functional use and visual enjoyment.
2. Surface Material Selection
The selection of surface materials constitutes a crucial phase in the creation of a tiled low table. The chosen material directly impacts the aesthetic appeal, durability, and overall functionality of the completed piece.
- Material Durability
The material’s inherent resistance to scratching, chipping, and staining is paramount. Porcelain tiles, for example, offer superior hardness and low porosity compared to certain ceramic options. In high-traffic areas or settings where spills are likely, selecting a durable material mitigates the risk of damage and simplifies maintenance. The use of natural stone, while aesthetically pleasing, may require periodic sealing to prevent staining and water damage.
- Aesthetic Compatibility
The selected surface material should harmonize with the surrounding environment and the intended design aesthetic. Options range from minimalist, monochrome tiles to intricately patterned mosaics. The choice should reflect the desired ambiance and complement existing decor. For instance, a rustic-themed room might benefit from terracotta tiles, while a contemporary space might favor sleek, large-format porcelain.
- Surface Texture and Safety
The surface texture impacts both the visual appeal and the practical safety of the tiled low table. Smooth, polished surfaces may present a slip hazard, particularly when wet. Textured tiles, conversely, offer increased grip and reduce the risk of accidents. Consideration should be given to the intended use of the table and the likelihood of spills or moisture exposure.
- Cost Considerations
The cost of surface materials can vary significantly depending on the type, size, and origin. Budget constraints may influence the selection process, necessitating a balance between desired aesthetics and affordability. While high-end materials offer superior durability and visual appeal, cost-effective alternatives can provide a satisfactory result when properly installed and maintained. Balancing the expense of materials with the long-term investment in quality and durability is a key aspect of material selection.
The interplay of these facets during material selection directly impacts the ultimate success of the tiled low table. By carefully considering durability, aesthetics, texture, and cost, one can create a durable, visually appealing, and functional piece that complements its intended environment and meets the user’s needs.
3. Adhesive Compatibility
Adhesive compatibility represents a critical determinant in the structural integrity and longevity of a tiled low table. The adhesive serves as the essential bond between the surface material and the substrate; therefore, the selection of an inappropriate adhesive can precipitate premature failure, leading to cracked tiles, grout separation, and eventual structural collapse. A primary example involves the use of a non-modified thin-set mortar with porcelain tiles, known for their low porosity. The adhesive’s inability to properly bond with the impervious tile surface results in a weak connection, susceptible to stress from weight and temperature fluctuations. The cause-and-effect relationship is evident: incompatible adhesives yield compromised results.
The practical application of adhesive compatibility principles necessitates careful consideration of both the tile type and the substrate material. Specific thin-set mortars are formulated for various surface materials, including glass, stone, and large-format tiles. Furthermore, the substrate’s compositionwhether cement board, plywood, or concreteinfluences the adhesive’s performance. For instance, when tiling over plywood, a flexible, polymer-modified thin-set mortar is required to accommodate the wood’s inherent expansion and contraction. Failure to adhere to these guidelines leads to bonding issues. One frequently cited example consists of using a standard, unmodified thin-set on a large format tile, where the limited open time of the adhesive coupled with tile size prevents adequate adhesion and can lead to cracking or disbondment over time.
In summary, adhesive compatibility forms an indispensable component of a durable and aesthetically pleasing tiled low table. The prudent selection of adhesive, tailored to the characteristics of both the surface material and the substrate, mitigates the risk of structural failure and ensures long-term performance. Overlooking this aspect introduces potential challenges, ultimately compromising the project’s success and necessitating costly repairs, therefore practical understanding is vital for optimal project outcomes.
4. Grout Application
Grout application plays a pivotal role in the successful completion of a tiled low table. It functions as both a structural component, filling the spaces between the tiles to provide lateral support, and an aesthetic element, defining the visual character of the finished surface. The integrity and appearance of the grout directly impact the longevity and overall appeal of the furniture piece.
- Grout Selection
The choice of grout type directly influences performance. Cementitious grout, epoxy grout, and furane resin grout each offer distinct properties regarding water resistance, stain resistance, and flexibility. Cementitious grout, while cost-effective, is more porous and susceptible to staining than epoxy grout, which is virtually impermeable and resistant to chemical damage. The selection must align with the table’s intended use and potential exposure to moisture or spills. For example, a low table intended for outdoor use necessitates a grout with superior water resistance to prevent freeze-thaw damage and mold growth.
- Application Technique
Proper application technique is critical for achieving a durable and visually appealing grout finish. Consistent grout depth and complete filling of the grout lines ensure adequate lateral support for the tiles. The use of a rubber grout float and a consistent wiping technique prevents uneven surfaces and excess grout haze on the tile faces. Inconsistent application can lead to weakened grout lines, increasing the risk of cracking and water penetration. The necessity for even grout distribution is illustrated in situations where improperly packed grout fails to support tile edges, leading to chipping and premature wear.
- Sealing and Maintenance
Sealing grout lines enhances their resistance to staining and moisture penetration. The application of a penetrating grout sealer creates a protective barrier, preventing liquids and dirt from entering the porous grout structure. Regular cleaning with pH-neutral cleaners preserves the grout’s color and prevents the buildup of grime. Neglecting sealant application and allowing stains to penetrate the grout necessitates more aggressive cleaning methods, potentially damaging the grout and compromising its integrity. In outdoor settings, routine maintenance protects the grout from environmental factors, prolonging its lifespan.
- Color Coordination
The choice of grout color significantly impacts the aesthetic outcome of the tiled low table. Grout color can either blend seamlessly with the tiles, creating a uniform surface, or contrast sharply, accentuating the individual tile patterns. A light-colored grout may brighten a dark tile arrangement, while a dark grout can define the tile shapes and conceal minor imperfections. The coordination of grout color with both the tiles and the surrounding environment requires careful consideration to achieve the desired visual effect. Misalignment between grout color and tile design can detract from the overall aesthetic appeal of the finished table.
In conclusion, the intricacies of grout application extend beyond merely filling the spaces between tiles. The selection of appropriate materials, meticulous application techniques, consistent maintenance practices, and thoughtful color coordination collectively contribute to the structural stability, longevity, and visual harmony of the tiled surface. These factors directly enhance the value and usability of the finished low table.
5. Edge Finishing
Edge finishing is a critical element in the construction of a tiled surface, particularly in the context of a do-it-yourself tiled low table. The exposed edges are inherently vulnerable to chipping, cracking, and moisture penetration. Inadequate edge treatment can compromise the structural integrity of the entire surface, leading to premature failure and detracting from the aesthetic appeal. Consider a table where the surface material is abruptly terminated at the edge without protection; routine contact from objects and cleaning activities will inevitably lead to damage, undermining the craftsmanship and functionality. The effect of neglecting edge finishing ranges from minor cosmetic flaws to significant structural issues requiring costly repairs.
Effective edge finishing strategies for a do-it-yourself tiled low table include several proven techniques. Edge banding, using materials such as wood, metal, or PVC, provides a protective barrier against impact and moisture. Bullnose tiles, with their rounded edges, offer a seamless and aesthetically pleasing transition. Mitered edges, where the surface material is cut at a 45-degree angle to create a clean, joined corner, require precision but yield a professional finish. Grout alone does not constitute adequate edge protection; it is porous and prone to cracking under stress. For example, a metal edge trim applied with construction adhesive creates a durable and visually appealing border, increasing the overall resilience of the table and preventing water ingress. This is in contrast to an unprotected edge which could quickly deteriorate in a high use enviroment.
In summary, edge finishing is not merely a cosmetic consideration; it is an essential aspect of ensuring the long-term durability and aesthetic value of a do-it-yourself tiled low table. The implementation of appropriate techniques, such as edge banding, bullnose tiles, or mitered edges, provides crucial protection against damage and enhances the overall quality of the finished piece. Overlooking this critical step can significantly reduce the lifespan of the table and necessitate premature repairs, underscoring the practical importance of thorough edge treatment. Proper execution contributes directly to the longevity and visual refinement of the final product.
Frequently Asked Questions
This section addresses common inquiries regarding the design, construction, and maintenance of tiled low tables, offering practical guidance and clarifying potential misconceptions.
Question 1: What constitutes the most appropriate substrate for a tiled low table?
Cement backer board, specifically designed for wet environments, is generally considered the optimal substrate. Its water resistance and dimensional stability minimize the risk of moisture damage and tile cracking, unlike plywood or standard drywall, which are susceptible to warping and degradation when exposed to moisture.
Question 2: Which adhesive is most suitable for securing tiles to a low table surface?
A polymer-modified thin-set mortar is recommended for most tiling applications. Its enhanced bonding strength and flexibility accommodate slight movements in the substrate, preventing tile detachment. Non-modified thin-set mortars are typically inadequate, particularly when using dense tiles such as porcelain or glass.
Question 3: How can grout discoloration be effectively prevented?
Regular application of a quality grout sealer forms a protective barrier against stains and moisture penetration. Routine cleaning with pH-neutral cleaners prevents the buildup of dirt and grime. Harsh chemicals and abrasive scrubbers should be avoided, as they can damage the grout and compromise its integrity.
Question 4: What is the recommended procedure for achieving a level tiled surface?
Prior to tiling, the substrate must be meticulously leveled using shims or self-leveling compound. Employing a level and straightedge throughout the tiling process ensures consistent tile alignment. Uneven surfaces not only detract from the aesthetic appeal but also create stress points, increasing the likelihood of tile cracking.
Question 5: How can the exposed edges of a tiled low table be effectively protected?
Edge banding, utilizing materials such as wood, metal, or PVC, provides a durable barrier against impact and moisture. Bullnose tiles, with their rounded edges, offer a seamless transition. Mitering the corners of the tiles and adhering them carefully also creates a professional look with sufficient protection.
Question 6: What is the optimal method for cutting tiles during table construction?
A wet saw, equipped with a diamond blade, provides the most precise and clean cuts for tiles. The water lubrication minimizes friction and prevents chipping. Manual tile cutters are suitable for simpler cuts on thinner tiles, but wet saws are generally preferred for their accuracy and versatility.
The information provided in these frequently asked questions is intended to guide individuals through the successful construction and maintenance of tiled low tables, promoting both durability and aesthetic satisfaction.
The subsequent section will present a detailed guide on troubleshooting common problems encountered during the process.
Conclusion
This exploration of the diy tile coffee table has addressed essential considerations, encompassing material selection, substrate preparation, adhesive compatibility, grout application, and edge finishing techniques. Emphasis has been placed on the relationship between informed construction practices and the resulting durability and aesthetic quality of the finished piece. Critical steps such as proper substrate leveling and grout sealing have been examined to ensure successful project outcomes.
The diy tile coffee table presents a viable opportunity for cost-effective and personalized furniture creation. Successful construction, guided by the principles outlined herein, offers lasting value and demonstrable enhancement to the domestic environment. Continued adherence to best practices will ensure the enduring appeal and functionality of this crafted item.


