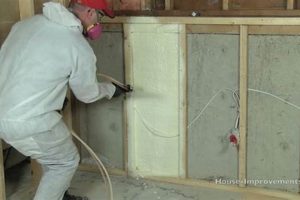
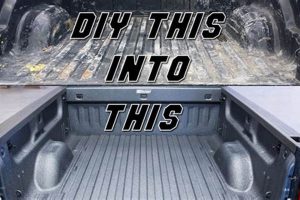
A do-it-yourself sprayable protective coating, frequently applied to truck beds or other surfaces requiring resilience, offers an alternative to professionally installed liners. These coatings are typically composed of polyurethane, polyurea, or hybrid formulations dispensed through specialized spray equipment or aerosol cans. The application creates a durable, textured surface designed to resist abrasion, corrosion, and impact damage.
The adoption of this protective measure yields several advantages. Cost-effectiveness is a primary driver, allowing individuals to achieve similar protection at a lower expense compared to professional services. Furthermore, the ability to customize the application thickness and texture provides flexibility to meet specific needs. Historically, these materials were primarily used in industrial settings, but their availability to consumers has broadened their usage for personal vehicle upkeep and other protective applications.
The subsequent sections will delve into the different types of sprayable coatings available, a detailed examination of the application process, crucial preparation steps for optimal adhesion, and important safety precautions to mitigate potential hazards. Additionally, a comparative analysis will be presented outlining advantages and disadvantages relative to professional installations.
Application Guidance for Sprayable Protective Coatings
The successful implementation of a sprayable protective coating necessitates meticulous attention to detail. The following guidance aims to optimize the application process and ensure a durable, aesthetically pleasing result.
Tip 1: Surface Preparation is Paramount. Thoroughly clean and degrease the intended surface. Abrade the surface using appropriate grit sandpaper to create a mechanical bond for the coating. Removal of rust or existing loose coatings is essential to prevent premature failure.
Tip 2: Environmental Conditions Matter. Application should occur within the temperature range specified by the coating manufacturer. High humidity or the presence of moisture on the surface will impede adhesion and potentially cause blistering.
Tip 3: Apply Thin, Multiple Coats. Avoid applying the coating too thickly in a single application. Multiple thin coats, allowing each to properly cure, result in a more uniform and durable finish. This minimizes the risk of runs or sagging.
Tip 4: Masking Prevents Overspray. Use high-quality masking tape and paper to protect surrounding areas from overspray. Proper masking ensures clean lines and prevents unwanted coating on adjacent surfaces.
Tip 5: Proper Equipment is Crucial. For aerosol applications, maintain a consistent distance and speed during spraying. For systems requiring a spray gun, ensure the nozzle and pressure settings are adjusted according to the coating manufacturer’s recommendations.
Tip 6: Curing Time is Not Negotiable. Allow the coating to fully cure per the manufacturer’s instructions before subjecting it to heavy use. Premature use can compromise the coating’s integrity and reduce its lifespan.
These guidelines represent critical factors for achieving a professional-grade finish. Diligent adherence to these practices will enhance the protective properties and longevity of the applied coating.
The following section will cover potential challenges encountered during the application process and offer solutions for mitigating common issues.
1. Surface Preparation
Surface preparation constitutes a critical and often underestimated phase in the application of do-it-yourself sprayable protective coatings. Its influence directly correlates with the coating’s adhesion, durability, and overall performance. Inadequate surface preparation invariably leads to premature coating failure, rendering the protective layer ineffective.
- Cleaning and Degreasing
The removal of contaminants such as grease, oil, dirt, and wax is paramount. These substances impede the coating’s ability to bond with the substrate. Solvents, detergents, or specialized degreasers are typically employed. Failure to adequately clean the surface will result in the coating adhering to the contaminants rather than the substrate, leading to peeling and delamination.
- Abrasive Blasting or Sanding
Creating a textured surface, often achieved through abrasive blasting or sanding, enhances the mechanical bond between the coating and the substrate. The resulting profile increases the surface area available for adhesion. The specific grit of the abrasive material must be carefully selected based on the substrate material to avoid excessive damage or insufficient profiling.
- Rust and Corrosion Removal
Pre-existing rust or corrosion on metallic substrates must be completely removed prior to coating application. These contaminants undermine the structural integrity of the underlying material and prevent the coating from properly adhering. Mechanical methods, such as wire brushing or grinding, or chemical treatments are employed for rust and corrosion removal.
- Proper Drying and Neutralization
Following cleaning and abrasive preparation, the substrate must be thoroughly dried to eliminate any residual moisture. Furthermore, if chemical treatments were used, the surface must be neutralized to prevent adverse reactions with the coating. Residual moisture or chemical residue can interfere with the curing process and compromise the coating’s long-term performance.
The aforementioned facets of surface preparation are indispensable for the successful application of do-it-yourself sprayable protective coatings. Diligent adherence to these preparation procedures ensures optimal adhesion, durability, and long-term protection of the coated surface, mitigating the risk of premature failure and maximizing the return on investment.
2. Material Selection
The selection of appropriate materials is fundamental to the successful application and performance of do-it-yourself sprayable protective coatings. The chosen material directly influences the coating’s resistance to abrasion, impact, chemical exposure, and environmental degradation. For instance, a polyurethane-based coating offers high abrasion resistance suitable for truck beds, while an epoxy-based coating provides superior chemical resistance for applications involving corrosive substances. Incorrect material selection can lead to premature failure, requiring costly rework. The initial cost of the material is often less significant than the long-term expense associated with inadequate protection.
Practical considerations in material selection involve assessing the specific demands of the application. Factors include the typical load weight, exposure to ultraviolet radiation, and potential contact with solvents or other chemicals. Hybrid formulations, combining properties of different materials, may offer an optimized balance for certain applications. For example, a polyurea-polyurethane hybrid can provide both excellent flexibility and high tensile strength, making it suitable for applications subject to both impact and flexing. Real-world examples demonstrate that choosing a material with insufficient UV resistance results in cracking and discoloration over time.
Ultimately, informed material selection represents a critical determinant of a do-it-yourself sprayable coating’s effectiveness. While budget constraints can influence decisions, prioritizing performance characteristics that align with the application’s specific requirements will yield superior results. The absence of meticulous material evaluation renders the entire endeavor vulnerable to premature degradation and financial loss, negating the intended benefits of protective coatings. Understanding the material properties and performance trade-offs is therefore a key aspect of the effective application of do-it-yourself sprayable protective coatings.
3. Application Technique
Application technique exerts a considerable influence on the final quality and protective capabilities of a do-it-yourself sprayable protective coating. Correct methodology is essential to achieve a uniform, durable, and aesthetically acceptable finish. Deviations from recommended practices typically result in substandard performance and premature failure of the coating.
- Spray Gun Settings and Control
The proper adjustment of spray gun settings, including pressure and nozzle configuration, is crucial for atomizing the coating material and achieving consistent coverage. Inconsistent pressure leads to uneven coating thickness, resulting in variations in protection. Incorrect nozzle selection produces excessive overspray or incomplete atomization, impacting both material waste and surface finish. For example, using too high pressure with a fine-finish nozzle can create excessive bounce-back, leading to a textured surface.
- Spray Pattern and Overlap
Maintaining a consistent spray pattern with appropriate overlap is necessary to ensure uniform coating thickness and prevent the formation of weak points. Failure to overlap spray passes adequately results in thin spots that are more susceptible to abrasion and corrosion. Conversely, excessive overlap creates areas of greater thickness, increasing the risk of runs or sags, particularly on vertical surfaces. A common practice is to overlap each pass by approximately 50% to ensure complete coverage.
- Distance and Angle
Maintaining the correct distance and angle between the spray gun and the substrate directly influences the coating’s wetness and adhesion. Too great a distance results in excessive drying of the coating before it reaches the surface, leading to poor adhesion and a rough texture. Too close a distance causes runs and sags due to excessive material buildup. Similarly, the angle of the spray gun affects the uniformity of the coating application; a perpendicular angle is generally recommended for optimal results.
- Environmental Considerations
Environmental factors, such as temperature and humidity, necessitate adjustments to the application technique. High humidity levels can impede the curing process and promote the formation of blisters or pinholes in the coating. Low temperatures increase the viscosity of the coating material, requiring adjustments to the spray gun settings to maintain proper atomization. Failure to account for these environmental variables compromises the coating’s overall integrity and long-term durability. For instance, in high-humidity environments, increasing the air pressure slightly and using a slower-drying hardener can prevent moisture from being trapped within the coating layer.
The nuances of application technique significantly impact the performance of do-it-yourself sprayable protective coatings. Mastery of these techniques requires practice and adherence to manufacturer specifications. While material selection and surface preparation are undoubtedly important, a flawed application technique can negate the benefits of even the highest-quality materials and most meticulous preparation. The ultimate goal is to achieve a uniform and continuous film that provides optimal protection for the intended surface.
4. Safety Precautions
Application of do-it-yourself sprayable protective coatings necessitates adherence to stringent safety protocols to mitigate potential health and environmental hazards. The materials employed often contain volatile organic compounds (VOCs) and isocyanates, posing risks of respiratory irritation, skin sensitization, and neurological effects. Inadequate ventilation during application can lead to the accumulation of harmful vapors, resulting in acute and chronic health problems. For instance, prolonged exposure to isocyanates, commonly found in polyurethane coatings, can induce asthma and other respiratory ailments. The absence of appropriate personal protective equipment (PPE) such as respirators, gloves, and eye protection significantly increases the likelihood of adverse health outcomes. Therefore, the integration of comprehensive safety measures is not merely advisable but essential for protecting the well-being of individuals undertaking such projects. Ignoring safety guidelines represents a direct threat to health and well-being.
Proper ventilation is paramount, requiring the use of a well-ventilated workspace or, ideally, an exhaust system to remove airborne contaminants. Respiratory protection, in the form of a NIOSH-approved respirator equipped with appropriate cartridges for organic vapors and isocyanates, is mandatory. Skin contact must be prevented through the use of chemical-resistant gloves and protective clothing. Eye protection, such as safety glasses or a face shield, is necessary to guard against splashes or airborne particles. Furthermore, measures to prevent fire hazards are crucial, given the flammability of many coating materials. Open flames or sparks must be eliminated from the work area. A readily accessible fire extinguisher should be available in case of emergencies. Practical examples include the ignition of flammable vapors from static electricity and the potential for explosions if coatings are sprayed near sources of ignition.
In summary, the safe application of do-it-yourself sprayable protective coatings demands a proactive approach to hazard identification and risk mitigation. The utilization of appropriate PPE, coupled with adequate ventilation and fire prevention measures, is indispensable. Neglecting these precautions exposes individuals to unnecessary health risks and potential environmental damage. A thorough understanding of the hazards associated with specific coating materials and strict adherence to safety guidelines are the cornerstones of a successful and safe do-it-yourself project. Failure to prioritize safety can result in irreversible health consequences and significant financial liabilities. Prioritizing safety is not an option, but a necessity.
5. Curing Process
The curing process is an indispensable stage in the application of do-it-yourself sprayable protective coatings, significantly impacting the coating’s final hardness, durability, and resistance to environmental factors. Inadequate or improperly managed curing compromises the integrity of the applied protective layer, diminishing its intended function and lifespan.
- Temperature Sensitivity
The rate of chemical reactions during curing is directly influenced by temperature. Most coatings exhibit a minimum temperature threshold below which curing is significantly slowed or halted. Suboptimal temperatures can result in a coating that remains tacky, soft, or otherwise incompletely cured, leading to reduced abrasion resistance and increased susceptibility to damage. Conversely, excessively high temperatures during curing can cause premature hardening or bubbling. As a real-world example, applying a coating in freezing temperatures without proper heating will prevent proper crosslinking, resulting in a soft, easily damaged finish.
- Humidity Effects
Certain coating formulations are sensitive to moisture. High humidity levels can interfere with the curing process, leading to the formation of blisters, pinholes, or clouding within the coating. In some cases, moisture can react with the coating components, altering their chemical structure and compromising their performance. Conversely, excessively dry environments may cause the coating to cure too rapidly, resulting in cracking or delamination. Specific coatings might require controlled humidity to ensure optimal crosslinking and film formation.
- Curing Time and Load Bearing
The manufacturer’s specified curing time must be strictly observed before subjecting the coated surface to any load or stress. Premature loading can cause permanent deformation or damage to the uncured coating. Different coatings have different curing times depending on their chemical composition and the prevailing environmental conditions. For example, a two-component epoxy coating might require a full seven days to achieve its maximum hardness and chemical resistance, while a fast-curing polyurea coating might be ready for use within hours. Imposing stress before the full curing period negates the benefits of protective coatings.
- Ventilation and Solvent Evaporation
Proper ventilation is critical during the curing process to facilitate the evaporation of solvents and other volatile components from the coating. Insufficient ventilation can lead to the accumulation of these vapors, posing health hazards and potentially interfering with the curing process. The concentration of solvent vapors near the curing surface can inhibit proper crosslinking and result in a weaker, less durable coating. Forced air circulation, through fans or ventilation systems, promotes efficient solvent removal and accelerates the curing process while maintaining air quality.
These facets of the curing process highlight its central role in achieving the desired performance characteristics of do-it-yourself sprayable protective coatings. Ignoring these factors increases the risk of coating failure, necessitating costly repairs or replacements. Successful implementation of these coatings demands an understanding and meticulous adherence to the specified curing protocols.
6. Environmental Factors
Environmental conditions exert a substantial influence on the application and longevity of do-it-yourself sprayable protective coatings. Temperature, humidity, and ultraviolet (UV) radiation each affect the viscosity, curing rate, and long-term degradation of these coatings. Failure to account for these factors results in suboptimal adhesion, diminished durability, and accelerated deterioration. For example, applying a polyurethane coating in excessively humid conditions can lead to blistering due to trapped moisture, reducing its protective capacity. Similarly, exposure to high levels of UV radiation without proper UV inhibitors can cause cracking and discoloration over time, compromising both the aesthetic and functional integrity of the liner. The selection of appropriate materials and adherence to recommended application procedures are thus contingent upon a thorough understanding of the prevailing environmental context.
Practical implications of these considerations are evident in various applications. In regions with high temperature fluctuations, coatings with greater flexibility and thermal expansion coefficients are necessary to prevent cracking. Coastal environments necessitate coatings with enhanced resistance to saltwater corrosion. Furthermore, the presence of airborne pollutants, such as industrial chemicals or particulate matter, can affect the coating’s adhesion and chemical resistance. These factors necessitate the implementation of additional surface preparation steps or the selection of specialized coatings formulated to withstand such specific challenges. A truck bed liner applied in a region with heavy snowfall and road salt exposure requires a different formulation compared to one used in a dry, temperate climate.
In conclusion, environmental factors are not merely peripheral considerations, but integral determinants of a do-it-yourself spray liner’s effectiveness. A comprehensive assessment of these conditions is essential for selecting appropriate materials, optimizing application techniques, and ensuring the long-term performance of the protective coating. Challenges arise from the variability and unpredictability of weather patterns, requiring ongoing monitoring and potential adjustments during the application process. Understanding and mitigating the impact of environmental factors is paramount for achieving a durable and reliable protective layer, ultimately maximizing the value and lifespan of the coated surface.
7. Cost Considerations
The economic feasibility of a do-it-yourself spray liner installation is a primary motivator for many consumers. Evaluating the various cost components is essential to determine whether this approach provides genuine savings relative to professional alternatives. A comprehensive cost analysis necessitates consideration of material expenses, equipment needs, and the value of labor time.
- Material Costs
The primary expense is the spray liner material itself, which varies significantly depending on the type of polymer (e.g., polyurethane, polyurea), volume purchased, and vendor. Lower-cost materials may compromise durability, necessitating more frequent re-applications and ultimately increasing long-term expenses. Conversely, higher-quality materials, while initially more expensive, offer superior resistance to abrasion, UV degradation, and chemical exposure, reducing the lifecycle cost. For example, a lower-grade polyurethane liner might cost $100 but require replacement within three years, while a high-quality polyurea liner costing $300 could last ten years or more.
- Equipment Investment
Application of a spray liner necessitates specialized equipment, including a spray gun, compressor (if not using aerosol cans), and personal protective equipment (PPE). Initial investment in this equipment can be substantial, particularly for systems requiring a high-pressure compressor and professional-grade spray gun. Aerosol can systems offer a lower entry cost but may result in higher material consumption and a less uniform finish. The purchase versus rental option for equipment should be carefully considered, factoring in the frequency of use and potential maintenance costs. For instance, renting a spray gun and compressor might be economically viable for a single application, while purchasing the equipment becomes more cost-effective for multiple projects.
- Labor Time and Expertise
The value of labor time is often overlooked in cost assessments. DIY installations demand significant time investment for surface preparation, masking, application, and cleanup. Furthermore, the absence of professional expertise can lead to application errors, resulting in material waste, substandard finish quality, and the potential need for rework. Assigning a monetary value to the labor time and expertise required provides a more accurate comparison to professionally installed liners, where labor costs are explicitly included. A skilled installer completes the job quickly and with minimal waste, potentially offsetting the perceived cost advantage of a DIY approach.
- Hidden Costs and Risks
Unforeseen expenses can arise during the installation process, including the cost of additional materials to correct errors, equipment malfunctions, or the need for professional assistance to rectify application problems. The risk of personal injury during the application process, necessitating medical treatment, represents another potential hidden cost. Additionally, the environmental disposal of leftover materials and cleaning solvents incurs expenses that must be factored into the overall cost calculation. Proper planning and adherence to safety guidelines can mitigate these risks, but their potential impact on the overall cost should not be disregarded.
A thorough evaluation of all cost components, encompassing material expenses, equipment requirements, labor time, and potential hidden costs, is essential to determine the true economic advantage of a do-it-yourself spray liner. While the upfront material costs might appear lower, a comprehensive analysis often reveals that professionally installed liners provide greater long-term value due to superior durability, reduced labor time, and minimized risk of application errors. The ultimate decision necessitates balancing the desire for cost savings with the need for a durable and professionally executed protective coating.
Frequently Asked Questions Regarding DIY Spray Liner Applications
The following section addresses common inquiries and misconceptions surrounding the selection, application, and performance of do-it-yourself sprayable protective coatings. The information presented aims to provide clarity and facilitate informed decision-making.
Question 1: What is the expected lifespan of a DIY spray liner compared to a professionally installed liner?
The longevity of a do-it-yourself spray liner is contingent upon various factors, including material quality, surface preparation, application technique, and environmental conditions. While some DIY applications can achieve satisfactory results, professionally installed liners often exhibit superior durability due to specialized equipment, expertise, and controlled application environments. A professionally installed liner typically offers a lifespan of 5-10 years or more, while a DIY application may range from 2-7 years, depending on adherence to best practices and material quality.
Question 2: Is specialized equipment required for all DIY spray liner applications?
The necessity of specialized equipment depends on the chosen application method. Aerosol can systems represent a lower barrier to entry, requiring minimal equipment beyond basic masking supplies and personal protective equipment. However, systems employing spray guns necessitate a compressed air source and a properly calibrated spray gun. The latter approach offers greater control over coating thickness and texture but demands a higher initial investment and technical proficiency.
Question 3: What level of surface preparation is truly necessary for optimal adhesion?
Thorough surface preparation is paramount to achieving adequate adhesion and preventing premature coating failure. This entails the removal of all contaminants, including grease, oil, rust, and loose paint. Abrasive blasting or sanding is typically required to create a mechanical bond between the coating and the substrate. Failure to adequately prepare the surface will inevitably compromise the coating’s long-term performance, irrespective of material quality or application technique.
Question 4: Are all DIY spray liner materials equally resistant to UV degradation?
No, the resistance to ultraviolet (UV) degradation varies significantly among different spray liner materials. Polyurethane-based coatings are generally more susceptible to UV-induced fading and cracking compared to polyurea-based coatings. The addition of UV inhibitors can enhance the UV resistance of certain formulations, but careful material selection is crucial, particularly for applications exposed to prolonged sunlight.
Question 5: What safety precautions are essential during DIY spray liner application?
Safety precautions are non-negotiable during DIY spray liner application. Adequate ventilation is essential to prevent the inhalation of harmful vapors. A NIOSH-approved respirator equipped with appropriate cartridges for organic vapors and isocyanates is mandatory. Chemical-resistant gloves and eye protection are also required to prevent skin and eye contact. Furthermore, precautions must be taken to prevent fire hazards, given the flammability of many coating materials.
Question 6: How does the ambient temperature affect the curing process of a DIY spray liner?
Ambient temperature exerts a significant influence on the curing process of spray liners. Most formulations exhibit a minimum temperature threshold below which curing is significantly slowed or halted. Applying a coating in cold weather without proper heating can result in an incompletely cured finish, compromising its durability and performance. Conversely, excessively high temperatures can cause premature hardening or bubbling. Adherence to the manufacturer’s recommended temperature range is critical for optimal curing.
The key takeaways from these frequently asked questions emphasize the importance of thorough research, meticulous preparation, adherence to safety guidelines, and a realistic assessment of one’s capabilities. A successful DIY spray liner application demands a commitment to best practices and a willingness to invest the necessary time and resources.
The subsequent section will explore alternative protective coating options beyond spray liners, providing a comparative analysis of their respective advantages and disadvantages.
Conclusion
The preceding analysis has examined the multifaceted aspects of “diy spray liner” applications. From surface preparation and material selection to application techniques, safety protocols, and cost considerations, a thorough understanding of each element is paramount. Substantial risks attend to the uncritical adoption of this protective measure. Mitigation of potential failures hinges upon diligence in research, uncompromising adherence to safety mandates, and realistic self-assessment of competence.
Ultimately, the decision to employ a “diy spray liner” necessitates a comprehensive evaluation of the trade-offs between potential cost savings and the inherent risks of a non-professional application. Further research into emerging coating technologies and evolving best practices remains crucial for informed decision-making. The responsibility for ensuring a safe and effective application rests solely upon the individual undertaking this endeavor.


