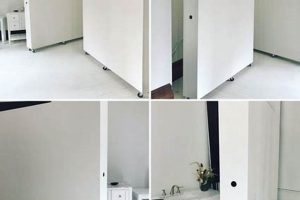
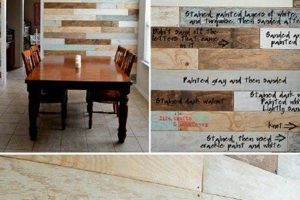
A decorative treatment applied directly to interior walls, created and installed by the homeowner, significantly alters the appearance of a space. These treatments involve attaching panels of varying materials wood, MDF, or even textured fabrics to existing walls. For example, installing pre-cut wainscoting to a dining room wall, painted a contrasting color, provides an upgraded aesthetic achieved through self-directed labor.
The practice offers numerous advantages. It represents a cost-effective method for enhancing interior design, avoiding professional installation fees. Additionally, this method allows for personalized customization reflecting individual tastes and design preferences. Historically, such wall paneling served functional purposes insulation and protection before evolving into a purely decorative element reflecting evolving architectural styles and design sensibilities.
The following discussion will delve into the diverse materials suitable for creating wall treatments, explore various design considerations for a visually appealing outcome, and provide practical guidance on the installation process to ensure a successful and aesthetically pleasing finished result.
Guidance for Decorative Wall Paneling
Implementing decorative wall paneling requires careful planning and execution to achieve a professional and lasting result. Consider the following guidelines to ensure a successful project.
Tip 1: Material Selection: Choose materials appropriate for the environment. Solid wood offers durability, while MDF provides a cost-effective alternative that is easy to paint. Consider moisture resistance for bathrooms or kitchens.
Tip 2: Precise Measurements: Accurate measurements are paramount. Measure the wall’s height and width multiple times to account for any inconsistencies. Minor discrepancies can lead to noticeable alignment issues.
Tip 3: Design Considerations: Evaluate the room’s existing style. Simple, clean lines complement modern spaces, while intricate designs are suited to traditional aesthetics. A cohesive design ensures the paneling enhances, rather than clashes with, the room’s dcor.
Tip 4: Surface Preparation: Prior to installation, thoroughly clean the wall surface. Fill any holes or imperfections with spackle and sand smooth. A clean, even surface ensures proper adhesion and a professional finish.
Tip 5: Secure Attachment: Use appropriate adhesives and fasteners based on the chosen material and wall type. Construction adhesive provides a strong bond, while finishing nails or screws offer additional support, particularly for heavier panels.
Tip 6: Leveling and Alignment: Employ a level to ensure panels are installed straight and true. Consistent vertical and horizontal alignment is critical for a visually appealing outcome. Utilize spacers to maintain uniform gaps between panels.
Tip 7: Finishing Touches: Caulk seams and gaps for a seamless appearance. Apply paint or stain to match the room’s color scheme. Sand lightly between coats for a smooth, professional finish.
Adhering to these tips promotes a successful transformation, adding character and value to the space. Proper planning, execution, and finishing will enhance interior design and increase perceived quality.
The subsequent sections will address advanced techniques and address common challenges encountered during wall paneling projects.
1. Material Selection
The choice of materials is paramount in the construction of a decorative feature, directly impacting its aesthetic, longevity, and overall success. Careful deliberation regarding material suitability is therefore essential before commencing any installation.
- Material Cost and Budgetary Constraints
Budgetary considerations often dictate the viable range of material options. While solid hardwoods present a premium aesthetic and increased durability, they also represent a higher upfront investment. Cost-effective alternatives, such as Medium-Density Fiberboard (MDF), offer a paintable surface at a reduced price point, but may compromise on durability in high-moisture environments. Balancing desired aesthetic qualities with budgetary limitations is crucial during material selection.
- Aesthetic Compatibility and Design Cohesion
Material selection should align with the existing interior design. The grain and finish of natural wood may complement traditional or rustic aesthetics, while smooth, paintable surfaces are more versatile for modern styles. The chosen material must integrate harmoniously with the surrounding decor and color palette to create a cohesive and visually appealing finished product. Mismatched materials can detract from the overall design and diminish the impact of the decorative wall.
- Environmental Considerations and Sustainability
Increasingly, material selection includes evaluation of environmental impact. Sustainable options include reclaimed wood, bamboo panels, or materials certified by organizations promoting responsible forestry practices. Choosing materials with lower embodied carbon and reduced environmental footprint contributes to a more sustainable approach. Neglecting environmental considerations can lead to unsustainable resource consumption and contribute to ecological degradation.
- Durability and Environmental Resistance
The intended location of the decorative feature necessitates selecting materials with appropriate durability and environmental resistance. High-moisture environments, such as bathrooms, require water-resistant materials like PVC panels or treated wood to prevent warping, mold growth, or degradation. High-traffic areas may benefit from more durable materials resistant to scratches and impact. Failure to consider environmental factors can lead to premature material failure and costly repairs.
Ultimately, the selection of appropriate materials is a pivotal step in creating a visually appealing and structurally sound wall. By carefully considering factors such as cost, aesthetics, environmental impact, and durability, a design can be brought to life that enhances any interior space.
2. Design Aesthetic
The selection and implementation of a design aesthetic are paramount when undertaking a wall paneling project. The chosen aesthetic serves as the guiding principle, dictating material selection, panel arrangement, color palettes, and overall spatial integration.
- Architectural Harmony
The chosen aesthetic should harmonize with the existing architectural style of the space. For instance, a contemporary home may benefit from minimalist, geometric panel designs, while a traditional residence might lend itself to raised panel wainscoting or ornate molding details. A discordant aesthetic can undermine the overall visual coherence of the room.
- Spatial Perception and Scale
Panel dimensions and arrangement influence the perceived size and proportions of a room. Vertical panels can elongate walls, creating a sense of height, whereas horizontal panels can visually widen a narrow space. Large panels in a small room can feel overwhelming, while smaller, more intricate designs may become lost in a large, open area. Careful consideration of scale is crucial for achieving visual balance.
- Color Palette and Material Contrast
The color palette should complement the existing room furnishings and create the desired mood. Neutral tones offer versatility and blend seamlessly with various styles, while bolder colors can add visual interest and personality. The interplay of materials, such as contrasting wood grains or the juxtaposition of painted panels with exposed brick, can enhance the tactile and visual richness of the design.
- Personal Expression and Customization
Wall paneling offers a significant opportunity for personal expression and customization. Individuals can tailor the design to reflect their unique tastes and preferences, incorporating custom motifs, intricate patterns, or unique material combinations. The ability to personalize the design contributes to the creation of a bespoke interior that reflects the homeowner’s individual style.
Successfully integrating a design aesthetic requires a thorough understanding of the intended space, a keen eye for detail, and a commitment to creating a cohesive and visually harmonious environment. The resulting wall paneling will serve as a focal point, enhancing the overall character and ambiance of the room.
3. Precise Measurements
Accurate dimensional assessment is foundational to the success of any wall paneling project. Deviations from exact measurements compromise the final aesthetic and structural integrity.
- Material Optimization and Waste Reduction
Precise measurements enable accurate material procurement. Determining the precise surface area to be covered prevents over- or under-ordering materials. This reduces construction waste and optimizes budgetary allocation. For instance, inaccurate measurements might lead to purchasing excess panels, increasing project costs and contributing to landfill waste. Conversely, insufficient material necessitates additional trips to suppliers, delaying project completion.
- Seamless Panel Alignment and Aesthetic Integrity
Accurate measurements are critical for achieving a seamless, professional finish. Precise dimensions ensure panels align correctly, minimizing visible seams and gaps. Inaccurate measurements can result in misaligned panels, disrupting the visual harmony and detracting from the intended aesthetic. Consider a scenario where panels are cut based on estimated, rather than exact, dimensions. These panels may not fit together uniformly, resulting in noticeable irregularities and a compromised visual appearance.
- Structural Stability and Load Distribution
In installations where panels provide structural support or contribute to load distribution, precise measurements are vital for stability. Inaccurate dimensions can create stress points or weaknesses in the wall structure. An example would be a feature wall designed to support shelving. Incorrect panel dimensions could result in uneven load distribution, potentially leading to structural failure. Ensuring accurate measurements ensures the panels fit securely and distribute weight evenly, maintaining the integrity of the wall structure.
- Accurate Cut and Placement
Prior to final install, accurate measurements allow cuts that align with outlets, windows or door frames. This eliminates overlap between paneling and existing fixtures. Precise cutting creates a polished finish. Inaccurate measurements will produce visible obstructions, undermining the effect of the wall paneling.
The interconnectedness of accurate measurement and successful construction cannot be overstated. Implementing meticulous measurement practices translates to reduced material waste, enhanced aesthetic quality, and improved structural soundness, all contributing to a superior finished product.
4. Installation Technique
The method employed to affix panels directly impacts the final aesthetic and structural integrity of any wall treatment project. Selection of inappropriate techniques can lead to compromised visual appeal, reduced lifespan, and even structural failure. For example, panels improperly adhered to a wall surface may detach over time due to inadequate bonding or unsuitable adhesive for the substrate. The method is a critical determinant of the project’s overall success.
Diverse methods exist, each suited to different materials, wall types, and project goals. Adhesives, mechanical fasteners (nails, screws), or a combination thereof are common choices. Consider a situation where lightweight MDF panels are being installed on a drywall surface. Construction adhesive, coupled with strategically placed finishing nails, may provide adequate support. Conversely, installing heavier solid wood panels on a concrete wall necessitates the use of robust mechanical fasteners, such as concrete screws, to ensure secure attachment. Selection depends on understanding the properties of both the paneling material and the wall substrate.
Effective installation also encompasses surface preparation. Cleaning, leveling, and priming the wall surface enhances adhesion and ensures a smooth, even plane. Failing to adequately prepare the surface can result in uneven panel placement, visible gaps, and compromised adhesion. In summary, the selected method, coupled with meticulous surface preparation, significantly contributes to the durability, longevity, and visual appeal of the wall treatment.
5. Surface Preparation
Surface preparation forms the crucial foundation for any successful decorative panel installation. The condition of the wall prior to the application of panels directly influences the adhesion, alignment, and overall longevity of the finished feature. Neglecting this step can result in compromised aesthetics and potential structural issues. For example, installing panels over a wall with peeling paint or loose wallpaper significantly diminishes the adhesive bond, increasing the risk of panel detachment over time. Surface preparation, therefore, constitutes a critical prerequisite rather than an optional step.
The process typically involves cleaning the wall to remove dirt, dust, and grease, followed by addressing any imperfections such as holes, cracks, or uneven textures. Filling holes with spackle and sanding smooth creates a uniform substrate for panel adhesion. Additionally, priming the wall can improve adhesion and prevent the panel adhesive from being absorbed into the wall surface. Real-world examples demonstrate the impact of inadequate preparation: panels applied to untreated drywall may exhibit poor adhesion, requiring additional fasteners or even complete reinstallation. Proper surface preparation ensures a secure bond, preventing warping, shifting, or detachment of the panels.
In summary, surface preparation is intrinsically linked to the success of a wall feature project. It impacts material usage, visual appearance, and long-term stability. While it might appear time-consuming, the investment in thorough surface preparation ensures a professional, durable, and aesthetically pleasing outcome. Addressing surface irregularities also contributes to a more uniform adhesive application, preventing inconsistencies that may lead to structural weaknesses or visible imperfections in the final installation.
6. Finishing Details
Finishing details represent the culmination of the decorative wall treatment process, directly impacting the overall aesthetic appeal and long-term durability. They encompass actions performed following the primary installation, including caulking, painting, staining, and the application of protective coatings. Inadequate attention to these steps can negate the visual impact of the initial paneling and expose the underlying structure to environmental damage. For instance, neglecting to caulk seams between panels allows moisture ingress, potentially leading to warping, mold growth, and eventual deterioration of the panels and the wall itself.
Caulking creates a seamless transition between panels and adjacent surfaces, eliminating visible gaps and preventing air infiltration. Painting or staining provides a protective layer, enhancing resistance to moisture, scratches, and fading. Furthermore, the choice of paint or stain significantly influences the visual character, allowing for customization to complement existing decor. A poorly executed paint job, characterized by drips, uneven coverage, or an inappropriate sheen level, diminishes the overall perceived quality of the finished feature. Similarly, neglecting to apply a clear protective coating to stained panels leaves the wood vulnerable to wear and tear. Therefore, the selection of appropriate finishing materials and the application techniques employed are critical determinants of the final outcome.
In conclusion, finishing details are not merely cosmetic enhancements; they are integral components of the decorative wall treatment. Their proper execution safeguards the structural integrity, extends the lifespan, and elevates the aesthetic quality of the completed project. Prioritizing these final steps transforms a basic wall covering into a refined and enduring feature, enhancing the overall value and visual appeal of the interior space. The omission of finishing details presents a direct threat to both the aesthetic and functional longevity of the wall treatment.
Frequently Asked Questions About Wall Paneling
The following questions address common concerns and misconceptions regarding the installation and maintenance of interior wall paneling. Answers are provided in a straightforward and informative manner.
Question 1: What is the appropriate panel thickness for a wall?
The selection of panel thickness is contingent upon the material used and the intended application. Thinner panels, typically ranging from 1/4 to 3/8 inches, are suitable for purely decorative purposes on smooth, even walls. Thicker panels, generally 1/2 inch or greater, offer increased durability and may be required for uneven wall surfaces or applications where structural support is a factor.
Question 2: Is specialized equipment required for wall panel installation?
While certain projects can be completed with basic hand tools, some installations benefit from specialized equipment. A power miter saw ensures precise angle cuts, while a pneumatic nailer streamlines the attachment process. A laser level assists in maintaining horizontal and vertical alignment. Assess project complexity to determine necessity.
Question 3: How is moisture addressed when installing wall panels in a bathroom?
High-moisture environments, such as bathrooms, necessitate the use of water-resistant materials like PVC panels or treated wood. Adequate ventilation is essential to minimize moisture buildup. Seal all seams with waterproof caulk to prevent water penetration behind the panels, which can lead to mold growth and material degradation.
Question 4: What are the maintenance requirements for wall panels?
Maintenance requirements vary depending on the panel material and finish. Painted panels can be cleaned with a damp cloth and mild detergent. Wood panels may require periodic polishing or refinishing to maintain their luster. Regularly inspect panels for signs of damage or moisture intrusion and address any issues promptly.
Question 5: Can wall panels be installed over existing wallpaper?
Installing panels directly over existing wallpaper is generally not recommended. The wallpaper can compromise the adhesive bond and potentially detach from the wall, taking the panels with it. Removing the wallpaper prior to panel installation ensures a secure and long-lasting attachment.
Question 6: How can wall paneling be integrated with electrical outlets and light switches?
Accurate measurements and precise cuts are essential for integrating panels with electrical outlets and light switches. Power should be shut off to the circuit before commencing any work around electrical components. Use a hole saw to create openings for the outlets and switches, ensuring a snug fit and a professional finish.
Understanding these key aspects of wall paneling enables a more informed approach to design, installation, and long-term maintenance. Careful planning and attention to detail will yield a visually appealing and durable finished product.
The following section will explore advanced techniques for unique panel designs and custom installations.
Conclusion
The preceding exploration of “diy panel wall” installation emphasizes the multifaceted nature of this endeavor. Accurate measurement, informed material selection, meticulous surface preparation, precise installation techniques, and appropriate finishing touches are equally critical. Mastery of these elements yields a successful and visually striking interior enhancement.
The capacity to transform interior spaces through such design is significant. Adherence to established guidelines and thoughtful planning minimizes risk and maximizes the likelihood of a durable and aesthetically pleasing outcome. Further research and attention to detail will foster successful and transformative installations.


