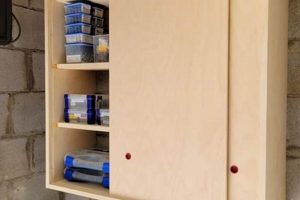
Constructing replacements or modifications for existing kitchen storage fronts represents a common home improvement project. This undertaking generally involves selecting materials, measuring dimensions, cutting and assembling the door components, and applying finishes. For example, a homeowner might choose to replace dated, flat-panel doors with raised-panel designs to update the aesthetic of the kitchen.
Undertaking such a project provides opportunities for significant cost savings compared to professional installations. Furthermore, it allows for customization reflecting individual tastes and functional requirements. Historically, homeowners have adapted woodworking skills and readily available materials to personalize and maintain their living spaces; updating storage fronts continues this tradition.
The subsequent sections will detail essential aspects of the undertaking, including material selection, accurate measurement techniques, construction methodologies, and finishing options for achieving professional-quality results.
Essential Guidance for Constructing Replacement Kitchen Storage Fronts
The following provides critical guidance to ensure a successful outcome. Adherence to these principles will enhance the longevity and aesthetic appeal of the finished product.
Tip 1: Accurate Measurement is Paramount: Precise dimensions are essential. Measure the existing openings and account for hinge placement and clearances. Inaccurate measurements lead to ill-fitting units and project failure.
Tip 2: Select Durable Materials: Opt for hardwoods like maple or oak, or high-quality plywood. These materials resist warping and damage, particularly in a kitchen environment prone to moisture and temperature fluctuations.
Tip 3: Employ Precise Cutting Techniques: Utilize a table saw or circular saw with a guide for straight, clean cuts. Chipped or uneven edges compromise the integrity and appearance of the finished product.
Tip 4: Prioritize Joint Strength: Employ robust joinery methods such as mortise and tenon, rabbet, or dowel joints. Weak joints will fail over time, especially with frequent use.
Tip 5: Invest in Quality Hardware: Hinges and pulls should be durable and appropriate for the style. Cheap hardware detracts from the overall quality and can fail prematurely.
Tip 6: Proper Surface Preparation is Critical: Sand all surfaces thoroughly to create a smooth, uniform base for finishing. Failure to do so will result in uneven finish application.
Tip 7: Apply Finishes Evenly: Use multiple thin coats of paint, stain, or sealant. This ensures a consistent color and provides optimal protection against moisture and wear.
Tip 8: Allow Adequate Drying Time: Adhere to the manufacturer’s recommendations for drying times between coats and before installation. Rushing the process can lead to defects in the finish.
Implementing these guidelines results in durable, aesthetically pleasing, and functional kitchen storage fronts. Attention to detail and adherence to best practices are crucial for a successful outcome.
The subsequent section offers advice about troubleshooting typical problems.
1. Material Selection
Material selection forms a foundational element in the construction of replacement kitchen storage fronts. The chosen material directly influences the durability, stability, aesthetic qualities, and overall longevity of the finished product. The consequences of inappropriate material selection include warping, cracking, finish degradation, and premature failure, thereby negating any initial cost savings. For example, using medium-density fiberboard (MDF) in high-moisture environments without adequate sealing inevitably leads to swelling and disintegration, whereas a hardwood like maple, properly sealed, withstands such conditions effectively.
Considerations during material selection extend beyond basic cost and appearance. Weight is a crucial factor, particularly for larger units, as excessive weight strains hinges and can lead to sagging. Grain pattern influences the final aesthetic and the ease with which finishes are applied. Hardwoods possess inherent durability and often exhibit appealing grain patterns but can be more challenging to work with. Plywood offers greater stability and is less prone to warping, making it a suitable alternative, provided the edges are properly concealed. A practical example would be choosing a paint-grade maple for a shaker-style door, allowing for a smooth, even paint finish, or selecting a quarter-sawn oak for a more traditional design, showcasing the wood’s natural beauty.
Ultimately, material selection represents a critical decision point in the entire undertaking. While cost considerations are often a factor, prioritizing durability, stability, and suitability for the intended environment ensures a longer lifespan and a more satisfying outcome. Overlooking these aspects results in compromised quality and potentially costly repairs or replacements. Success in constructing replacement kitchen storage fronts hinges significantly on a well-informed and judicious approach to material selection, acknowledging that this is a critical factor.
2. Accurate Measurements
Precise dimensional assessment represents a cornerstone of success in projects involving the fabrication of replacement kitchen storage fronts. Deviations from accurate measurements inevitably lead to functional and aesthetic deficiencies, often requiring costly rework or complete project abandonment.
- Opening Dimensions and Frame Tolerances
Accurate measurement of existing cabinet openings dictates the external dimensions of the replacement fronts. Frame tolerances, representing acceptable variations in dimensions, must be accounted for to ensure a seamless fit. Overlooking this, for example, by failing to accurately measure a slightly out-of-square opening, results in a door that either binds or exhibits unsightly gaps.
- Hinge Placement and Overlay Considerations
Hinge placement directly impacts the door’s swing and alignment. Accurate measurement and marking of hinge locations are critical for proper functionality. Overlay, the extent to which the door overlaps the cabinet frame, must be precisely measured to maintain a consistent aesthetic across all storage fronts. Miscalculated hinge placement or overlay leads to doors that are misaligned, difficult to open, or aesthetically inconsistent.
- Panel and Frame Component Sizing
The dimensions of individual components, such as panels and frames, must be accurately determined to ensure proper assembly. Errors in component sizing result in misaligned joints, uneven surfaces, and structurally unsound doors. For example, if a panel is cut slightly too small, it will not fit snugly within the frame, creating gaps and compromising the door’s structural integrity.
- Accounting for Expansion and Contraction
Wood, a common material, undergoes dimensional changes with variations in humidity. Accurate measurements must account for potential expansion or contraction, especially in environments with significant humidity fluctuations. Ignoring this factor will lead to doors that bind during humid conditions or exhibit excessive gaps during dry periods. Consideration, for example, should be given to using wider gaps to allow for expansion.
The preceding facets underscore the fundamental importance of precise dimensional assessment in all stages of construction. A comprehensive understanding of these aspects, coupled with the use of calibrated measuring instruments and meticulous workmanship, maximizes the likelihood of achieving professional-quality results and long-term functionality.
3. Joinery Techniques
The selection and execution of appropriate joinery techniques are crucial for the structural integrity and longevity of replacement kitchen storage fronts. The method used to connect individual components directly impacts the door’s resistance to warping, sagging, and overall durability. Improper joinery leads to premature failure, necessitating costly repairs or replacements.
- Mortise and Tenon Joints
The mortise and tenon joint, a traditional woodworking method, provides exceptional strength and resistance to racking. This joint involves fitting a projecting tenon from one piece of wood into a precisely cut mortise in another. Its inherent strength makes it suitable for frame construction, particularly for larger units subjected to frequent use. An example would be utilizing mortise and tenon joints for the frame of a solid wood door, ensuring that the corners remain square and stable over time.
- Rabbet Joints
A rabbet joint, created by cutting a recess along the edge of one board to receive another, offers a simple yet effective means of joining frame components. While not as strong as a mortise and tenon, rabbet joints provide adequate support for smaller, less stressed components. For instance, a rabbet joint is frequently used to attach the back panel of a cabinet door to the surrounding frame. The simplicity and ease of execution make it a popular choice for less demanding applications.
- Dowel Joints
Dowel joints rely on cylindrical pins (dowels) inserted into precisely drilled holes in adjacent pieces of wood to create a secure connection. This method is relatively straightforward and provides adequate strength for many applications. Dowel joints are often employed in edge-joining boards for panels or assembling smaller frame components. A common application would be using dowels to align and strengthen the joint between two pieces of wood forming part of a cabinet door frame.
- Pocket Hole Joints
Pocket hole joinery involves drilling angled holes into one piece of wood and then securing it to another with screws. This technique offers a rapid and relatively strong connection, making it popular for a variety of woodworking projects. In the context of replacement kitchen storage fronts, pocket hole joints can be utilized for assembling frames or attaching face frames to cabinet boxes. While the screw heads are typically concealed, the aesthetic may be less refined than traditional joinery methods.
The choice of joinery technique significantly impacts the performance and appearance of replacement kitchen storage fronts. While simpler methods like rabbet or dowel joints suffice for certain applications, stronger techniques like mortise and tenon are essential for ensuring long-term durability, particularly for larger, heavier doors or those subjected to frequent use. The skillful execution of chosen joints contributes to the overall quality and longevity of completed doors.
4. Hardware Choice
Hardware selection significantly influences the functionality, aesthetics, and longevity of replacement kitchen storage fronts. Thoughtful consideration of hardware components is paramount, as these elements directly impact ease of use, visual appeal, and overall durability. Inadequate hardware compromises the investment in replacement efforts.
- Hinge Selection and Functionality
Hinges dictate the swing and alignment of storage fronts. Concealed hinges offer a clean, modern aesthetic, while traditional hinges provide a more classic appearance. Considerations include hinge type (e.g., overlay, inset, full-overlay), weight capacity, and adjustability. Selecting hinges with insufficient weight capacity leads to sagging and misalignment, while inadequate adjustability makes precise alignment challenging.
- Knob and Pull Design and Ergonomics
Knobs and pulls serve as the primary point of interaction with storage fronts. Ergonomic design ensures comfortable and intuitive operation. Style should complement the overall aesthetic of the kitchen. Improper sizing or placement renders them difficult to use, while poorly designed hardware detracts from the visual appeal.
- Drawer Slides and Extension Mechanisms
For storage fronts incorporated into drawers, drawer slides determine the smoothness and extent of drawer extension. Options range from basic side-mount slides to full-extension, soft-close mechanisms. The choice depends on the intended load capacity and desired level of convenience. Inadequate slides result in sticking or sagging drawers, while the absence of soft-close mechanisms leads to slamming and potential damage.
- Latches and Closing Mechanisms
Latches and closing mechanisms ensure that storage fronts remain securely closed. Magnetic catches offer a simple and cost-effective solution, while more elaborate mechanisms provide enhanced security and prevent accidental opening. Selection depends on the contents being stored and the desired level of security. Weak latches fail to keep fronts closed, while overly complex mechanisms are prone to malfunction.
Proper hardware selection enhances the usability and visual appeal of replacement kitchen storage fronts. Strategic selection contributes significantly to the long-term satisfaction and functionality of the renovated space. In contrast, compromised components diminish both the aesthetic quality and usability.
5. Finishing Application
The finishing application constitutes a critical phase in the creation of replacement kitchen storage fronts, directly influencing their aesthetic appeal, durability, and resistance to environmental factors. A properly executed finish protects the underlying material from moisture, scratches, and UV damage, while also enhancing its visual characteristics. Conversely, a poorly applied finish compromises both the appearance and longevity of the completed storage fronts, regardless of the quality of materials and construction techniques used.
- Surface Preparation and Its Impact
Thorough surface preparation forms the foundation for a successful finish. Sanding, cleaning, and priming remove imperfections, create a uniform texture, and promote adhesion of the topcoat. Failure to adequately prepare the surface results in uneven color distribution, visible scratches, and premature finish failure, necessitating costly rework. For instance, neglecting to sand a door prior to staining results in blotchy color absorption, especially on softwoods.
- Selection of Finishing Materials
The choice of finishing material, whether paint, stain, varnish, or lacquer, dictates the final appearance and protective properties. Oil-based paints offer superior durability but require longer drying times. Water-based paints are easier to clean and have lower VOC emissions but may be less resistant to scratches. Selecting the appropriate finish requires careful consideration of the intended use, desired aesthetic, and environmental conditions. A clear varnish, for example, enhances the natural grain of wood while providing a protective barrier against moisture.
- Application Techniques and Equipment
Proper application techniques, including brushing, spraying, and wiping, ensure a uniform and durable finish. The choice of application method depends on the type of finish, the size and complexity of the surface, and the desired level of control. Using the incorrect equipment or application technique results in runs, drips, bubbles, or uneven coverage, detracting from the overall appearance. Spraying, for example, offers a smooth, even finish on large, flat surfaces but requires proper ventilation and safety precautions.
- Curing and Protection
Allowing sufficient curing time is essential for the finish to fully harden and develop its protective properties. Premature handling or exposure to moisture or abrasion compromises the integrity of the finish. Protecting the finished storage fronts during installation and use prevents scratches, dents, and other damage. Manufacturers’ recommendations provide guidance. For example, applying multiple thin coats of varnish, allowing each coat to fully cure, results in a more durable and aesthetically pleasing finish.
In summation, the finishing application plays a crucial role in the overall success of replacement kitchen storage fronts. Thoughtful consideration of surface preparation, material selection, application techniques, and curing processes ensures a durable, aesthetically pleasing, and long-lasting outcome, directly contributing to the value and appeal of the completed project. Conversely, compromised quality diminishes both the aesthetic appeal and the utility of the installation.
Frequently Asked Questions Regarding DIY Kitchen Cabinet Doors
The following addresses common inquiries concerning the fabrication and installation of replacement kitchen storage fronts. The information provided aims to clarify key aspects and guide informed decision-making.
Question 1: What is the typical lifespan of kitchen storage fronts constructed using DIY methods?
The longevity of kitchen storage fronts constructed via DIY methods depends significantly upon material selection, construction techniques, and environmental conditions. Properly constructed units utilizing high-quality materials and finished with durable coatings can achieve a lifespan comparable to professionally manufactured counterparts, potentially exceeding 15-20 years. Substandard materials or improper construction, however, significantly reduce the expected lifespan.
Question 2: What tools are essential for fabricating kitchen storage fronts?
Essential tools include a table saw or circular saw with a guide for accurate cutting, a drill with various bits for hardware installation, a router for shaping edges and creating joinery, sandpaper for surface preparation, clamps for securing joints during assembly, and measuring instruments for precise dimensional assessment. Access to specialized equipment, such as a jointer or planer, facilitates more refined results but is not strictly essential.
Question 3: What are the primary factors influencing the cost of DIY kitchen cabinet door projects?
The primary cost drivers are material selection, hardware choices, and finishing materials. Hardwoods and high-quality plywood command higher prices than lower-grade alternatives. Similarly, premium hinges, knobs, and pulls increase overall project costs. Elaborate finishes, such as multi-step paint systems or catalyzed varnishes, add significantly to the expense. Project scope and the need for specialized tools further impact costs.
Question 4: What are the most common mistakes made during the construction of replacement kitchen storage fronts?
Frequently encountered errors include inaccurate measurements, improper joinery, inadequate surface preparation, and the application of finishes under unsuitable environmental conditions. These mistakes result in ill-fitting doors, structurally unsound assemblies, uneven finish quality, and premature failure.
Question 5: What safety precautions should be observed during the DIY fabrication of kitchen storage fronts?
Essential safety precautions include wearing appropriate personal protective equipment, such as safety glasses, dust masks, and hearing protection. Power tools necessitate adherence to manufacturer’s instructions and the implementation of safe operating practices. Adequate ventilation is crucial when working with finishing materials, and appropriate fire safety measures should be in place.
Question 6: How can I ensure a consistent finish across all replacement kitchen storage fronts?
Achieving a uniform finish necessitates meticulous surface preparation, the use of high-quality finishing materials, consistent application techniques, and controlled environmental conditions. Applying multiple thin coats, allowing adequate drying time between coats, and using a spray gun for a uniform application, are essential. Variations in lighting or temperature influence the final finish. Batch-to-batch variations in stain or paint should be avoided.
In conclusion, the successful execution of DIY kitchen storage front projects requires a thorough understanding of materials, techniques, and safety practices. Attention to detail and adherence to best practices contribute significantly to achieving professional-quality results.
The subsequent section offers guidance on troubleshooting common issues encountered during fabrication and installation.
Conclusion
The preceding has explored the multifaceted process of creating replacement kitchen storage fronts. Key points encompass material selection impacting longevity, the criticality of accurate measurements, the importance of robust joinery, appropriate hardware choices, and meticulous finishing application. Adherence to established best practices in each of these areas significantly contributes to the successful outcome of such projects.
The undertaking represents a significant commitment of time and resources. Careful planning, diligent execution, and a commitment to quality are essential for realizing the potential benefits of this endeavor. The information presented here is intended to serve as a foundation for informed decision-making and to facilitate the creation of durable and aesthetically pleasing kitchen components.


