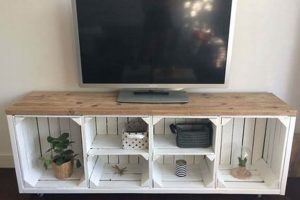
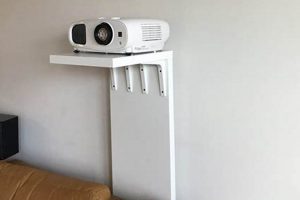
The construction of custom platforms for elevating display screens is a widespread practice. This activity involves individuals creating stands tailored to specific monitor dimensions and ergonomic preferences. An example is fabricating a wooden structure to raise a computer monitor to eye level, thereby promoting better posture.
Creating customized monitor risers offers several advantages. It provides a cost-effective alternative to purchasing commercially available stands. Furthermore, the practice fosters resourcefulness and allows for personalization to match existing desk decor or accommodate specific workspace constraints. Historically, individuals have fashioned such supports from readily available materials to optimize viewing angles and reduce neck strain.
Subsequent sections will detail various design approaches, material selections, and construction techniques relevant to building a stable and functional display screen support. Emphasis will be placed on safety considerations and ensuring the longevity of the resulting structure.
Construction Tips for Elevated Display Platforms
The following guidance outlines essential considerations for fabricating stable and ergonomically sound supports for display screens. Adherence to these recommendations will contribute to a safer and more functional workspace.
Tip 1: Material Selection. Opt for materials with sufficient load-bearing capacity to safely support the monitor’s weight. Solid wood, plywood of appropriate thickness, or metal are viable options. Ensure the selected material is free of defects that could compromise structural integrity.
Tip 2: Precise Measurement and Planning. Accurately measure the monitor’s base dimensions to determine the platform’s required surface area. Plan for adequate ventilation around the monitor to prevent overheating. Consider the desired height of the platform to achieve optimal viewing angle.
Tip 3: Secure Joinery Techniques. Employ robust joinery methods, such as screws, dowels, or metal fasteners, to ensure the structural integrity of the platform. Avoid relying solely on adhesives for critical load-bearing connections.
Tip 4: Stable Base Construction. Design a stable base to prevent tipping or wobbling. A wider base provides greater stability. Consider adding rubber feet to the base to prevent slippage and protect the desk surface.
Tip 5: Cable Management Considerations. Incorporate cable management features, such as holes or channels, to keep cables organized and prevent entanglement. This contributes to a cleaner and safer workspace.
Tip 6: Surface Finishing. Apply a protective finish to the platform to enhance its durability and aesthetic appeal. Sanding and sealing wooden surfaces can prevent splintering and moisture damage. Metal surfaces may require painting or powder coating to prevent corrosion.
Tip 7: Weight Distribution Assessment. Evaluate the platform’s weight distribution after construction to ensure it remains stable and does not exhibit any tendency to tilt or overturn. Adjustments may be necessary to achieve optimal balance.
Implementing these guidelines results in a cost-effective and personalized solution for optimizing monitor placement, improving ergonomics, and enhancing the overall workspace environment. Prioritizing stability, material selection, and precise execution are paramount for long-term functionality.
The subsequent discussion will address design variations and advanced construction techniques for creating more complex elevated display platforms.
1. Material Strength
The selection of appropriate materials is a paramount concern in the construction of custom monitor stands. Material strength directly influences the structural integrity and load-bearing capacity of the stand, ensuring the safe and stable support of the display screen.
- Load-Bearing Capacity
This refers to the maximum weight a material can withstand before deformation or failure. For a monitor stand, the selected material must possess sufficient load-bearing capacity to support the monitor’s weight consistently over time. Failure to consider this aspect can lead to structural instability and potential damage to the monitor.
- Material Durability
Durability relates to the material’s resistance to wear, tear, and environmental factors. A monitor stand constructed from a durable material will withstand daily use and maintain its structural integrity over an extended period. For example, solid hardwoods offer greater durability compared to particleboard, especially in environments with fluctuating humidity levels.
- Shear Strength
Shear strength is the material’s ability to resist forces acting parallel to its surface. Monitor stands experience shear forces at points of connection, such as where the platform meets the legs. Materials with inadequate shear strength may exhibit weakness at these joints, potentially leading to structural failure. Reinforcement techniques or alternative joinery methods may be necessary to compensate for lower shear strength.
- Deformation Resistance
All materials deform to some degree under load. The extent of this deformation is crucial for monitor stands. Excessive bending or sagging can compromise the stability and aesthetics of the stand. Materials with high stiffness, such as steel or thick hardwoods, minimize deformation under load, maintaining a level, visually pleasing platform.
In summary, the interplay between load-bearing capacity, durability, shear strength, and deformation resistance dictates the suitability of a material for monitor stand fabrication. A comprehensive understanding of these properties is essential to ensure a safe, stable, and long-lasting support structure for the display screen. The improper selection of materials based on strength considerations poses potential risks to the monitor and the user.
2. Ergonomic Height
Ergonomic height, the vertical positioning of a display screen relative to the user’s eye level, is a critical consideration in the design and construction of custom monitor stands. Incorrect monitor height can lead to musculoskeletal strain, particularly in the neck and upper back. Therefore, when engaging in a “monitor stand diy” project, determining the appropriate height is paramount to achieving a comfortable and healthy workspace. This involves assessing the user’s seated height and the dimensions of the monitor to calculate the necessary elevation. A monitor positioned too low necessitates a downward gaze, causing neck flexion and potential strain. Conversely, a monitor positioned too high results in neck extension, with similar adverse effects. A real-world example is an individual experiencing chronic neck pain due to using a monitor placed directly on a desk surface. The solution involves constructing an elevated platform that raises the monitor to eye level, thus mitigating the strain. The practical significance of understanding ergonomic height is not merely theoretical; it directly impacts user well-being and productivity.
The implementation of ergonomic height principles in a “monitor stand diy” project often involves iterative adjustments. Initial calculations may require refinement based on the user’s subjective comfort and feedback. The design of the stand should ideally allow for some degree of vertical adjustability, catering to variations in posture or the use of different chairs. For instance, a design incorporating adjustable-height legs or a sliding platform enables fine-tuning of the monitor’s position. Furthermore, factors such as viewing distance and screen size influence the optimal ergonomic height. A larger screen viewed from a closer distance may necessitate a slightly lower positioning to ensure the entire display is comfortably within the user’s field of vision.
In conclusion, the precise calibration of ergonomic height is an indispensable element of any “monitor stand diy” undertaking. The challenges in achieving this ideal are mitigated through careful measurement, iterative adjustments, and a user-centric design approach. By prioritizing ergonomic considerations, individuals can construct monitor stands that not only enhance workspace organization but also promote long-term physical health and productivity, avoiding musculoskeletal issues stemming from prolonged computer use.
3. Base Stability
Base stability is a fundamental requirement in any elevated display platform construction. The integrity of the entire structure rests upon the foundation, and its absence introduces significant risks to both equipment and user safety.
- Footprint Size and Distribution
The size of the base’s footprint directly correlates with its resistance to tipping forces. A wider footprint, where the support points are further apart, provides a greater lever arm against overturning. For example, a stand with a narrow base is more susceptible to toppling than one with a broad, rectangular base. The distribution of weight across the base also influences stability; uneven weight distribution can concentrate stress on specific points, leading to potential failure. Consider a scenario where a monitor stand is accidentally bumped; a wider footprint increases the likelihood of the stand remaining upright.
- Material Rigidity and Damping
The inherent rigidity of the materials used in the base’s construction determines its ability to resist deformation under load. Highly rigid materials, such as steel or thick hardwood, minimize flexing and wobbling, contributing to overall stability. Damping refers to the material’s capacity to absorb vibrations. Materials with good damping properties prevent resonance and reduce the transmission of vibrations from the desk surface to the monitor. This is particularly relevant in environments with frequent disturbances, such as shared workspaces or areas with heavy machinery.
- Center of Gravity Considerations
The center of gravity of the monitor stand and the supported display must fall within the base’s footprint for stable equilibrium. If the combined center of gravity extends beyond the base’s support points, the stand becomes inherently unstable and prone to tipping. Careful consideration must be given to the monitor’s weight distribution and the overall geometry of the stand to ensure that the center of gravity remains safely positioned. Counterweights or adjustments to the base’s design may be necessary to achieve the desired stability, such as adding weight to the base’s interior.
- Surface Contact and Friction
The nature of the contact between the base and the supporting surface influences the stand’s resistance to sliding and unintentional movement. Smooth surfaces offer minimal friction, increasing the risk of slippage, especially under lateral forces. The addition of high-friction materials, such as rubber feet or non-slip pads, enhances the base’s grip and prevents unwanted movement. These elements are particularly important on surfaces that are prone to being slippery, such as polished wood or glass desktops.
These considerations collectively underscore the importance of a well-designed and robust base for any monitor stand, irrespective of its complexity. Addressing these factors diligently during the planning and construction phases will ensure a safe, stable, and reliable platform for the display screen, contributing to an improved and more ergonomic workspace.
4. Cable Management
Effective cable management is an intrinsic component of a well-executed “monitor stand diy” project. Neglecting this aspect can result in a cluttered workspace, posing both aesthetic and functional drawbacks. The correlation is causal: a poorly designed monitor stand lacking integrated cable management features inevitably leads to tangling, strain on cable connections, and impaired accessibility to ports. For instance, a handcrafted wooden monitor riser without pre-drilled routing channels often becomes a breeding ground for tangled power cords, display cables, and USB connections. This necessitates frequent reaching behind the monitor, increasing the risk of accidental disconnection or damage to the ports.
The integration of cable management into a “monitor stand diy” project is not merely an aesthetic consideration; it contributes directly to workplace safety and productivity. Tangled cables present a tripping hazard and impede efficient cleaning and maintenance of the workspace. Furthermore, proper cable routing minimizes electromagnetic interference, potentially improving the performance of sensitive electronic equipment. Practical implementations range from incorporating grommets or pass-through holes in the monitor stand’s platform to designing hidden compartments for housing excess cable length. Another example is integrating Velcro straps or clips to bundle and secure cables along the stand’s supporting structure.
In conclusion, cable management is an indispensable, not optional, consideration within “monitor stand diy”. Its inclusion mitigates hazards, enhances aesthetic appeal, and optimizes the functionality of the workspace. The challenges in implementing effective cable management are outweighed by the long-term benefits in terms of safety, organization, and ease of maintenance. Therefore, any “monitor stand diy” endeavor should prioritize the seamless integration of features that promote organized and accessible cable routing.
5. Ventilation Provision
Adequate ventilation is a critical, often overlooked, aspect of monitor stand design. Proper airflow around electronic devices, including monitors, is essential for dissipating heat generated during operation, thereby preventing overheating and potential performance degradation.
- Heat Dissipation Efficiency
Effective ventilation facilitates the convection and conduction of heat away from the monitor’s internal components. The design of a custom monitor stand must not impede natural airflow patterns. Enclosed spaces or restrictive designs can trap heat, leading to elevated operating temperatures. Real-world examples include stands constructed with solid, non-porous materials that block airflow, resulting in the monitor running hotter and potentially shortening its lifespan. The implication for “monitor stand diy” is that designs should incorporate open spaces or strategically placed vents to promote heat dissipation.
- Component Longevity
Elevated operating temperatures are a primary factor in reducing the lifespan of electronic components. Prolonged exposure to excessive heat accelerates degradation and increases the risk of premature failure. For instance, capacitors, a common component in monitor power supplies and display circuitry, are particularly susceptible to heat damage. A well-ventilated monitor environment mitigates this risk, extending the monitor’s operational life. Within the context of “monitor stand diy,” this means designing structures that maximize airflow around the monitor’s chassis, thereby contributing to its long-term reliability.
- Performance Stability
Overheating can lead to performance instability in electronic devices. As temperatures rise, components may operate outside their optimal specifications, resulting in reduced processing speed, image distortion, or even complete system shutdown. A custom monitor stand should, therefore, ensure sufficient ventilation to maintain stable operating temperatures. For example, gamers or professionals who rely on consistent monitor performance will benefit from a stand designed with ample airflow. Consequently, prioritizing ventilation in “monitor stand diy” is crucial for ensuring consistent and reliable performance.
- Material Selection Impact
The choice of materials used in the monitor stand construction influences the extent to which ventilation is necessary. Materials with high thermal conductivity, such as metal, can help dissipate heat away from the monitor, but may also become hot themselves if not properly ventilated. Conversely, materials with low thermal conductivity, such as wood or plastic, insulate the monitor, potentially trapping heat. This necessitates a more deliberate approach to ventilation design. For “monitor stand diy,” careful consideration should be given to the thermal properties of the selected materials to optimize airflow and prevent heat buildup.
In conclusion, ventilation provision is not merely a supplementary consideration in “monitor stand diy”; it is an integral aspect of ensuring the longevity, performance stability, and overall safety of the supported monitor. Proper ventilation mitigates the risk of overheating, extending the lifespan of sensitive components and guaranteeing stable operation, thereby justifying its importance.
6. Aesthetic Integration
Aesthetic integration, the harmonization of a monitor stand’s visual characteristics with its surrounding environment, is a significant consideration in the context of “monitor stand diy.” While functionality remains paramount, the visual impact of a custom-built stand affects the overall ambiance of the workspace. A poorly designed stand can detract from an otherwise well-appointed office, creating visual dissonance. Conversely, a thoughtfully designed and executed stand can enhance the aesthetic appeal of the workspace, contributing to a more pleasing and productive environment. For example, a minimalist, all-white desk would likely benefit from a monitor stand constructed from similar materials or featuring clean lines and a neutral color palette. The cause-and-effect relationship is clear: deliberate aesthetic integration leads to a visually cohesive workspace, while its absence can result in a disjointed and unappealing setting.
The practical application of aesthetic integration in “monitor stand diy” involves careful consideration of existing design elements. Matching wood finishes to existing furniture, selecting complementary colors, and adhering to a consistent design style are all crucial. Furthermore, the choice of materials influences the aesthetic impact. The use of reclaimed wood can impart a rustic charm, while polished metal lends a more modern and industrial aesthetic. Real-world examples include custom-built stands that seamlessly blend with mid-century modern decor or those that subtly incorporate corporate branding elements. The intentional alignment of the stand’s design with the broader aesthetic context is a testament to the project’s success.
In summary, aesthetic integration is not a superficial aspect of “monitor stand diy” but rather an integral component that significantly impacts the overall quality of the workspace. The challenge lies in balancing functional requirements with aesthetic considerations to create a cohesive and visually pleasing design. By prioritizing aesthetic integration, individuals can construct monitor stands that not only serve their intended purpose but also enhance the visual appeal of their environment, contributing to a more comfortable and productive workspace. A cohesive environment fosters a better mind set when working, therefore it’s an important factor to take note of.
Frequently Asked Questions
This section addresses common inquiries and potential misconceptions regarding the fabrication of custom display screen supports, often referred to as “monitor stand diy.” The following questions and answers aim to provide clarity and guidance on essential aspects of this process.
Question 1: What is the minimum load-bearing capacity required for materials used in elevated display platform construction?
The minimum load-bearing capacity is contingent upon the display screen’s weight. The selected material must withstand this weight with a safety margin of at least 25% to account for potential impacts or additional weight placed on the platform. Refer to the manufacturer’s specifications for the precise weight of the intended display screen.
Question 2: Is it necessary to incorporate ventilation into a custom-built display platform?
Yes, ventilation is advisable. While not all display screens generate substantial heat, providing adequate airflow reduces the risk of overheating, which can negatively impact component lifespan and performance stability. Constructing the platform with open spaces or strategically placed vents is recommended.
Question 3: What joinery methods are most suitable for ensuring the structural integrity of a display platform?
Robust joinery methods are essential. Screws, dowels, or metal fasteners are preferred over relying solely on adhesives. The specific method should be chosen based on the material being used and the anticipated load on the joints. Reinforcement techniques, such as adding corner braces, may be necessary for heavier displays.
Question 4: How can the risk of tipping or wobbling be minimized in elevated display platform construction?
A wide base is crucial for stability. The platform’s footprint should extend beyond the dimensions of the display screen’s base to prevent tipping. Additionally, ensuring that the center of gravity of the combined platform and display screen falls within the base’s support area is paramount. Rubber feet can enhance stability and prevent slippage.
Question 5: What are the ergonomic considerations when determining the appropriate height for a display platform?
The top of the display screen should be positioned at or slightly below eye level when seated. This minimizes neck strain and promotes a more comfortable posture. The precise height will vary depending on the individual’s seated height and the dimensions of the display screen. Adjustability is a desirable feature to accommodate individual preferences.
Question 6: What types of finishes are recommended for protecting and enhancing the aesthetic appeal of a custom-built display platform?
The choice of finish depends on the material being used. For wooden platforms, sanding and sealing or applying a varnish or paint is recommended. Metal platforms may require painting or powder coating to prevent corrosion. The finish should be durable and resistant to scratches and moisture. The aesthetic appeal should complement the surrounding workspace.
The preceding questions and answers provide a foundation for understanding the key considerations in constructing custom elevated display platforms. Adherence to these guidelines will contribute to a safer, more functional, and aesthetically pleasing workspace.
The subsequent section will delve into advanced design techniques and specialized construction methods for creating more sophisticated elevated display platforms.
Conclusion
The preceding sections have comprehensively examined the multifaceted considerations inherent in elevated display platform construction, or “monitor stand diy.” Emphasis has been placed on structural integrity, ergonomic optimization, material selection, and aesthetic integration. The inherent benefits extend beyond mere cost savings, encompassing tailored workspace solutions and enhanced user comfort.
The successful execution of elevated display platform projects necessitates a rigorous adherence to established principles of engineering and design. Improper planning or execution can result in unstable or ergonomically unsound structures, potentially compromising user safety and equipment integrity. Therefore, prospective builders are urged to carefully assess their skills and resources before embarking on such endeavors. When properly executed, “monitor stand diy” offers a valuable opportunity to enhance workspace functionality and aesthetics, promoting both productivity and well-being.



![Build a Strong DIY Boat Motor Stand [Easy Guide] The DIY Hub: Creative Crafts, Repairs & Life Hacks Build a Strong DIY Boat Motor Stand [Easy Guide] | The DIY Hub: Creative Crafts, Repairs & Life Hacks](https://craftingdiycenter.com/wp-content/uploads/2025/07/th-3394-300x200.jpg)
