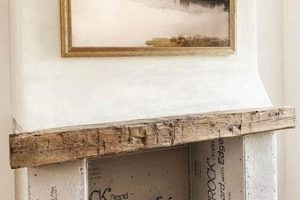
Constructing a housing for a reflective surface involves creating a border, typically from timber, to surround and enhance the mirror. This border can be assembled at home, allowing for customization in size, style, and material. For instance, salvaged lumber may be cut, joined, and finished to create a rustic-style encasement.
These projects offer several advantages, including cost savings compared to purchasing pre-made units and the opportunity to personalize home dcor. Historically, crafting these elements provided an accessible method to enhance and protect mirrors, a practice that continues to appeal to individuals seeking unique and customized furnishings.
The following discussion outlines the essential materials, tools, and steps required to successfully build a custom border for a reflective surface, covering aspects such as wood selection, cutting techniques, assembly methods, and finishing options.
Essential Considerations for Creating Timber Surroundings for Reflective Surfaces
Achieving a professional and aesthetically pleasing result necessitates careful planning and execution. The following guidelines offer insights into optimizing the construction process.
Tip 1: Accurate Measurement is Paramount: Precisely measure the mirror’s dimensions, accounting for any desired overlap or reveal. Inaccurate measurements can lead to improperly sized lumber components and a compromised final product.
Tip 2: Selecting Appropriate Timber: Choose timber that complements the surrounding dcor and is suitable for the intended application. Hardwoods offer increased durability, while softwoods are generally easier to work with. Consider grain patterns and color variations when making the selection.
Tip 3: Mitered Joints Enhance Aesthetics: Employ mitered joints at the corners for a clean, professional appearance. Utilize a miter saw or miter box to achieve accurate and consistent angles. Ensure tight joints for optimal structural integrity.
Tip 4: Secure Fastening Techniques: Select appropriate fasteners, such as wood screws or brad nails, to securely join the timber components. Pre-drilling pilot holes prevents splitting, particularly when working with hardwoods. Consider using wood glue in conjunction with fasteners for added strength.
Tip 5: Careful Sanding and Finishing: Thoroughly sand all surfaces to achieve a smooth and even texture prior to applying any finish. Progress through successively finer grits of sandpaper. Choose a finish that protects the wood and enhances its natural beauty, such as stain, paint, or varnish.
Tip 6: Use Safety Equipment: It is important to use all safety equipment while cutting, sawing, or sanding the wood frame for mirror. This is to ensure that there is no accident, injury or damages happens while working on the project.
Tip 7: Clamping Wood: When clamping the wood frame for the mirror, it is important to use a rubber padding or sheet to prevent clamp marks from appearing on the wood frame.
By adhering to these guidelines, the creation of a visually appealing and structurally sound housing for a reflective surface can be achieved. Attention to detail throughout the construction process is essential for a successful outcome.
The subsequent section explores various design options and decorative techniques to further personalize and enhance the aesthetic appeal of the finished product.
1. Accurate Measurements
The creation of a timber housing for a reflective surface is predicated upon accurate measurements. Dimensional precision in the initial stages directly influences the success of subsequent construction phases. Incorrect dimensions result in constituent parts that fail to align properly, leading to gaps, misalignments, and a structurally compromised final product. For example, if the dimensions of the reflective surface are underestimated when cutting the lumber, the created border will be too small, rendering it unusable. Conversely, overestimation will result in a loose fit, detracting from the aesthetic appeal and potentially compromising the stability of the mirror within its housing.
Accurate measurements facilitate the creation of precisely mitered corners, critical for achieving a professional finish. These measurements also determine the quantity of material needed, minimizing waste and reducing project costs. Furthermore, precise dimensional data is essential when ordering pre-cut timber or utilizing power tools, ensuring correct cuts are made. A failure to accurately measure and account for material thickness during the cutting phase will impact the joining process of the timber housing.
In summary, accurate measurements are not merely a preliminary step, but a foundational element in creating a timber encasement for a reflective surface. Dimensional precision is a prerequisite for achieving structural integrity, aesthetic appeal, and cost-effectiveness in such projects. Disregarding this foundational element inevitably leads to complications and a diminished outcome.
2. Material Selection
The successful construction of a timber border for a reflective surface is heavily contingent upon informed material selection. This choice impacts not only the aesthetic qualities of the finished product but also its structural integrity, longevity, and overall cost. For example, utilizing a softwood such as pine may be economically advantageous for a small, decorative mirror, but its susceptibility to dents and scratches renders it unsuitable for high-traffic areas or larger, heavier mirrors requiring greater support. Conversely, a hardwood like oak provides superior durability and a more refined appearance, but its increased cost and difficulty in machining may be prohibitive for some projects. The selected material must therefore align with the intended application and the builder’s skill level.
Furthermore, material selection dictates the appropriate joining methods and finishing techniques. Certain woods accept stains and paints more readily than others, influencing the ultimate aesthetic. For instance, closed-grain hardwoods like maple require careful preparation to ensure even stain absorption, while open-grain woods like ash naturally highlight grain patterns. The chosen material also affects the required fasteners and adhesives. Utilizing the wrong type of screw or glue can lead to joint failure, especially with hardwoods known for their density and resistance to penetration. Salvaged lumber, while environmentally responsible, may present challenges due to inconsistencies in dimension and pre-existing damage, necessitating more extensive preparation and potentially compromising structural stability.
In conclusion, material selection is an indispensable aspect of creating timber housings for reflective surfaces. A thorough understanding of the properties, advantages, and limitations of various lumber options is essential for achieving a visually appealing, structurally sound, and durable final product. Neglecting this consideration can lead to aesthetic compromises, structural failures, and increased long-term maintenance costs. Thus, careful planning and research regarding material properties are paramount to a successful building endeavor.
3. Joint Construction
Joint construction represents a fundamental element in the successful creation of a timber surround for a reflective surface. The method employed to connect the constituent lumber pieces directly impacts the structural integrity, aesthetic quality, and overall longevity of the final product. Improper joint selection or execution can lead to instability, visual imperfections, and premature failure of the framework.
- Miter Joints and Corner Integrity
Miter joints, characterized by angled cuts typically at 45 degrees, are frequently utilized at the corners of rectangular or square frames. Achieving precise miter angles is critical for creating seamless and visually appealing corners. Imperfect miter angles result in gaps, requiring filling and compromising the aesthetic finish. Furthermore, poorly executed miter joints can be structurally weak, susceptible to separation under stress, especially with larger or heavier mirrors.
- Butt Joints and Reinforcement Needs
Butt joints, where two pieces of lumber are joined end-to-end, are the simplest to execute but inherently weaker than other joint types. When employing butt joints in the construction of a timber surround, reinforcement is essential. This can be achieved through the use of screws, nails, dowels, or metal fasteners. Additionally, the application of high-quality wood glue significantly increases the strength and durability of butt joints, mitigating the risk of separation over time.
- Rabbet Joints for Mirror Retention
Rabbet joints, characterized by a recessed channel cut along the inside edge of the frame, provide a secure recess for the reflective surface. This joint type effectively retains the mirror within the framework, preventing movement or displacement. The depth and width of the rabbet must be accurately sized to accommodate the thickness of the mirror and any backing material. An improperly sized rabbet can lead to an insecure fit, requiring additional shimming or adhesive to ensure stability.
- Dado Joints for Added Strength
Dado joints, which involve cutting a groove into one piece of wood to receive another, provide increased strength and stability. In the context of constructing timber surrounds, dado joints can be used to reinforce corners or to create a more secure housing for the mirror. The precision of the dado cut is crucial for a tight and accurate fit, ensuring optimal load distribution and minimizing stress on other joint types.
The selection and proper execution of joint construction methods are paramount to the overall success of creating a timber surround for a reflective surface. Each joint type offers distinct advantages and limitations, and the appropriate choice depends on the size, weight, and desired aesthetic of the final product. Neglecting this foundational element can compromise the structural integrity and visual appeal of the framework, ultimately diminishing the quality and longevity of the mirror housing.
4. Assembly methods
The creation of a timber border for a reflective surface necessitates the application of effective assembly methods. The chosen technique directly impacts the structural integrity, visual alignment, and overall durability of the project. Inadequate assembly compromises the frame’s capacity to securely house the mirror, potentially leading to distortion, breakage, or detachment. For instance, failing to properly clamp and adhere mitered corners during glue-up can result in gaps and a weakened joint, causing the frame to separate over time under the weight of the mirror.
Assembly methods encompass a range of techniques, including clamping, screwing, nailing, and the use of adhesives. The selection of the appropriate method depends on the type of joints employed (miter, butt, rabbet, etc.), the type of wood used, and the size and weight of the mirror. For example, constructing a large oak frame with mitered corners necessitates robust clamping to maintain alignment while the adhesive cures, supplemented by screws or dowels for added strength. Conversely, a smaller frame constructed from softwood using butt joints might only require nails and glue for adequate stability. The proper sequence of assembly is equally important, typically involving dry-fitting components before applying adhesive, ensuring accurate alignment and a secure fit before permanent fastening.
Effective assembly methods are integral to a successful outcome. Selecting the correct approach based on joint type, materials, and dimensions, coupled with meticulous execution, ensures a durable, visually appealing, and structurally sound timber surround for a reflective surface. Ignoring this aspect leads to compromised integrity and diminishes the longevity of the project. Therefore, a thorough understanding of the principles and techniques of timber assembly is crucial for individuals undertaking such projects.
5. Finishing Techniques
Finishing techniques represent a critical stage in the creation of a timber housing for a reflective surface, influencing both the aesthetic appeal and the protective qualities of the finished product. The application of appropriate finishing materials and methods directly affects the visual characteristics of the wood, enhancing its natural grain or providing a desired color and sheen. Moreover, a well-executed finish safeguards the timber from environmental factors such as moisture, ultraviolet radiation, and physical abrasion, thereby extending the lifespan of the frame and preserving its aesthetic integrity. For example, a frame left unfinished or inadequately sealed is susceptible to moisture absorption, leading to warping, cracking, and potential fungal growth, ultimately compromising its structural stability and visual appeal.
The selection of finishing techniques must be informed by the type of wood employed, the intended use environment, and the desired aesthetic outcome. Oil-based finishes penetrate the wood, emphasizing its natural grain patterns and providing a warm, rich tone. Water-based finishes, on the other hand, offer lower VOC emissions and are often preferred for interior applications, providing a durable and readily cleanable surface. Paint provides a broader range of color options and can be used to create a more contemporary or stylized appearance. Each finishing approach necessitates specific preparation steps, including sanding, cleaning, and potentially the application of a primer or sealer, to ensure optimal adhesion and uniformity of coverage. The choice of finish also determines the required application tools, such as brushes, sprayers, or wiping cloths, and the necessary safety precautions to minimize exposure to potentially harmful chemicals.
In conclusion, appropriate finishing techniques are essential for optimizing both the aesthetic and functional aspects of a timber surround for a reflective surface. The selection and application of finishing materials significantly impact the frame’s visual appeal, its resistance to environmental damage, and its overall longevity. Thus, a thorough understanding of available finishing options and their respective application protocols is critical for achieving a professional and enduring outcome. Neglecting this stage can result in a visually unappealing, structurally vulnerable, and ultimately short-lived project.
6. Hanging hardware
The selection and installation of appropriate hanging hardware are inextricably linked to the successful completion of a timber encasement for a reflective surface. Hanging hardware constitutes the mechanism by which the constructed frame and its enclosed mirror are securely affixed to a wall or other supporting structure. An inadequate or improperly installed system poses a significant risk of failure, potentially resulting in damage to the mirror, the surrounding environment, and even personal injury. The weight of the framed mirror, combined with the intended mounting location and wall material, dictates the appropriate type and capacity of the hanging hardware required. For example, a small, lightweight mirror constructed from pine and intended for mounting on drywall may necessitate only basic picture-hanging hooks. In contrast, a larger, heavier mirror framed with oak and intended for mounting on plaster or masonry will require sturdier hardware, such as D-rings with wire, heavy-duty hooks, or even a French cleat system.
The type of hanging hardware also influences the aesthetic presentation of the finished project. Concealed hardware systems, such as French cleats or recessed mounting plates, offer a clean, seamless appearance by minimizing visible mounting elements. Conversely, decorative hooks or chains can be intentionally incorporated as a design feature, enhancing the overall style of the framed mirror. The correct placement of the hardware on the frame is equally critical. Hardware positioned too close to the top edge of the frame may cause the frame to tilt forward, while hardware positioned too low may result in excessive stress on the mounting points. The spacing between mounting points should be carefully considered to distribute the weight evenly and prevent warping or distortion of the frame over time. Furthermore, ensuring that the chosen hardware is compatible with the wall material is paramount. Using drywall anchors in solid wood or masonry, or failing to properly pre-drill pilot holes, can lead to compromised holding power and eventual failure.
In conclusion, the choice and application of hanging hardware represent an indispensable element in the creation of a timber surround for a reflective surface. Selecting hardware appropriate for the weight, size, and intended mounting location of the framed mirror is essential for ensuring both safety and stability. Proper installation techniques, combined with consideration for the aesthetic integration of the hardware, contribute significantly to the overall success and longevity of the project. Neglecting this final but crucial step can undermine all the preceding efforts, resulting in a compromised and potentially hazardous outcome.
7. Design aesthetics
Design aesthetics constitute a critical element in the creation of a timber surround for a reflective surface. The aesthetic considerations directly influence the visual appeal, stylistic coherence, and overall perceived value of the finished product. A frame constructed without regard to design aesthetics may appear disjointed, out of place, or visually unappealing, thereby detracting from the reflective surface it is intended to enhance. For instance, a highly ornate, Victorian-style frame might clash with a minimalist, modern interior, while a rough-hewn, rustic frame could appear incongruous in a formal setting. The selection of wood type, finish, and decorative elements must therefore align with the intended aesthetic and complement the surrounding environment.
The influence of design aesthetics extends beyond mere visual appeal. It affects the perceived quality and craftsmanship of the frame. A well-designed and executed frame, characterized by clean lines, balanced proportions, and thoughtful details, elevates the reflective surface to a higher level of artistic expression. This is particularly evident in bespoke creations, where the frame is designed to specifically complement the characteristics of the mirror and the style of the room. For example, a frame incorporating inlaid marquetry or intricate carvings not only enhances the visual interest but also conveys a sense of craftsmanship and attention to detail that contributes to the overall aesthetic value. In practical applications, integrating design principles such as the golden ratio or principles of visual balance can significantly enhance the frame’s aesthetic impact.
In summary, design aesthetics are not merely superficial considerations but are integral to the creation of a successful timber frame for a reflective surface. Thoughtful attention to design principles, material selection, and finishing techniques contributes to the frame’s visual appeal, its perceived quality, and its overall contribution to the aesthetic harmony of the surrounding environment. Understanding and applying design principles are therefore essential for achieving a result that is both visually pleasing and functionally appropriate.
Frequently Asked Questions
The following addresses prevalent inquiries regarding the construction of timber surrounds for reflective surfaces, providing concise and authoritative responses.
Question 1: What wood type is most suitable for constructing a robust frame?
Hardwoods, such as oak, maple, or walnut, offer superior durability and resistance to wear compared to softwoods. However, softwoods like pine or fir can be suitable for smaller frames or projects where cost is a primary concern, provided appropriate reinforcement is implemented.
Question 2: How can miter joints be accurately cut without specialized equipment?
A miter box and backsaw provide a cost-effective method for achieving accurate miter cuts. A precise protractor and careful marking can also be utilized in conjunction with a hand saw, although this requires greater skill and attention to detail.
Question 3: What adhesive is recommended for joining timber components?
Polyvinyl acetate (PVA) wood glue is generally suitable for most timber-joining applications. However, epoxy resins offer superior strength and water resistance, making them appropriate for projects exposed to moisture or requiring exceptional structural integrity.
Question 4: How should the frame be attached to the reflective surface?
Silicone adhesive formulated for mirror applications is recommended. Mechanical fasteners, such as clips or brads, can provide additional security, but caution must be exercised to avoid damaging the reflective surface.
Question 5: How can warping of the timber be prevented?
Properly seasoned and dried timber should be utilized. Sealing all surfaces of the frame with a suitable finish minimizes moisture absorption and reduces the likelihood of warping. Adequate ventilation in the surrounding environment is also crucial.
Question 6: What safety precautions should be observed during construction?
Eye protection, respiratory protection (when sanding or applying finishes), and hearing protection (when using power tools) are essential. Securely clamping workpieces and utilizing sharp cutting tools minimizes the risk of injury.
Adherence to best practices regarding material selection, joint construction, and safety protocols significantly enhances the likelihood of a successful project outcome.
The subsequent section explores various aesthetic considerations and personalization techniques.
Concluding Remarks
The preceding discussion has detailed the multifaceted aspects of constructing a timber surround for a reflective surface, encompassing material selection, joint construction, assembly methodologies, finishing techniques, hanging hardware considerations, and design aesthetics. Emphasis has been placed on the importance of precise measurements, informed material choices, robust jointing methods, and careful execution of each construction phase. The utilization of appropriate tools and the adherence to safety protocols are also underscored.
The creation of a diy wood frame for mirror represents a fusion of practical skill and artistic expression. The information provided herein serves as a foundation for individuals seeking to create custom housings for reflective surfaces, offering the potential to enhance both the functional utility and aesthetic appeal of interior spaces. Through diligent planning and execution, a durable and visually pleasing result can be achieved, enriching the environment and reflecting individual craftsmanship.


