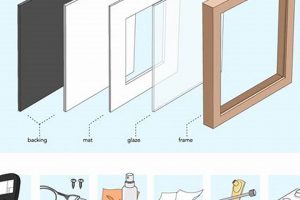
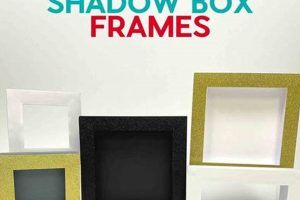
A self-constructed structure designed to support a projector screen’s fabric or material defines a do-it-yourself support. These supports are typically built from wood, metal, or PVC, and customized to specific dimensions and aesthetic preferences. For example, a homeowner might build a wooden frame with mitered corners to achieve a professional-looking finish for a home theater setup.
These self-made supports offer several advantages, including cost savings compared to commercially available options and the ability to tailor the screen size to fit unique room dimensions. Historically, individuals have built their own supports for various purposes, predating commercially manufactured options, reflecting a desire for customization and resourcefulness in creating viewing environments. The practice continues due to its adaptability and potential for significant cost reduction.
The following sections will detail materials selection, construction methods, fabric attachment techniques, and considerations for achieving optimal screen performance when undertaking this type of project.
Essential Considerations for Projector Screen Support Construction
The following provides a series of essential tips to ensure a successful outcome when constructing a projector screen support independently. Adherence to these points will contribute to a stable, aesthetically pleasing, and functionally effective viewing surface.
Tip 1: Precise Measurement is Paramount: Prior to cutting any materials, meticulously measure the intended screen dimensions. Account for any fabric overlap required for secure attachment to the support. Inaccurate measurements can lead to wasted materials and a compromised final product.
Tip 2: Select Appropriate Materials: Choose materials that offer sufficient rigidity and resistance to warping or bending. Kiln-dried wood, aluminum, or sturdy PVC are common choices. The selection should also consider the overall weight of the finished screen and its intended mounting location.
Tip 3: Ensure Square and True Corners: When assembling the structure, use a framing square to verify that all corners are perfectly square. Utilize clamps to hold the pieces together while the adhesive dries or fasteners are secured. This is crucial for preventing distortion in the projected image.
Tip 4: Employ Proper Fastening Techniques: Select fasteners appropriate for the chosen materials. Screws, nails, or specialized adhesives designed for plastics or metals are suitable options. Ensure fasteners are countersunk or flush with the surface to avoid interfering with the screen material.
Tip 5: Consider Fabric Tensioning Methods: Plan for a system to maintain uniform tension across the screen surface. This may involve using staples, clips, or a grooved frame design in conjunction with elastic cords or springs. Uneven tension can cause wrinkles and distortions in the projected image.
Tip 6: Incorporate Adequate Support: For larger screens, consider adding internal bracing or support structures to prevent sagging. Crossbeams or diagonal supports can significantly enhance the frame’s rigidity and long-term stability.
Tip 7: Apply a Smooth and Neutral Finish: If the frame will be visible, apply a smooth and non-reflective finish. Matte black or dark gray are common choices to minimize distractions and maximize contrast on the screen.
By following these guidelines, a durable and visually appealing projector screen support can be created, providing an optimized viewing experience. Careful planning and execution are key to achieving professional-quality results.
The final section will offer insights into fabric selection and attachment methods to complete the projector screen project.
1. Precise Measurements
The dimensional accuracy of a self-constructed projector screen support directly influences the final viewing experience. Inaccurate measurements during the support’s construction propagate errors into the screen’s shape and tension, leading to geometric distortions in the projected image. For example, if the support is not precisely rectangular, the projected image will exhibit keystone distortion, requiring digital correction that may degrade image quality. The criticality of accurate dimensioning necessitates the use of precise measuring tools and careful execution of cutting and joining processes.
Beyond image geometry, measurement errors affect the tensioning of the screen material. A support that deviates from the intended dimensions will introduce uneven tension across the screen surface. This can manifest as wrinkles or sagging, particularly in larger screens, which negatively impacts image uniformity and sharpness. Practical application involves verifying the support’s dimensions with a framing square and level at each stage of construction to ensure adherence to the design specifications. Consider a scenario where a support is marginally out of square; even a small deviation can accumulate over the screen’s surface area, resulting in noticeable distortions.
Therefore, precise measurements are not merely a preparatory step, but an integral component that dictates the final performance of a projector screen support. Challenges associated with achieving this level of accuracy can be mitigated through meticulous planning, employing reliable measuring tools, and incorporating tolerances into the design to accommodate minor variations. Ultimately, the success of a projector screen support relies on the faithful translation of the intended dimensions into the physical structure, ensuring a distortion-free and visually immersive viewing experience.
2. Material Selection
Material selection constitutes a foundational element in the construction of a self-made projector screen support. The choice of materials directly influences the structural integrity, longevity, and overall performance of the finished product. Inadequate material selection can lead to warping, sagging, or instability, compromising the flatness of the screen surface and ultimately distorting the projected image. For instance, using untreated softwood for a large support in a humid environment may result in the wood absorbing moisture, causing it to warp and render the screen unusable. Conversely, selecting a robust material like aluminum or kiln-dried hardwood ensures dimensional stability and resistance to environmental factors. The practical significance lies in understanding that a well-chosen material mitigates potential issues, translating to a high-quality viewing experience.
Further analysis reveals that material selection is intertwined with the intended screen size and mounting location. Larger screens necessitate stronger and more rigid materials to prevent sagging in the center. If the support is to be wall-mounted, the material’s weight becomes a critical consideration to ensure the mounting system can adequately bear the load. Consider the scenario of constructing a portable projector screen support. Lightweight materials like PVC or thin-gauge aluminum tubing might be preferred to facilitate ease of transport. These choices present a trade-off between portability and structural rigidity, highlighting the need for informed decision-making based on the specific application requirements. Different materials will also affect the method used in the assembly of the structure, from different types of adhesives to different fasteners.
In summary, the appropriate choice depends on factors such as screen size, mounting constraints, environmental conditions, and desired portability. While seemingly a preliminary decision, material selection has profound implications for the support’s structural soundness, visual performance, and useful lifespan. Neglecting this aspect can lead to substandard results, whereas careful consideration ensures a stable and visually pleasing viewing surface.
3. Square Corners
In the context of a self-constructed projector screen support, achieving perfectly square corners constitutes a critical determinant of the final product’s visual performance. Deviation from squareness introduces geometric distortions into the frame, directly affecting the projected image. The principle underpinning this relationship lies in the fact that a projector casts a rectangular image; a non-square support will therefore stretch or compress portions of the image, leading to a trapezoidal distortion known as keystone effect. For instance, if one corner of the support is even slightly obtuse, the corresponding edge of the projected image will appear elongated, requiring digital correction that reduces resolution and overall image clarity. Therefore, the pursuit of square corners is not merely an aesthetic consideration, but a fundamental requirement for accurate image reproduction.
The impact of non-square corners extends beyond simple geometric distortion. Such imperfections can also induce uneven tension across the screen material. If one side of the support is longer than its opposite, the fabric stretched across it will experience greater tension, leading to wrinkles and creases in those areas. These imperfections become especially noticeable in scenes with uniform colors or gradients, where the variations in screen surface reflect light unevenly, creating distracting artifacts. In practical application, achieving squareness requires meticulous measurement and the utilization of tools such as framing squares and laser levels. The application of clamping devices during assembly further ensures that the corners remain square while adhesives cure or fasteners are secured. A real-world example involves the construction of a large-format screen where a one-degree deviation from squareness resulted in a visible distortion across the entire image, necessitating a complete rebuild of the support.
In conclusion, the attainment of square corners represents a pivotal challenge in the creation of a functional and visually accurate projector screen support. The absence of squareness precipitates geometric distortions and uneven fabric tension, both of which negatively impact the viewing experience. By prioritizing accurate measurements, employing appropriate tools, and meticulously executing the assembly process, constructors can mitigate these challenges and achieve a professional-quality result. Understanding the direct correlation between square corners and image fidelity is essential for anyone undertaking this project, underscoring the importance of precision and careful craftsmanship.
4. Secure Fastening
Secure fastening is a critical element in the construction of a self-constructed projector screen support. The integrity of the entire structure depends on the strength and reliability of the connections between its constituent parts. Insufficient or inappropriate fastening techniques lead to instability, potential collapse, and ultimately, a compromised viewing experience. The relationship is causal: inadequate fastening directly causes structural weakness. Examples include a wooden support held together with insufficient brad nails, which can separate under the weight of the screen material, or a PVC structure assembled with incompatible adhesive that fails over time due to temperature fluctuations. The practical significance lies in understanding that a properly fastened support ensures long-term stability and prevents distortion of the screen surface.
Further analysis reveals the interplay between fastening methods and material selection. Different materials necessitate different fastening approaches. Wood typically utilizes screws, nails, or specialized wood glues. Metal requires welding, rivets, or metal-specific adhesives. PVC commonly employs solvent cement. Mismatched fastening methods compromise the structural integrity. A real-world application involves selecting screws of appropriate length and gauge for a wooden support. Short screws provide inadequate grip, while overly long screws can split the wood. The correct choice ensures a firm, lasting connection. Moreover, the distribution of fasteners is important; evenly spaced fasteners provide uniform support and prevent stress concentrations that could lead to failure. It is essential that the support structure uses a good amount and quality of fasteners to provide a strong and stable platform for the screen. If there is too much sag in the frame, the image on the screen will be warped and unable to be enjoyed.
In conclusion, secure fastening is not merely a construction detail but an integral aspect determining the stability and longevity of the projector screen support. Neglecting this aspect can result in structural failure, image distortion, and a diminished viewing experience. Proper fastener selection, appropriate application techniques, and consideration of material compatibility are essential for creating a robust and reliable support. By prioritizing secure fastening, constructors contribute to a stable, visually pleasing, and long-lasting viewing environment, therefore maximizing the value and use out of their display.
5. Fabric Tension
The achievement of optimal image quality on a projector screen is fundamentally linked to the tension of the screen material stretched across the support. Adequate and uniform tension eliminates wrinkles, creases, and sagging, all of which degrade image clarity and uniformity. Therefore, a comprehensive understanding of tensioning methods is essential for successful implementation of any self-made projector screen support.
- Impact on Image Geometry
Inadequate material tension directly distorts the projected image. Wrinkles and uneven surfaces cause light to scatter irregularly, resulting in hotspots and inconsistent brightness across the screen. Keystone distortion, though often addressed digitally, can be exacerbated by poorly tensioned fabric, demanding increased digital correction and a subsequent loss of image resolution. A tightly stretched screen, conversely, presents a uniform and flat surface, minimizing distortion and optimizing image accuracy. This is especially important for short throw projectors that magnify any surface imperfection.
- Methods of Achieving Uniform Tension
Several techniques exist for achieving consistent fabric tension. Stapling the material to the support is a common approach, but requires careful spacing and consistent force to avoid localized tension variations. Spring-loaded tensioning systems, utilizing elastic cords or springs attached to grommets in the fabric, provide more uniform and adjustable tension. Grooved frames, in which the fabric is inserted and held in place by a spline, offer a clean and consistent tensioning method, especially with velvet materials that cannot be stretched or stapled. The selection of the most appropriate tensioning method depends on factors such as the type of fabric used, the size of the screen, and the skill level of the constructor.
- Material Properties and Tension
The characteristics of the screen material itself significantly influence the required tension and the effectiveness of different tensioning methods. Highly elastic materials, such as spandex, can tolerate a greater degree of stretching and are more forgiving of minor tension variations. Inelastic materials, such as blackout cloth, require more precise tensioning to prevent wrinkles and sagging. The weight of the fabric also affects the required support structure and tensioning system. Heavier fabrics demand stronger supports and more robust tensioning methods to maintain a flat and uniform surface. Proper choice and tensioning, combined, affect the visual experience.
- Long-Term Tension Maintenance
Fabric tension is not static; it can change over time due to environmental factors such as temperature and humidity, as well as the natural elasticity of the material. Therefore, it is essential to design the system with provisions for tension adjustment. Spring-loaded systems inherently provide some degree of self-adjustment. With other methods, periodic adjustments may be necessary to maintain optimal tension. Neglecting long-term tension maintenance can lead to a gradual degradation of image quality, underscoring the need for a proactive approach to tension management.
These interconnected elements of fabric tension demonstrate its fundamental role in achieving a high-quality viewing experience. By carefully considering the choice of material, selecting an appropriate tensioning method, and planning for long-term maintenance, constructors can create a system that delivers sharp, uniform, and distortion-free images. Understanding that adequate tension is not just an outcome but a vital factor to a projector screen support, constructors will improve their design.
6. Adequate Support
Adequate support is a non-negotiable attribute of any self-constructed projector screen support, influencing not only its structural integrity but also the quality of the projected image. Insufficient support can lead to sagging, warping, or even structural failure, rendering the entire project unusable.
- Preventing Sagging and Warping
The primary role of adequate support is to resist gravitational forces that cause sagging and warping, particularly in larger screens. Horizontal members, such as crossbeams or intermediate supports, distribute the load and prevent the screen material from bowing. For instance, a wooden support exceeding eight feet in width typically requires a center support to maintain a flat surface. Without this support, the weight of the fabric will cause the center to sag, distorting the projected image and rendering it unusable for critical viewing.
- Ensuring Frame Stability
Adequate support extends beyond the screen surface itself to include the overall stability of the frame. Bracing, gussets, and corner reinforcements enhance the rigidity of the structure, preventing it from twisting or collapsing under its own weight or external forces. For example, a PVC support constructed without diagonal bracing is susceptible to racking, which can not only damage the frame but also create uneven tension in the screen material, leading to wrinkles and distortions.
- Load Distribution and Mounting Considerations
The method of mounting the projector screen support dictates the type and extent of adequate support required. A wall-mounted support must distribute the load evenly across the mounting points to prevent stress concentrations that could lead to failure. Similarly, a free-standing support must have a stable base and sufficient internal bracing to resist tipping. If the support will be portable, extra support may be needed to handle regular dissembly and reassembly, while maintaining integrity and image quality.
- Material-Specific Support Requirements
The type of material used in the construction of the projector screen support influences the support requirements. Wood, metal, and PVC exhibit different strength and stiffness characteristics, necessitating tailored support strategies. For instance, a lightweight metal support may require additional bracing compared to a similarly sized wooden support to achieve the same level of rigidity. The choice of materials should therefore be informed by a comprehensive understanding of their structural properties and the intended application.
The interplay between adequate support, material selection, and mounting considerations dictates the long-term performance and reliability of any self-constructed projector screen support. By prioritizing structural integrity and implementing appropriate support strategies, constructors can create a stable, visually accurate, and durable viewing surface that enhances the home theater experience.
7. Neutral Finish
The application of a neutral finish to a self-constructed projector screen support represents a critical step in optimizing the viewing experience. The finish, typically a matte black or dark gray, serves a functional purpose beyond mere aesthetics. It minimizes light reflection and distractions, thereby enhancing the perceived contrast and clarity of the projected image.
- Minimizing Light Reflection
A primary function of a neutral finish is to absorb ambient light that might otherwise reflect off the frame and onto the screen. Reflected light reduces the contrast ratio, washing out the darker areas of the image and diminishing overall detail. A matte black finish, in particular, is designed to absorb a wide spectrum of light wavelengths, effectively reducing glare and reflections. This effect can be demonstrated by comparing two identical projector screens, one with a light-colored frame and the other with a dark, neutral finish. The latter will exhibit a noticeably improved contrast ratio, particularly in dimly lit environments. The absence of a neutral finish creates an undesirable halo effect around the screen, detracting from the immersive viewing experience.
- Enhancing Perceived Contrast
By minimizing light reflection, a neutral finish enhances the perceived contrast of the projected image. Contrast refers to the difference in luminance between the brightest and darkest parts of an image. A higher contrast ratio allows for greater detail and a more dynamic range of colors. A dark frame effectively “frames” the image, making the projected area appear brighter and more vibrant. The human eye perceives contrast in relative terms; therefore, a dark surround makes the bright image appear even brighter by comparison. This effect is analogous to that observed in photography, where a dark matte board enhances the perceived brightness of a print.
- Eliminating Distractions
A brightly colored or glossy frame can be distracting to viewers, drawing attention away from the projected image. A neutral finish blends seamlessly into the background, allowing the viewer to focus solely on the content being displayed. The human eye is naturally drawn to areas of high contrast or bright colors. Therefore, a distracting frame competes for attention and diminishes the immersive quality of the viewing experience. A neutral finish ensures that the frame remains unobtrusive and does not interfere with the intended focus on the projected image.
- Aesthetic Integration
Beyond its functional benefits, a neutral finish contributes to the overall aesthetic integration of the projector screen support within the viewing environment. A dark frame tends to recede into the background, creating a clean and professional appearance. This is particularly important in dedicated home theater spaces where the goal is to create a visually immersive experience. A well-executed neutral finish elevates the overall impression of the viewing setup and enhances the perceived quality of the entire system.
These facets underscore the importance of applying a neutral finish to any self-constructed projector screen support. By minimizing light reflection, enhancing perceived contrast, eliminating distractions, and promoting aesthetic integration, the neutral finish contributes significantly to an enhanced and more immersive viewing experience. Constructors should consider the finish as an integral part of the screen design.
Frequently Asked Questions
The following addresses common inquiries regarding the design, construction, and performance of independently built projector screen supports. These responses aim to clarify key concepts and provide practical guidance.
Question 1: What are the most critical factors influencing the overall quality of a DIY projector screen support?
The overall quality is primarily determined by the precision of measurements, the selection of appropriate materials, the squareness of the corners, the security of fasteners, the uniformity of fabric tension, the adequacy of structural support, and the application of a neutral finish to minimize light reflection.
Question 2: What materials are best suited for constructing a durable and stable support?
Kiln-dried hardwoods, aluminum extrusions, and high-grade PVC are all viable options. The selection should consider the screen size, mounting location, and environmental conditions. Kiln dried is least likely to bend, twist, warp, and crack compared to other soft woods. Aluminum is generally light and resists bending. High grade PVC is cheap and easily customizable to particular sizes and specifications.
Question 3: How can one ensure perfectly square corners during assembly?
A framing square, laser level, and meticulous attention to detail are essential. Clamping devices should be used to hold the components securely in place while adhesives cure or fasteners are applied. If this is not done, then image clarity may not be as effective.
Question 4: What is the recommended method for achieving uniform fabric tension across the screen surface?
Spring-loaded tensioning systems, grooved frames with spline insertion, or careful stapling with consistent force are all effective techniques. The choice depends on the type of fabric used and the desired level of adjustability. Elastic materials are most forgiving. However, consistent tension is more important than the material used.
Question 5: Is internal bracing necessary for larger screens?
Yes. For screens exceeding approximately six feet in width, internal bracing is crucial to prevent sagging and maintain a flat, distortion-free viewing surface. It’s generally recommended to prevent image degradation or structural problems.
Question 6: Why is a neutral finish recommended for the frame?
A matte black or dark gray finish minimizes light reflection, enhances perceived contrast, and eliminates distractions, thereby optimizing the viewing experience. It provides a non reflective border that prevents visual anomalies from showing.
These considerations offer a framework for constructing a functional and visually satisfying projector screen support. Diligence in these areas significantly impacts the final outcome.
The subsequent section delves into advanced techniques for fine-tuning the projector screen setup.
DIY Projector Screen Frame
The preceding discussion has provided a detailed overview of essential considerations when constructing supports independently. From precise measurement and material selection to secure fastening, fabric tensioning, adequate structural support, and the application of a neutral finish, these factors directly impact the performance and longevity of the finished product. Deviation from these best practices leads to compromised image quality, structural instability, and a diminished viewing experience.
Careful adherence to established principles ensures the creation of a stable, visually accurate, and durable viewing surface. Continued exploration and refinement of construction techniques will undoubtedly lead to further advancements in this area, optimizing the home theater experience. Individuals should approach this endeavor with a focus on precision, planning, and a commitment to quality craftsmanship to achieve optimal outcomes.


