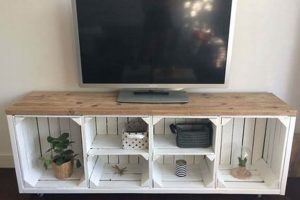
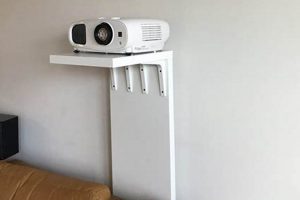
A do-it-yourself (DIY) project involving a television stand that is mounted to the wall, giving the appearance of floating above the floor. This type of media console typically consists of a shelf or cabinet secured to the wall using brackets or other hardware, concealing cables and creating a minimalist aesthetic. For instance, a homeowner might construct a wooden platform attached to wall studs, providing a surface for a television and related electronic devices.
Such constructions maximize floor space, contributing to a cleaner and more organized living area. They offer a visually appealing alternative to traditional floor-standing units. Historically, wall-mounted shelves and cabinets have been utilized to save space and enhance interior design, with the floating television stand representing a modern adaptation of these principles for entertainment centers. The design also enhances safety by eliminating tipping hazards, especially important in homes with children or pets.
The following discussion explores various aspects of creating such a feature, including planning and design considerations, materials and tools required, step-by-step construction guidance, safety precautions, and customization options.
DIY Floating TV Stand
Constructing a wall-mounted media console requires careful planning and execution. The following guidelines are designed to ensure a successful and safe outcome.
Tip 1: Structural Integrity Assessment: Before commencing the project, identify wall studs using a stud finder. Fasten supporting structures directly to studs for maximum weight capacity and stability. Failure to do so can result in structural failure.
Tip 2: Precise Measurement and Leveling: Accurate measurements are paramount. Use a level to ensure the mounting surface is perfectly horizontal. This prevents the television and associated equipment from appearing crooked or unstable.
Tip 3: Cable Management Integration: Plan for cable concealment within the wall cavity or behind the stand. Install cable management sleeves or conduits to maintain a clean and organized appearance. Consider future wiring needs when planning.
Tip 4: Weight Distribution Calculation: Calculate the total weight of the television, media devices, and any decorative items to be placed on the stand. Ensure the chosen mounting hardware and materials can adequately support the load, exceeding the calculated weight for safety.
Tip 5: Concealed Mounting Hardware Selection: Select mounting brackets or hardware that are robust and designed for concealed installation. Evaluate load-bearing capacity and material compatibility to ensure a secure and aesthetically pleasing installation.
Tip 6: Pre-Drilling and Pilot Holes: Always pre-drill pilot holes before driving screws into the wall studs or mounting surface. This prevents wood splitting and ensures a stronger, more secure connection.
Tip 7: Safety First: Disconnect all power sources before working with electrical wiring or drilling into walls. Wear appropriate safety gear, including eye protection and a dust mask, during the construction process.
Following these tips promotes a secure, aesthetically pleasing, and functional wall-mounted media solution, enhancing the living space while minimizing safety risks.
The subsequent sections delve into specific design considerations and material choices relevant to this project.
1. Planning
Effective planning constitutes the foundation of any successful DIY floating TV stand project. A deficient initial design phase inevitably leads to structural instabilities, aesthetic compromises, or functional limitations. Precise measurements of the intended wall space and the dimensions of the television are essential prerequisites. Furthermore, a detailed schematic outlining the design, material choices, and mounting strategy mitigates potential errors during construction. For instance, neglecting to account for cable management during the planning stage may result in unsightly wires and necessitate disruptive post-construction modifications.
The planning process also extends to a comprehensive assessment of wall structure and load-bearing capacity. Identifying stud locations and ensuring the chosen mounting hardware is appropriate for the wall type are critical safety considerations. A failure to adequately plan for weight distribution can lead to a catastrophic collapse of the structure, potentially damaging the television and surrounding property. Consider the scenario of a homeowner who, without careful planning, selects inadequate mounting brackets, resulting in the unit detaching from the wall under the weight of the television.
In summary, meticulous planning serves as a preventative measure against costly errors and safety hazards. It encompasses precise measurement, detailed design schematics, and a thorough assessment of structural requirements. The investment of time and effort in comprehensive planning yields a structurally sound, aesthetically pleasing, and functionally efficient DIY floating TV stand, ultimately enhancing the overall viewing experience and room aesthetic. The subsequent phases of the project rely heavily on the precision and thoroughness established during this critical initial stage.
2. Materials
The selection of appropriate materials is paramount to the structural integrity and aesthetic appeal of a DIY floating TV stand. The materials used directly influence the unit’s load-bearing capacity, longevity, and overall appearance, impacting its suitability for the intended purpose.
- Wood Type
Solid wood, such as oak or maple, offers superior strength and durability, making it suitable for supporting heavier televisions. Engineered wood products, such as plywood or MDF, provide a more cost-effective alternative but may require additional reinforcement. The choice of wood type should align with the weight of the television and the desired aesthetic. Using a softwood for a large, heavy television could lead to sagging or structural failure.
- Mounting Hardware
The selection of appropriate mounting hardware, including brackets, screws, and anchors, is critical for ensuring the stand’s secure attachment to the wall. The hardware must be rated for the weight of the television and any additional components. Using inadequate hardware can result in the unit detaching from the wall, posing a safety hazard.
- Finishing Materials
The choice of finishing materials, such as paint, stain, or varnish, affects the aesthetic appeal and durability of the stand. Selecting a finish that complements the surrounding decor and provides adequate protection against moisture and scratches is essential. A poorly chosen finish can detract from the overall appearance or prematurely degrade, requiring refinishing.
- Adhesives
When constructing the stand, high-quality wood glue or construction adhesive will ensure strong bonding between wood components. Consider using products that have high shear and tensile strength, but are also designed to be sandable and paintable if required. Inadequate adhesives may compromise the overall structural integrity.
The careful selection and application of materials are intrinsic to the success of any floating TV stand project. Choosing high-quality, appropriate materials, alongside proper construction techniques, ensures a durable, visually appealing, and safe addition to the living space. Failure to carefully consider materials can undermine the entire project, leading to costly repairs or hazardous conditions.
3. Support
The structural support system represents a crucial element in the successful implementation of a DIY floating television stand. Adequate support ensures stability, prevents potential hazards, and safeguards the investment in both the stand and the electronic equipment it houses.
- Wall Stud Integration
Direct attachment to wall studs provides the most robust support. Studs, typically wooden or metal, form the vertical framing members of a wall. Securing the mounting hardware directly to these studs distributes the load effectively. Inadequate stud engagement can lead to the stand pulling away from the wall over time. For instance, relying solely on drywall anchors without stud support risks failure due to the relatively low shear strength of drywall. Stud finders are essential tools for locating these critical structural elements behind the wall surface.
- Load-Bearing Capacity of Hardware
Mounting brackets and fasteners possess specific load-bearing ratings, indicating the maximum weight they can safely support. Selecting hardware that exceeds the total weight of the television, media devices, and the stand itself is paramount. Underestimating the weight or using hardware with insufficient load-bearing capacity can result in catastrophic failure. Manufacturers typically provide specifications for their hardware, which should be carefully reviewed and compared against the project’s weight requirements.
- Weight Distribution Strategies
Even with adequate hardware and stud engagement, proper weight distribution is critical. Distributing the weight across multiple mounting points reduces stress on any single point. For larger or heavier setups, employing a wider mounting plate or additional brackets can improve weight distribution. Uneven weight distribution can create stress concentrations, potentially leading to hardware failure or damage to the wall. Simulating weight distribution scenarios during the planning phase can help identify potential weak points.
- Supplementary Support Mechanisms
In certain situations, supplementary support mechanisms may be necessary. For instance, if wall studs are spaced too far apart, a backboard attached to multiple studs can provide a more stable mounting surface. Alternatively, heavy-duty toggle bolts can be used in conjunction with studs to increase load-bearing capacity. These supplementary measures address specific challenges posed by wall construction or unusually heavy equipment loads. They offer added insurance against potential structural issues.
In conclusion, the support system of a DIY floating television stand involves a multifaceted approach, encompassing wall stud integration, hardware load-bearing capacity, weight distribution strategies, and supplementary support mechanisms. A thorough understanding and careful implementation of these elements are indispensable for creating a safe, stable, and long-lasting media center. Neglecting any aspect of support risks compromising the entire project.
4. Aesthetics
Aesthetics play a pivotal role in the design and construction of a DIY floating TV stand. The visual appeal of the unit significantly contributes to the overall ambiance of the living space, necessitating careful consideration of various aesthetic elements.
- Color Palette and Finish
The selection of color and finish directly impacts the stand’s visual integration with the existing decor. A cohesive color palette creates a harmonious and balanced look, while a contrasting color scheme can serve as a focal point. Matte finishes minimize glare and create a more subdued appearance, whereas gloss finishes offer a reflective surface that can enhance the perceived brightness of the room. The choice should align with the desired aesthetic and the lighting conditions of the space. For example, a dark wood stain complements a traditional setting, while a sleek white finish suits a modern interior.
- Form and Minimalism
The form of the floating TV stand often embodies minimalist principles, emphasizing clean lines and a streamlined silhouette. A minimalist design reduces visual clutter, creating a sense of spaciousness and order. This approach typically involves concealing cables and minimizing visible hardware. The shape can range from simple rectangular shelves to more complex geometric designs, but the underlying principle remains the same: to create a visually unobtrusive and elegant structure. Consider the impact of rounded edges versus sharp corners on the overall aesthetic.
- Material Texture and Grain
The texture and grain of the chosen materials contribute significantly to the aesthetic experience. Natural wood grains add warmth and character, while smooth, manufactured surfaces offer a more contemporary feel. The interplay of textures can create visual interest and depth. For instance, pairing a rough-hewn wooden shelf with sleek metal brackets provides a compelling contrast. The selection of material texture should complement the overall design scheme and enhance the tactile experience of the space.
- Lighting Integration
Integrating lighting into the floating TV stand can enhance its visual appeal and functionality. LED strip lights placed beneath the stand create a subtle ambient glow, adding depth and dimension to the space. Spotlights or recessed lighting can highlight decorative elements displayed on the stand. Proper lighting integration not only enhances the aesthetic but also improves the functionality of the media center by providing task lighting for adjusting equipment or accessing media. The color temperature and intensity of the lighting should be carefully considered to create the desired mood.
These aesthetic considerations underscore the importance of a holistic approach to the design and construction of a DIY floating TV stand. By carefully selecting colors, finishes, forms, materials, and lighting, one can create a visually stunning and functionally efficient media center that seamlessly integrates with the existing interior design, enhancing the overall aesthetic of the room.
5. Safety
Safety is paramount when undertaking a do-it-yourself floating television stand project. Improper construction or installation can result in significant risks, ranging from equipment damage to personal injury. The inherent nature of a floating structure, unsupported from below, places heightened emphasis on secure mounting and weight-bearing capacity. For instance, a stand inadequately attached to wall studs may detach, causing the television and any associated equipment to fall, potentially harming individuals in the vicinity. Selecting appropriate mounting hardware, verifying the wall’s structural integrity, and adhering to established building codes are crucial preventative measures. A real-world example involves a homeowner who neglected to properly anchor the stand to the wall studs, leading to a collapse that damaged the television and narrowly avoided injuring a child. This underscores the practical significance of prioritizing safety throughout the entire DIY process.
Furthermore, electrical safety must be addressed during the planning and execution phases. Concealing wires within the wall cavity requires careful consideration of local electrical codes and best practices. Improper wiring can create fire hazards or pose electrocution risks. For example, running unrated cables within the wall without proper conduit could lead to overheating and ignition. Consulting with a qualified electrician to ensure compliance with safety regulations is advisable. The long-term benefits of implementing safe practices far outweigh the time and resources invested in proper planning and execution. Ensuring adequate ventilation for electronic devices housed on the stand also prevents overheating and potential fire hazards.
In conclusion, safety is an indispensable component of any successful DIY floating television stand project. Ignoring safety protocols can result in property damage, personal injury, or even life-threatening situations. Thorough planning, adherence to building codes and electrical standards, and the use of appropriate materials and techniques are essential. The challenges associated with ensuring safety are readily addressable through proper education, careful execution, and a commitment to prioritizing well-being. A focus on safety not only protects individuals and property but also contributes to the overall success and longevity of the project.
6. Mounting
Mounting is the critical process of securing a DIY floating TV stand to the wall, directly impacting its stability, safety, and overall functionality. A thorough understanding of mounting techniques and considerations is essential for a successful project.
- Stud Location and Attachment
Identifying and utilizing wall studs for attachment is paramount. Studs provide structural support, distributing the weight of the stand and television. Attaching directly to studs ensures a secure connection. For instance, a floating TV stand secured to multiple studs will exhibit greater stability than one relying solely on drywall anchors. Ignoring stud location risks the stand detaching from the wall, posing a significant safety hazard.
- Hardware Selection and Load Capacity
Choosing appropriate mounting hardware, including brackets, screws, and anchors, is crucial. The hardware must possess a load capacity exceeding the combined weight of the stand, television, and any additional media devices. Using inadequate hardware can result in structural failure. For example, heavy-duty brackets rated for 100 pounds are necessary for supporting a 50-pound television and a 30-pound stand. Selecting hardware designed for drywall when studs are available compromises the mounting integrity.
- Leveling and Alignment
Precise leveling and alignment are essential for aesthetic appeal and stability. An unlevel stand appears visually unappealing and may place undue stress on the mounting hardware. Employing a level during installation ensures the stand is perfectly horizontal. For instance, a slight misalignment can cause the television to appear crooked, detracting from the overall visual impression.
- Cable Management Integration
Integrating cable management into the mounting process enhances the overall appearance and functionality. Concealing cables behind the stand or within the wall creates a cleaner, more organized look. Implementing cable management solutions during mounting, such as installing conduit or using cable ties, prevents unsightly wires from detracting from the aesthetic. For example, pre-planning cable routes avoids the need for post-installation modifications.
These mounting considerations underscore their critical impact on the safety and visual integration of a DIY floating TV stand. Proper mounting techniques, hardware selection, leveling, and cable management contribute to a functional and aesthetically pleasing media center. Failure to address these considerations compromises the entire project, potentially resulting in safety hazards or visual deficiencies.
Frequently Asked Questions
The following addresses common inquiries regarding the design, construction, and installation of a do-it-yourself floating television stand.
Question 1: What is the minimum wall thickness required to support a floating TV stand?
The minimum wall thickness is contingent upon the wall’s construction material and the chosen mounting hardware. Attachment to wall studs is universally recommended. If studs are inaccessible, a reinforced backboard secured to multiple points on the wall surface can distribute the load. Consult local building codes for specific requirements.
Question 2: Which materials offer the greatest structural integrity for a DIY floating TV stand?
Solid hardwoods such as oak, maple, or walnut exhibit superior structural properties. Engineered wood products, such as plywood or MDF, can be viable alternatives if properly reinforced. The selection should consider the anticipated weight load and desired aesthetic.
Question 3: How is cable management effectively integrated into a floating TV stand design?
Cable management solutions can be implemented through internal routing channels within the stand’s construction, or by utilizing external cable sleeves or conduits. Careful planning during the design phase is essential to conceal cables and maintain a clean aesthetic.
Question 4: What safety precautions are necessary during the installation of a floating TV stand?
Disconnect all electrical power to the area prior to installation. Wear appropriate personal protective equipment, including eye protection and dust masks. Ensure the mounting hardware is adequately rated for the anticipated weight load. Verify the stand is level and securely fastened to the wall structure.
Question 5: How does one determine the appropriate height for mounting a floating TV stand?
The ideal mounting height aligns the viewer’s eye level with the center of the television screen when seated. This minimizes neck strain and optimizes the viewing experience. Measure the eye level from the seated position and adjust the stand’s height accordingly.
Question 6: What are the potential risks associated with an improperly installed floating TV stand?
An improperly installed stand poses a significant risk of detachment from the wall, potentially damaging the television and causing personal injury. Insufficient load-bearing capacity of the mounting hardware or inadequate attachment to wall studs are primary contributing factors. Thorough planning and adherence to safety guidelines are essential to mitigate these risks.
Proper planning and execution are essential for a successful DIY floating television stand. Prioritizing safety and adhering to best practices minimizes potential risks.
The subsequent section delves into advanced design considerations for customized floating television stands.
Conclusion
The preceding discussion has elucidated the critical aspects of undertaking a diy floating tv stand project. The examination encompassed design considerations, material selection, support structure, aesthetic integration, safety protocols, and proper mounting techniques. A comprehensive understanding of these elements is paramount for ensuring the structural integrity, aesthetic appeal, and overall functionality of the resulting media center. Furthermore, adherence to established building codes and electrical standards is essential for mitigating potential safety hazards.
Therefore, prospective constructors are urged to approach this project with meticulous planning and a commitment to best practices. A properly executed diy floating tv stand not only enhances the aesthetic of the living space but also provides a secure and organized platform for entertainment equipment. The investment of time and resources in thorough preparation and careful execution is ultimately an investment in safety, functionality, and enduring aesthetic value. This approach ensures that the final product meets both practical requirements and personal design preferences.


![Build a Strong DIY Boat Motor Stand [Easy Guide] The DIY Hub: Creative Crafts, Repairs & Life Hacks Build a Strong DIY Boat Motor Stand [Easy Guide] | The DIY Hub: Creative Crafts, Repairs & Life Hacks](https://craftingdiycenter.com/wp-content/uploads/2025/07/th-3394-300x200.jpg)
