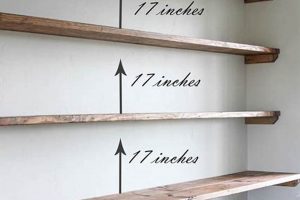
A do-it-yourself decorative wall treatment utilizing horizontally arranged planks, often with a slight gap between them, creates a visually appealing focal point within a room. This application typically involves individual boards or manufactured panels affixed directly to an existing wall surface. For example, installing pre-primed boards onto a bedroom wall transforms a plain space into a more textured and characterful environment.
This type of wall enhancement offers several advantages. It provides an affordable alternative to more extensive renovations, enabling homeowners to add visual interest and depth to their living spaces. Its historical roots can be traced back to ship construction techniques, where interlocking planks created watertight hulls. The aesthetic appeals to a broad range of design preferences, from rustic farmhouse to modern coastal.
The subsequent sections will address essential elements for successfully executing this decorative project, including material selection, proper installation methods, and considerations for surface preparation and finishing techniques to achieve a professional-looking outcome.
Essential Installation Guidance
Successful execution of this decorative project requires careful planning and attention to detail. The following points offer important guidance for achieving a professional finish and lasting durability.
Tip 1: Precise Measurement and Planning: Prior to initiating the installation, meticulously measure the wall to determine the quantity of materials required. Develop a detailed layout plan that accounts for board spacing, edge alignment, and potential obstructions such as electrical outlets.
Tip 2: Proper Surface Preparation: Ensure the wall surface is clean, dry, and free of imperfections. Patch any holes or cracks with appropriate filler and lightly sand the surface to promote adhesion. Applying a primer can further enhance paint or sealant bonding.
Tip 3: Accurate Cutting Techniques: Utilize a miter saw to achieve precise and consistent cuts. For inside corners, employ a coping saw or similar tool for a seamless fit. Consider the angle of the walls, as they may not be perfectly square.
Tip 4: Consistent Board Spacing: Maintain uniform spacing between each board using spacers or shims. This ensures a visually appealing and professional appearance. Consider the desired aesthetic when selecting the gap width.
Tip 5: Secure Fastening Methods: Use construction adhesive in conjunction with brad nails or screws to securely attach the boards to the wall. Ensure that fasteners are driven flush with the surface to avoid protruding edges.
Tip 6: Careful Sealing and Caulking: Apply a bead of caulk along the top, bottom, and side edges to seal any gaps and create a clean, finished look. Select a caulk that is paintable and compatible with the chosen paint or sealant.
Tip 7: Appropriate Finishing: After installation, apply the chosen paint, stain, or sealant according to the manufacturer’s instructions. Multiple coats may be necessary to achieve the desired color and sheen. Allow sufficient drying time between coats.
Adhering to these guidelines will help ensure a durable, aesthetically pleasing, and professionally installed decorative wall treatment, enhancing the visual appeal of the space.
The concluding segment will present potential pitfalls and troubleshooting strategies.
1. Material Selection
Material selection constitutes a foundational decision point in the creation of a decorative plank wall. The choice directly influences the project’s overall aesthetic, cost, and installation complexity. For instance, reclaimed wood offers a rustic, character-rich appearance, but its inherent irregularities and potential for warping necessitate specialized skills and may increase the project’s cost. Conversely, medium-density fiberboard (MDF) presents a smoother, more uniform surface, simplifying the painting process and reducing material expenses. However, MDF’s susceptibility to moisture damage necessitates careful sealing and limits its suitability for bathrooms or areas with high humidity.
The selection process also impacts structural considerations. Solid wood, such as pine or cedar, provides inherent strength and dimensional stability, making it suitable for walls that may experience impact or require the mounting of fixtures. Alternatively, lighter-weight options like plywood offer ease of handling and reduced wall load, but their lower density may compromise structural integrity. Furthermore, the chosen material dictates the required tools and techniques. Working with hardwoods demands more robust cutting tools and precise joinery, while softer materials allow for simpler cutting and fastening methods. Therefore, understanding the properties of different materials and their compatibility with the intended application is essential for a successful installation.
In summary, the material selection process is critical to the outcome of a plank wall project. The choice profoundly influences the appearance, durability, installation complexity, and long-term performance of the finished wall. Careful consideration of these factors, combined with a thorough understanding of the project’s specific requirements, enables informed decisions that contribute to a satisfactory and lasting result.
2. Precise Measurements
Accuracy in measurement serves as a cornerstone for successful execution. Imprecise measurements directly contribute to material waste, misalignment, and an unprofessional final appearance. For example, incorrectly calculating the wall’s surface area leads to purchasing insufficient or excessive planking material, impacting project budget and timeline. Furthermore, variations in individual board lengths resulting from inaccurate cutting introduce unsightly gaps or overlaps, compromising the wall’s aesthetic uniformity and creating structural weaknesses over time.
The implications of measurement errors extend beyond mere aesthetics. Miscalculated board placement can interfere with existing architectural features, such as electrical outlets or window frames, necessitating costly and time-consuming modifications. Conversely, careful attention to detail during the measurement phase ensures a seamless integration with the existing structure. This involves accounting for wall irregularities, corner angles, and the desired spacing between boards, resulting in a visually harmonious and structurally sound installation.
In conclusion, precision in measurement is not merely a procedural step but a fundamental requirement for realizing a professional and durable wall. Overlooking this aspect inevitably leads to complications, increased costs, and a compromised final product. Adherence to accurate measurement techniques, coupled with meticulous planning, ensures a successful installation that enhances the aesthetic appeal and longevity of the wall.
3. Secure Attachment
The durability and longevity of any decorative plank wall are inextricably linked to the effectiveness of its attachment to the underlying wall structure. Secure attachment serves as the foundational element preventing detachment, warping, or shifting of the planks over time. Insufficient or improper fastening methods directly result in structural instability, creating potential safety hazards and diminishing the wall’s aesthetic appeal. For example, planks attached solely with adhesive in high-humidity environments often detach due to moisture-induced weakening of the adhesive bond, necessitating costly repairs or complete replacement. Similarly, inadequate nail or screw placement fails to provide sufficient holding power, leading to plank movement and eventual separation from the wall.
The selection of appropriate attachment methods directly depends on the plank material, the substrate wall composition, and the anticipated environmental conditions. Solid wood planks typically require mechanical fasteners, such as nails or screws, driven into wall studs to ensure robust and enduring attachment. In contrast, lighter-weight materials, like MDF or plywood, may be adequately secured with a combination of construction adhesive and brad nails. However, the adhesive must be compatible with both the plank material and the wall surface to achieve a lasting bond. Furthermore, walls constructed of drywall necessitate the use of anchors or specialized fasteners to prevent pull-through and ensure a secure connection. Careful consideration of these factors, combined with proper installation techniques, mitigates the risk of premature failure and ensures the wall’s structural integrity.
In summary, secure attachment constitutes a critical aspect of decorative plank wall construction. The selection of appropriate fasteners, combined with meticulous installation practices, directly influences the wall’s long-term stability and aesthetic appeal. Neglecting this fundamental requirement inevitably leads to structural vulnerabilities and a compromised final product. Therefore, prioritizing secure attachment is essential for realizing a durable, visually appealing, and safe decorative wall treatment.
4. Level Installation
Maintaining horizontal alignment throughout the installation process is paramount for a visually appealing and structurally sound decorative plank wall. Deviations from a level plane compromise the overall aesthetic and can lead to further complications during the finishing stages. Proper leveling ensures consistent spacing and prevents the illusion of a sloped or uneven surface.
- Visual Harmony and Aesthetic Appeal
A level installation guarantees that the planks align consistently, creating a visually pleasing and balanced composition. Misaligned planks introduce visual dissonance, detracting from the intended design and creating a perception of unprofessional craftsmanship. For example, even a slight deviation from level can be readily apparent, particularly in rooms with strong horizontal lines or prominent architectural features. Level installation is therefore critical in achieving a polished and sophisticated finished product.
- Facilitating Consistent Spacing
Maintaining consistent spacing between planks is essential for achieving the desired textured effect. When the planks are not level, the spacing between them becomes uneven, resulting in a haphazard and disorganized appearance. Consistent spacing emphasizes the uniform lines and shadows, enhancing the wall’s visual depth. To illustrate, if one end of a plank is higher than the other, the gap between it and the adjacent plank will vary, disrupting the intended pattern and creating an undesirable visual effect.
- Preventing Structural Issues
While primarily an aesthetic concern, significant deviations from level can introduce structural stresses, particularly in larger installations. Uneven weight distribution can place undue stress on certain fasteners or adhesive bonds, potentially leading to warping, detachment, or cracking over time. Level installation ensures that the weight of the planks is evenly distributed across the wall, minimizing the risk of structural failure and prolonging the wall’s lifespan. This is especially crucial when using heavier plank materials, such as solid wood.
- Simplifying Finishing and Detailing
A level installation simplifies the subsequent finishing and detailing processes. Applying caulk, paint, or other finishes becomes more straightforward when the planks are evenly aligned. Gaps or uneven surfaces resulting from a non-level installation require additional effort and may compromise the quality of the finished product. For instance, attempting to caulk a large gap between two misaligned planks often results in an unsightly and unprofessional appearance. Level installation minimizes the need for extensive patching and ensures a clean, crisp finish.
The importance of level installation in executing a plank wall cannot be overstated. It influences not only the visual appeal but also the structural integrity and ease of finishing. By prioritizing level installation, project results in a lasting enhancement of a space.
5. Consistent Spacing
Within the context of a decorative plank wall project, consistent spacing between individual planks represents a critical element influencing the overall visual appeal and perceived quality of the finished installation. Variations in spacing disrupt the intended rhythmic pattern, creating a disjointed and unprofessional appearance. This inconsistency can stem from several factors, including inaccurate cutting of planks, imprecise installation techniques, or failure to account for variations in wall surface irregularities. The consequence is a compromised aesthetic, diminishing the intended effect of the decorative wall treatment. For example, consider a wall designed with a deliberate reveal between planks; deviations from the planned spacing will create an uneven shadow line, drawing unwanted attention to the inconsistencies rather than the wall’s intended design.
The application of consistent spacing is achieved through meticulous planning and execution. Utilizing spacers of uniform thickness during the installation process ensures that each gap maintains the intended width. Furthermore, accurate measurement and cutting of planks are essential to minimize discrepancies that could accumulate and disrupt the overall spacing pattern. Real-world examples highlight the significance of this: professional installers often employ laser levels to establish a perfectly horizontal line as a reference point, guaranteeing that the plank rows remain parallel and the spacing remains uniform throughout the entire installation. Addressing challenges such as uneven wall surfaces requires additional care; shimming individual planks may be necessary to compensate for irregularities and maintain consistent spacing across the entire wall plane. Failure to address these challenges results in visible inconsistencies that detract from the final result.
In summary, consistent spacing serves as a key determinant of a successful project. Achieving this uniformity requires careful planning, precise execution, and diligent attention to detail throughout the installation process. The benefits extend beyond mere aesthetics; consistent spacing contributes to a polished and professional appearance, enhancing the perceived value of the wall treatment. By prioritizing consistent spacing, one ensures that the finished outcome aligns with the intended design and enhances the overall aesthetic of the space. Challenges presented by wall irregularities necessitate proactive solutions to maintain visual harmony and achieve the desired outcome.
Frequently Asked Questions
The following addresses common inquiries regarding the planning, installation, and maintenance of a plank wall, providing insights into best practices and potential challenges.
Question 1: What is the recommended plank thickness for optimal visual effect and ease of installation?
Plank thickness is generally recommended to be between 1/4 inch and 3/4 inch. Thinner planks are lightweight and easier to install but may lack visual depth and structural rigidity. Thicker planks offer a more substantial appearance but can be more challenging to handle and require stronger fastening methods.
Question 2: Is it necessary to locate wall studs prior to installation?
Locating and marking wall studs is highly advisable. Fastening planks directly to studs provides a secure and stable attachment, minimizing the risk of detachment or warping over time. A stud finder is an effective tool for accurately locating stud positions.
Question 3: What type of adhesive is best suited for securing planks to the wall surface?
Construction-grade adhesive designed for interior applications is recommended. Ensure the adhesive is compatible with both the plank material and the wall surface. Apply the adhesive in a consistent bead along the back of each plank for optimal bonding.
Question 4: How should planks be finished to protect against moisture damage?
Applying a sealant or paint specifically formulated for interior use is essential. Multiple coats may be necessary to achieve adequate protection, particularly in areas with high humidity. Consider using a primer to enhance paint adhesion and prolong the finish’s lifespan.
Question 5: What is the best method for cutting planks to achieve clean and precise edges?
A miter saw is the preferred tool for achieving clean, accurate cuts. Ensure the blade is sharp and appropriate for the plank material. For intricate cuts or inside corners, a coping saw can provide greater precision.
Question 6: How can existing electrical outlets or fixtures be accommodated during installation?
Carefully measure and mark the location of outlets or fixtures on the planks. Use a drill or jigsaw to create appropriately sized openings, ensuring a snug fit around the existing hardware. De-energize electrical circuits before working near wiring.
Effective execution depends on understanding these key points. With meticulous planning and attention to detail, achieving a successful plank wall is achievable.
The subsequent content addresses best practice of surface preperation.
Concluding Summary
This exploration of the diy shiplap accent wall project has underscored the critical elements necessary for a successful outcome. From meticulous material selection and precise measurement to secure attachment, level installation, and consistent spacing, each phase demands diligent attention to detail. Neglecting these principles invariably leads to compromised aesthetics, structural vulnerabilities, and increased project costs. Achieving a professional-grade finish requires a comprehensive understanding of materials, tools, and techniques, as well as a commitment to accuracy and precision throughout the installation process. The preceding guide offers the knowledge required to complete this ambitious project.
The decision to undertake a diy shiplap accent wall transformation should be approached with a clear understanding of the time, effort, and expertise required. While the visual impact of a well-executed wall treatment can significantly enhance a space, the potential pitfalls of inadequate planning or execution should not be underestimated. Therefore, prospective installers are urged to carefully consider their skills and resources before commencing the project, ensuring that the finished product not only meets aesthetic expectations but also provides lasting structural integrity. When undertaken with due diligence, this project becomes a tangible expression of competence.


