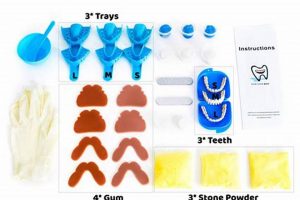
A collection of materials and tools designed for creating objects from a two-part epoxy system at home, this set typically includes resin, hardener, molds, pigments, mixing tools, and safety equipment. For example, hobbyists can employ such a set to produce jewelry, coasters, or decorative items without requiring specialized training or a dedicated workshop.
Such a curated compilation offers accessibility to a craft previously requiring specialized knowledge and equipment. The ready availability of these kits fosters creativity, allows for personalized item creation, and provides an engaging activity. Historically, working with these reactive polymers required specific industrial settings, but consumer-oriented sets have democratized the medium.
The following sections will examine specific components included, safety considerations to bear in mind during usage, the diverse range of projects possible, and best practices for achieving optimal results with this artistic medium.
Expert Guidance
The following guidance aims to optimize project outcomes and ensure safe handling of materials within a standard set of components. Adherence to these recommendations promotes successful and enjoyable creative endeavors.
Tip 1: Maintain Accurate Measurement Ratios: Strict adherence to the manufacturer’s specified mixing ratios of resin and hardener is crucial. Incorrect ratios can result in incomplete curing, producing a sticky or brittle final product. Utilize calibrated measuring cups or scales for precise measurements.
Tip 2: Employ Proper Mixing Techniques: Thoroughly combine the resin and hardener, scraping the sides and bottom of the mixing container. Inadequate mixing leads to uncured spots. Avoid vigorous mixing, which introduces excessive air bubbles.
Tip 3: Minimize Air Bubble Entrapment: After mixing, allow the resin to sit for a few minutes to allow air bubbles to rise to the surface. A heat gun or lighter, used carefully, can dissipate surface bubbles. Pressure pots are an alternative for minimizing bubble formation in complex molds.
Tip 4: Temperature and Humidity Control: Maintain a stable room temperature and low humidity during the curing process. Extreme temperatures or high humidity can affect the cure time and clarity of the finished piece.
Tip 5: Mold Preparation is Critical: Before pouring, ensure molds are clean and free from dust or debris. Applying a mold release agent facilitates easy removal of the cured resin and prevents damage to the mold.
Tip 6: Pigment Dispersion: When using pigments or dyes, mix them thoroughly into the resin before adding the hardener. Uneven pigment dispersion results in streaks or inconsistencies in color.
Tip 7: Layered Pouring for Complex Projects: For projects involving multiple colors or embedded objects, pour resin in layers, allowing each layer to partially cure before adding the next. This prevents colors from mixing and objects from shifting.
Effective implementation of these techniques ensures predictable outcomes, enhancing both the aesthetic appeal and the structural integrity of completed projects.
The subsequent sections will further explore advanced methods, troubleshooting common issues, and artistic applications that extend beyond the basic introduction provided.
1. Component Quality
The quality of components within a curated epoxy set is a primary determinant of the final product’s aesthetic appeal, structural integrity, and longevity. Inferior resins may exhibit discoloration, bubble formation, or uneven curing, directly impacting the visual presentation. Low-grade hardeners can lead to incomplete reactions, resulting in a flexible or tacky surface, compromising the finished item’s durability. For example, a set containing subpar pigments may produce muted or inconsistent colorations, detracting from the intended artistic design. The use of lower-quality molds can lead to surface imperfections and difficulties in demolding, resulting in project failure.
Furthermore, the presence of additives, such as UV stabilizers, within higher-quality resins plays a critical role in preventing yellowing or degradation over time when exposed to sunlight. This characteristic is especially significant for projects intended for outdoor display or frequent handling. Precise dosing and formulation of these additives are hallmarks of superior resin formulations. Similarly, the quality of mixing tools, such as silicone cups and stirring sticks, impacts the ease and accuracy of mixing, thereby minimizing air bubble entrapment and ensuring uniform distribution of additives and pigments.
In summary, the investment in curated epoxy sets with verified component quality is a direct investment in the success and enduring appeal of resin-based projects. Compromising on component quality often leads to frustration, wasted materials, and diminished artistic outcomes. Prioritizing component selection establishes a foundation for achieving professional-caliber results and realizing the full potential of this crafting medium.
2. Mixing Precision
Mixing precision is paramount to achieving desired outcomes with any curated set of components for crafting with two-part epoxy systems. Deviations from recommended ratios or inadequate blending directly affect the chemical reaction, impacting the physical properties and aesthetic qualities of the final product.
- Stoichiometry and Polymerization
The chemical reaction between resin and hardener relies on precise stoichiometry. An incorrect ratio disrupts the crosslinking process, resulting in incomplete polymerization. This manifests as a tacky, flexible, or brittle finish, rendering the piece unusable. For example, an under-catalyzed system will remain soft, while an over-catalyzed system may cure too quickly, generating excessive heat and potential cracking.
- Uniformity and Clarity
Thorough and consistent mixing ensures uniform distribution of all components, including pigments, additives, and fillers. Inadequate blending leads to streaks, color variations, and localized areas of uncured resin. This is particularly evident in transparent castings, where any imperfections are readily visible. Proper mixing techniques prevent these visual defects, resulting in a clear and homogenous appearance.
- Air Entrapment Minimization
Vigorous or improper mixing introduces air bubbles into the resin mixture. These bubbles can compromise the structural integrity and aesthetic appeal of the finished piece. Controlled, slow mixing techniques, combined with vacuum degassing or the application of heat, minimize air entrapment. This results in a smoother, more durable, and visually pleasing product.
- Working Time Considerations
The working time, or pot life, of a system is influenced by the
accuracy of the mixing process. Incorrect ratios or inadequate blending can shorten or lengthen the working time, making it difficult to pour and manipulate the resin before it begins to cure. Precise mixing ensures predictable and manageable working times, allowing for optimal project execution.
These elements highlight the criticality of mixing precision within the context of any curated epoxy set. By adhering to recommended ratios and employing proper mixing techniques, users can minimize defects, optimize material properties, and achieve professional-quality results.
3. Safety Protocols
The inherent chemical properties of the materials within a curated epoxy compound set necessitate strict adherence to safety protocols. These protocols serve to mitigate potential risks associated with skin contact, inhalation of fumes, and accidental ingestion. Failure to implement appropriate precautions can result in dermatological irritation, respiratory complications, or more severe health consequences depending on the duration and intensity of exposure. For example, without adequate ventilation, prolonged exposure to volatile organic compounds released during the curing process may trigger headaches, dizziness, or allergic reactions in susceptible individuals.
The inclusion of personal protective equipment (PPE), such as nitrile gloves, respirators, and eye protection, is crucial for safeguarding against potential harm. Nitrile gloves prevent skin contact with the resin and hardener, minimizing the risk of dermatitis or allergic reactions. Respirators equipped with appropriate filters protect against the inhalation of harmful vapors, especially in poorly ventilated areas. Eye protection shields against accidental splashes or spills, preventing potential eye irritation or damage. Real-world incidents involving mishandling of these chemicals highlight the importance of consistent and diligent use of PPE. Inadequate ventilation, absence of gloves, and lack of eye protection during mixing and pouring have resulted in adverse health effects ranging from mild skin rashes to severe respiratory distress.
Therefore, safety protocols are an indispensable component of any curated epoxy compound set. They are not merely suggestions but rather essential measures that must be consistently followed to ensure the health and well-being of individuals engaged in the crafting process. Understanding and prioritizing safety not only minimizes potential risks but also fosters a more sustainable and responsible approach to working with these materials.
4. Curing Environment
The conditions under which a resin mixture solidifies into its final form are critical. Environmental factors exert significant influence on the curing process, affecting the physical properties, appearance, and overall integrity of the finished article created with a curated two-part epoxy set. Maintaining a controlled environment is, therefore, a key aspect of successful project completion.
- Temperature Regulation
Temperature directly impacts the rate of chemical reaction. Higher temperatures accelerate curing, potentially leading to premature hardening, excessive heat generation, and warping. Conversely, lower temperatures retard curing, prolonging the process and potentially causing incomplete crosslinking. A stable temperature within the range specified by the resin manufacturer is crucial. For instance, a set formulated for room temperature curing (20-25C) will not achieve optimal hardness if left to cure in a cold garage (10C).
- Humidity Control
Excessive humidity can interfere with the curing process, particularly affecting surface clarity and adhesion. Moisture can react with the epoxy, creating a cloudy or sticky surface finish. Some resins are more sensitive to humidity than others, but generally, maintaining a relatively dry environment (below 60% relative humidity) is beneficial. This is especially important for projects involving thin layers or delicate details.
- UV Light Exposure
Direct exposure to ultraviolet (UV) light can cause discoloration and degradation of certain resins over time. While some sets include UV stabilizers to mitigate this effect, it is advisable to avoid prolonged exposure to direct sunlight during curing. A shaded or indoor location provides a more controlled environment, preventing premature yellowing or weakening of the material.
- Dust and Contamination Prevention
Airborne particles and contaminants can settle on the resin surface during curing, becoming permanently embedded and detracting from the finished product’s appearance. A clean and dust-free environment is essential. Covering the project during curing can further protect it from contamination. A simple enclosure made from cardboard or plastic sheeting can significantly improve the final result.
These environmental factors are interconnected and must be carefully managed to achieve the desired outcome. Effective environmental control maximizes the potential of components from the set, leading to creations characterized by clarity, durability, and aesthetic fidelity. When working with such sets, careful environmental considerations are as crucial as precise mixing and accurate measurement.
5. Project Design
Project design serves as the foundational blueprint dictating the success of any endeavor involving a curated epoxy compound set. Careful consideration of design parameters ensures compatibility between the intended outcome and the materials and capabilities provided within the set.
- Complexity and Skill Level
The intricacy of the design must align with the user’s proficiency. Beginner-level projects should prioritize simplicity, focusing on basic techniques and straightforward molds. Attempting complex designs with insufficient experience can lead to frustration and material wastage. Examples include starting with simple coasters or keychains before progressing to multi-layered or intricate jewelry pieces. Project selection should progressively increase in difficulty as skill develops.
- Material Compatibility and Volume
The design must account for the limitations of the materials included in the epoxy compound set. The volume of resin and hardener provided dictates the maximum size and complexity of the project. Embedding large objects may require specialized resin formulations or multiple pouring stages. Careful calculation of material requirements prevents underestimation and ensures sufficient supplies are available to complete the project.
- Mold Selection and Design Integration
The choice of mold is a critical design consideration. Molds should be appropriate for the intended shape and size of the final product. Complex molds with intricate details may require advanced techniques, such as pressure casting or vacuum degassing, to eliminate air bubbles. The design should integrate seamlessly with the mold, considering demolding requirements and potential surface imperfections. For example, designs incorporating sharp angles or undercuts may necessitate flexible molds or specialized release agents.
Aesthetic Considerations and Color Palette
The aesthetic elements of the design, including color choices, embedded objects, and surface finishes, play a crucial role in the final product’s appeal. The design should consider the compatibility of pigments and dyes with the chosen resin system. Experimentation with different color combinations and embedding techniques can enhance visual interest and artistic expression. The design should also address surface finish considerations, such as polishing, sanding, or sealing, to achieve the desired aesthetic effect.
These design facets collectively determine the feasibility and ultimate success of epoxy-based crafting. A comprehensive understanding of these considerations enables users to leverage the epoxy compound set effectively, transforming creative concepts into tangible and visually compelling works. These curated epoxy compound sets empower artisans to translate imaginative visions into concrete and aesthetically pleasing creations.
Frequently Asked Questions About DIY Resin Kits
The following addresses common inquiries and concerns regarding the use of curated sets for crafting with two-part epoxy systems. The goal is to provide clarity and promote safe, effective utilization of these materials.
Question 1: What is the typical shelf life of an unopened epoxy resin and hardener included in a DIY kit?
Unopened epoxy resin and hardener generally maintain their integrity for one to two years from the date of manufacture when stored properly. Optimal storage involves a cool, dry location away from direct sunlight and extreme temperature fluctuations. Check the manufacturer’s specifications printed on the product label for specific guidance. Degradation may manifest as discoloration, increased viscosity, or reduced curing performance.
Question 2: Can different brands of epoxy resin and hardener be interchanged within crafting projects?
Intermixing different brands or formulations of epoxy resin and hardener is generally discouraged. Each system is specifically formulated to achieve optimal performance with its counterpart. Substituting components can lead to unpredictable curing characteristics, compromised mechanical properties, and potential incompatibility issues. It is advisable to use only the resin and hardener provided within a specific curated compound set to ensure proper performance and avoid unexpected results.
Question 3: What are the recommended safety precautions when working with epoxy resin?
Essential safety precautions include wearing nitrile gloves, eye protection, and a respirator in a well-ventilated area. Epoxy resin and hardener can cause skin irritation or allergic reactions in sensitive individuals. Avoid direct skin contact and immediately wash any exposed areas with soap and water. Inhalation of vapors can cause respiratory irritation. A respirator equipped with appropriate filters is recommended to minimize exposure. Refer to the Safety Data Sheet (SDS) for detailed safety information.
Question 4: How can air bubbles be effectively removed from epoxy resin mixtures?
Several techniques can minimize or eliminate air bubbles. Gentle stirring, avoiding vigorous agitation, reduces bubble formation during mixing. Allowing the mixture to sit for a few minutes after mixing allows bubbles to rise to the surface. A heat gun or lighter, used carefully, can dissipate surface bubbles. For more demanding applications, a pressure pot or vacuum chamber can effectively remove trapped air.
Question 5: What causes epoxy resin to cure with a sticky or tacky surface?
A sticky or tacky surface typically indicates incomplete curing. Common causes include an incorrect resin-to-hardener ratio, inadequate mixing, low ambient temperature, or high humidity. Ensure precise measurement of resin and hardener, thorough mixing, and a suitable curing environment to promote complete polymerization. Resurfacing the tacky area with a thin layer of correctly mixed resin can sometimes rectify the issue.
Question 6: What are the appropriate disposal methods for unused epoxy resin and hardener?
Uncured epoxy resin and hardener are considered hazardous waste and should not be disposed of in regular trash or down drains. Contact local waste management authorities for guidance on proper disposal methods. Allow the resin and hardener to fully cure before disposal. Cured epoxy resin is generally considered non-hazardous and can be disposed of as solid waste, contingent on local regulations. Refer to Safety Data Sheets (SDS) for detailed disposal instructions.
This information underscores the importance of informed practices when utilizing sets containing epoxy-based materials. Diligent adherence to safety guidelines and recommended procedures facilitates successful project outcomes and mitigates potential risks.
The following section delves into advanced techniques and specialized applications, building upon the foundational knowledge presented here.
Conclusion
The preceding discussion has examined the multifaceted aspects of a diy resin kit, encompassing component quality, mixing precision, safety protocols, environmental considerations, and project design. A comprehensive understanding of these elements is essential for successful and safe utilization of these curated sets. Deviation from recommended practices can lead to suboptimal results and potential hazards.
Therefore, a commitment to rigorous technique and diligent adherence to safety guidelines is paramount. The potential applications of diy resin kit sets are vast, offering opportunities for creative expression and functional item creation. Continual education and responsible handling are necessary to maximize the benefits and minimize the risks associated with this versatile medium.


