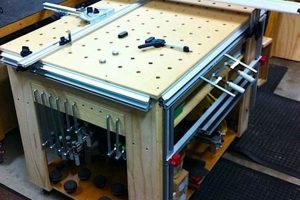
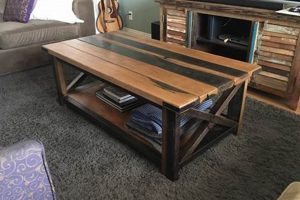
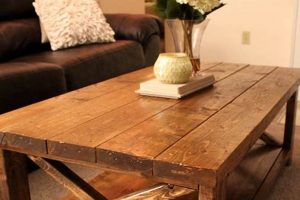
A self-assembled workspace specifically designed for creative projects provides a dedicated area for hobbies such as sewing, painting, jewelry making, or model building. These customized stations often incorporate features like adjustable heights, built-in storage, and durable work surfaces, catering to individual needs and project requirements. For instance, a repurposed door placed atop filing cabinets can serve as a budget-friendly and functional surface for various crafting endeavors.
The creation of personalized workstations fosters efficiency and organization, promoting focus and minimizing clutter. The availability of tailored storage solutions allows for immediate access to necessary tools and materials, streamlining workflow. Historically, the construction of customized furniture has empowered individuals to adapt their environments to specific tasks, reflecting a desire for functionality and personalized expression. This trend continues as individuals seek to optimize their creative spaces for maximum productivity and enjoyment.
The subsequent sections will explore various design considerations, material choices, and construction techniques relevant to building such a customized area. These explorations aim to equip individuals with the knowledge and resources necessary to create a workspace that optimally supports their artistic pursuits.
Crafting Station Construction & Optimization
The successful development of a personalized crafting station relies on careful planning and execution. These tips highlight crucial aspects to consider during the design and construction phases.
Tip 1: Space Assessment: Prior to beginning the building process, a thorough evaluation of the available area is essential. Precise measurements of the designated room or workspace are necessary to ensure that the constructed unit fits appropriately without obstructing movement or access to other areas.
Tip 2: Material Selection: The choice of materials directly impacts the durability and longevity of the structure. Opting for robust materials such as solid wood, plywood with a durable finish, or metal framing will ensure the workstation can withstand regular use and support the weight of tools and projects. Material selection should also consider resistance to spills and stains.
Tip 3: Ergonomic Design: Prioritizing ergonomic design principles is paramount to user comfort and long-term physical health. Adjustable height options are highly recommended to accommodate different users and project types. Consider the optimal reach distance for frequently used tools and materials to minimize strain.
Tip 4: Integrated Storage Solutions: Incorporating ample and well-organized storage is critical for maintaining a tidy and efficient workspace. Drawers, shelves, pegboards, and cabinets should be strategically integrated to accommodate tools, supplies, and works-in-progress. Transparent containers can aid in quick identification of contents.
Tip 5: Lighting Considerations: Adequate lighting is essential for detailed craft work. Natural light should be maximized wherever possible. Supplement this with adjustable task lighting that can be positioned to eliminate shadows and provide focused illumination on the work surface. Consider color-corrected light bulbs for accurate color representation.
Tip 6: Wiring and Power Access: For projects involving electrical tools or equipment, the inclusion of strategically placed power outlets is essential. Concealed wiring solutions are recommended to maintain a clean and uncluttered appearance and prevent tripping hazards. Consider incorporating a surge protector for added safety.
Tip 7: Surface Finish: The work surface should be treated with a durable and easily cleanable finish. Options include varnish, lacquer, epoxy resin, or laminate. The chosen finish should be resistant to scratches, stains, and chemicals commonly used in craft projects.
Careful attention to these details results in a highly functional and personalized space, thereby enhancing the crafting experience and promoting creative productivity.
The following sections will expand on specific design ideas and practical building techniques, providing further guidance for the construction of this unit.
1. Material Durability
Material durability is a foundational aspect influencing the long-term utility and functionality of a crafting station. The selection of robust materials directly impacts the station’s ability to withstand regular use, resist damage from tools and supplies, and maintain structural integrity over an extended period.
- Resistance to Wear and Tear
Materials with inherent resistance to wear and tear are crucial for crafting surfaces. Examples include hardwood, solid-core plywood with a protective finish, and certain metal alloys. These materials withstand scratching, denting, and abrasion from tools and materials, preserving the aesthetic and functional qualities of the station over time. The implications for a crafting station are reduced maintenance costs and a prolonged lifespan.
- Load-Bearing Capacity
The capacity of materials to support substantial weight is a key consideration, especially if the station will house heavy equipment or large quantities of supplies. Solid wood frames, reinforced shelving, and heavy-duty metal supports ensure the station can bear the load without deformation or structural failure. Failure to consider this aspect may result in a compromised structure requiring costly repairs or replacement.
- Resistance to Chemicals and Stains
Crafting projects often involve the use of paints, solvents, adhesives, and other potentially damaging chemicals. Selecting materials with inherent resistance to these substances, or applying protective coatings, prevents permanent staining and degradation. Materials like epoxy resin, laminate, and treated wood surfaces offer effective barriers against chemical damage, ensuring the station maintains a clean and presentable appearance. Without proper protection, the appearance and potentially the structural integrity of the station can be compromised.
- Resistance to Moisture and Humidity
In environments with fluctuating humidity levels or potential for spills, materials must exhibit resistance to moisture absorption and warping. Treated lumber, water-resistant sealants, and certain plastics are effective in preventing moisture-related damage. Failure to account for moisture resistance can lead to swelling, cracking, and eventual decay of wooden components, reducing the structural soundness and overall lifespan of the station.
The longevity and sustained functionality of a crafting station depend significantly on the thoughtful selection of durable materials. By prioritizing resistance to wear, load, chemicals, and moisture, the individual can ensure that the structure not only meets current needs but also provides a reliable and aesthetically pleasing workspace for years to come. Failing to select proper materials can lead to a reduced lifespan of the table with aesthetic deficits.
2. Workspace Ergonomics
Workspace ergonomics, concerning the optimization of a work environment to suit the user’s physical needs, is critically relevant to the design and construction of a do-it-yourself crafting table. A properly designed crafting table, incorporating ergonomic principles, minimizes physical strain, enhances comfort, and promotes sustained focus during creative activities.
- Adjustable Height Considerations
Adjustable height is a primary ergonomic feature, allowing the crafting surface to be adapted to the user’s stature and the specific task at hand. A surface set too low necessitates hunching, leading to back and neck pain. Conversely, a surface set too high causes shoulder and arm fatigue. Implementing an adjustable mechanism, such as lockable legs or a motorized lift, enables a comfortable and sustainable working posture, reducing the risk of musculoskeletal disorders.
- Reach and Accessibility Optimization
The ergonomic arrangement of tools and materials is essential for minimizing unnecessary reaching and stretching. Frequently used items should be placed within easy reach, ideally in a semi-circular zone in front of the user. Shelving, drawers, and pegboards can be strategically positioned to optimize accessibility and reduce the need for repetitive motions, preventing strain and improving workflow efficiency. An example would be storing frequently used paintbrushes in a container located within arm’s reach while seated.
- Surface Angle and Tilt Customization
For certain crafting activities, such as drafting or painting, a tilted work surface can significantly reduce neck and eye strain. Incorporating a tilting mechanism into the crafting table design allows the user to adjust the angle of the surface to achieve an optimal viewing position, minimizing the need to crane the neck or squint. A simple easel attachment or a hinged tabletop section can provide this functionality.
- Seating Compatibility and Support
Ergonomic considerations extend beyond the crafting surface to include the seating arrangement. The chair should provide adequate lumbar support, adjustable height, and the ability to swivel. The chair’s height should be adjusted in conjunction with the table height to ensure a comfortable and natural posture. Failure to consider seating ergonomics can negate the benefits of an ergonomically designed table, resulting in persistent discomfort and potential injury. Ensure compatibility between both the seat and the diy crafting table is maintained.
The integration of these ergonomic principles into the design and construction of a do-it-yourself crafting table is not merely a matter of convenience but a fundamental aspect of promoting user well-being and sustained creative productivity. By prioritizing adjustability, accessibility, and support, individuals can create a workspace that minimizes physical strain and fosters a more comfortable and engaging crafting experience.
3. Storage Integration
Efficient storage integration is a cornerstone of a functional workspace, particularly in the context of a do-it-yourself crafting table. The strategic incorporation of storage solutions directly impacts accessibility, organization, and overall productivity, transforming a mere surface into a comprehensive crafting ecosystem. A well-designed storage system minimizes clutter, maximizes space utilization, and enhances the user’s creative workflow.
- Dedicated Compartmentalization
The purposeful division of storage space into distinct compartments tailored to specific tools and materials is essential. Drawers, shelves, bins, and dividers facilitate the systematic categorization of items, enabling quick retrieval and preventing the commingling of dissimilar objects. For instance, a drawer dedicated solely to paintbrushes, separated by size and type, minimizes search time and protects the bristles from damage. The absence of such compartmentalization leads to disorganized clutter and reduced efficiency.
- Vertical Space Maximization
Effective storage integration extends beyond the horizontal plane to encompass the utilization of vertical space. Wall-mounted shelves, pegboards, and overhead cabinets expand storage capacity without encroaching upon valuable work surface area. A pegboard displaying frequently used tools, for example, keeps them readily accessible while freeing up drawer space. Neglecting vertical space results in a limited storage footprint and increased surface clutter.
- Mobile Storage Solutions
Incorporating mobile storage elements, such as rolling carts or modular drawer units, provides flexibility and adaptability within the crafting workspace. These portable solutions enable the user to reposition storage as needed, accommodating different project types and spatial configurations. A rolling cart stocked with essential supplies can be easily moved to different areas of the table, reducing the need for constant back-and-forth movement. Stationary storage alone restricts adaptability and can hinder workflow efficiency.
- Transparent Containment Systems
The use of transparent storage containers, such as clear plastic bins or glass jars, facilitates quick identification of contents without the need for labeling or rummaging. This visual accessibility streamlines the process of locating specific items, saving time and minimizing disruption. Storing beads in clear containers, for example, allows the user to quickly identify the desired color and size. Opaque containers necessitate labeling and require more time to locate items.
The integration of dedicated compartments, vertical space maximization, mobile solutions, and transparent containment systems transforms a simple crafting table into a highly efficient and organized creative hub. These strategies collectively minimize clutter, enhance accessibility, and promote a more focused and productive crafting experience. The absence of thoughtfully integrated storage significantly diminishes the functionality and appeal of a do-it-yourself crafting table.
4. Lighting Adequacy
Adequate illumination is a non-negotiable requirement in any functional workspace, and this holds particularly true for a do-it-yourself crafting table. Suboptimal lighting directly impacts the quality of work, increases the risk of errors, and can contribute to eye strain and fatigue. The construction of a crafting table must therefore incorporate lighting considerations from the outset, recognizing it not as an afterthought but as a fundamental component of the overall design. For instance, attempting detailed miniature painting under insufficient light sources will inevitably result in imprecise brushstrokes and inaccurate color representation.
Various lighting solutions can be integrated into or positioned near a crafting table to achieve optimal illumination. Natural light, while desirable, is often inconsistent and unreliable. Supplementation with artificial light is therefore essential. Task lighting, such as adjustable LED lamps, provides focused illumination directly on the work surface, eliminating shadows and enhancing visibility. Color-corrected bulbs are crucial for ensuring accurate color perception, especially in disciplines like painting and textile work. Furthermore, ambient lighting, provided by overhead fixtures, ensures a balanced level of illumination throughout the workspace, preventing harsh contrasts that can cause eye strain. The selection of lighting must also consider the potential for glare, which can be mitigated through the use of diffusers or adjustable lamp positions.
In summary, lighting adequacy is inextricably linked to the functionality and user experience of a crafting table. Insufficient or poorly designed lighting introduces challenges to precision, accuracy, and visual comfort. A thoughtful approach to lighting integration, considering the interplay of natural and artificial sources, task-specific requirements, and glare mitigation, is essential for creating a productive and ergonomically sound crafting environment. Therefore, diy crafting table and lighting adequacy are two things that cannot be separated from each other.
5. Power Accessibility
Power accessibility, representing the ease with which electrical outlets can be utilized, is a critical, often underestimated, component of a functional do-it-yourself crafting table. The absence of readily available power necessitates the use of extension cords and power strips, introducing safety hazards and visual clutter. Conversely, strategically integrated power outlets enable the convenient operation of tools, equipment, and lighting without compromising safety or aesthetics. The cause-and-effect relationship is direct: inadequate power access hinders workflow, while sufficient access streamlines it. For example, a sewing machine, heat gun, or soldering iron requires a nearby power source. Without it, the crafting process is significantly impeded.
Practical implementation includes integrating power outlets directly into the table’s structure, often along the back or sides. These outlets can be connected to a surge protector to safeguard sensitive electronic devices. Furthermore, USB ports may be incorporated to facilitate the charging of mobile devices or the operation of USB-powered tools. Concealing wiring within the table’s frame minimizes clutter and prevents accidental disconnections. The incorporation of a foot-operated power switch allows for hands-free operation of tools, enhancing safety and control. Consider a scenario where a crafter needs to frequently switch a hot glue gun on and off. A foot switch would drastically improve workflow and reduce the risk of burns.
Ultimately, power accessibility is not merely a convenience but an essential element of a well-designed crafting environment. The thoughtful integration of power outlets, surge protection, and concealed wiring enhances safety, promotes efficiency, and contributes to a more organized and productive crafting experience. Failure to adequately address this aspect diminishes the functionality and practicality of even the most meticulously constructed diy crafting table, so keep that in mind.
6. Surface Finish
The surface finish applied to a crafting table directly influences its durability, cleanability, and suitability for various crafting activities. The selection of an appropriate finish is not merely an aesthetic consideration but a functional imperative, impacting the table’s resistance to spills, scratches, and chemical damage. An unfinished wood surface, for example, is highly susceptible to staining from paints, dyes, and adhesives, rendering it unsuitable for many crafting applications. Conversely, a well-chosen finish provides a protective barrier, extending the lifespan of the table and simplifying maintenance. The relationship is fundamentally causal: the choice of surface finish directly affects the utility and longevity of the diy crafting table.
Practical examples illustrate the significance of surface finish. A high-gloss epoxy resin finish provides excellent resistance to chemicals and spills, making it ideal for crafting activities involving paints, solvents, or resins. A laminate surface, offering a balance of durability and affordability, is suitable for general crafting tasks. A polyurethane finish offers good protection for wood surfaces, resisting scratches and water damage. Conversely, a poorly chosen finish, such as an inadequately applied varnish, may peel, crack, or stain easily, necessitating frequent repairs or replacement. Different surfaces have their own advantages.
In conclusion, the surface finish is an integral component of the diy crafting table, directly affecting its performance and durability. A thoughtful selection process, considering the specific crafting activities and potential hazards, is crucial for ensuring a functional and long-lasting workspace. The selection challenge lies in balancing durability, aesthetics, and cost-effectiveness, leading to an optimized crafting solution.
7. Spatial Efficiency
Spatial efficiency, the optimization of available space for maximum utility, is a paramount consideration in the design and construction of a do-it-yourself crafting table. The effective management of area limitations directly impacts the table’s functionality, storage capacity, and overall integration within the intended workspace. Prioritizing spatial efficiency transforms a potentially cramped or cluttered crafting area into an organized and productive environment. For a crafting enthusiast with a compact apartment, maximizing every square inch is vital.
- Foldable and Collapsible Designs
The incorporation of foldable or collapsible components enables the crafting table to be stowed away when not in use, freeing up valuable floor space. Hinged tabletops, retractable shelves, and folding legs allow the table to transform from a fully functional workspace to a compact, easily stored unit. This is particularly relevant in smaller living spaces where dedicated crafting areas are a luxury. Example: A wall-mounted crafting table that folds down when needed and folds up into a slim cabinet when not in use, is the idea to save space.
- Multi-Functional Elements
Integrating multi-functional elements maximizes the utility of the available space. A crafting table that doubles as a storage unit, featuring built-in drawers, shelves, and cubbies, eliminates the need for separate storage solutions. A reversible tabletop could offer a cutting surface on one side and a smooth writing surface on the other. This approach consolidates multiple functions into a single unit, conserving space and reducing clutter. Example: a table with a built-in light table for tracing is an example of space saving and multi-functional.
- Vertical Storage Solutions
Leveraging vertical space through the use of wall-mounted shelving, pegboards, and overhead cabinets expands storage capacity without encroaching upon valuable work surface area. These solutions keep tools and materials within easy reach while freeing up the tabletop for active projects. Vertical storage is particularly effective for organizing small items such as paints, brushes, and beads. By utilizing wall space that would otherwise remain unused, the overall spatial efficiency of the crafting area is significantly enhanced. Example: A narrow shelf system on a wall to store materials is a good example.
- Nesting and Modular Components
The implementation of nesting or modular components allows for flexible configuration and adaptation to changing needs. Crafting tables can be designed to nest within each other, creating a tiered workspace. Modular storage units can be added or removed as required, adapting to the evolving demands of different crafting projects. This adaptability ensures that the crafting area remains optimized for spatial efficiency over time. Example: a collection of stacking bins that store materials.
These considerations collectively underscore the significance of spatial efficiency in the design of a do-it-yourself crafting table. By prioritizing foldable designs, multi-functional elements, vertical storage solutions, and nesting components, individuals can create a highly functional and organized crafting area, even within limited spaces. The careful attention to space-saving strategies transforms a potential constraint into an opportunity for creative innovation and efficient workflow.
Frequently Asked Questions about DIY Crafting Tables
This section addresses common inquiries and clarifies misconceptions regarding the design, construction, and utilization of customized crafting workstations.
Question 1: What is the optimal height for a crafting table?
The ideal height is determined by the user’s stature and the nature of the crafting activities. As a general guideline, the tabletop should be positioned at a height that allows the user to work comfortably with their elbows bent at a 90-degree angle. Adjustable-height tables offer the greatest flexibility.
Question 2: What materials are most suitable for a durable crafting table surface?
Durable options include solid hardwood, plywood with a high-quality laminate finish, and epoxy resin. These materials resist scratches, stains, and chemical damage, ensuring longevity.
Question 3: How can a crafting table be effectively integrated into a small space?
Solutions include foldable designs, wall-mounted units, and multi-functional tables that incorporate storage. Vertical storage solutions, such as shelves and pegboards, also maximize space utilization.
Question 4: What is the best way to organize tools and supplies on a crafting table?
Compartmentalized drawers, labeled containers, and pegboards offer effective organization. Transparency in storage containers facilitates quick identification of contents.
Question 5: What type of lighting is recommended for crafting activities?
A combination of ambient and task lighting is ideal. Adjustable task lighting should provide focused illumination on the work surface, while color-corrected bulbs ensure accurate color perception.
Question 6: How can electrical safety be ensured when using power tools on a crafting table?
Integrate surge protectors and grounded outlets directly into the table’s structure. Conceal wiring to prevent tripping hazards and accidental disconnections.
These answers provide a foundation for informed decision-making regarding crafting table design and construction, resulting in a more functional and enjoyable crafting environment.
The subsequent section will explore practical considerations for table construction and detailed design ideas.
DIY Crafting Table
The preceding exploration has detailed the multifaceted considerations inherent in the design and construction of a “diy crafting table”. From material selection and ergonomic principles to storage integration, lighting adequacy, power accessibility, surface finish, and spatial efficiency, each element contributes to the functionality and practicality of the customized workspace. Optimal implementation of these factors results in a dedicated area conducive to creative productivity.
Ultimately, the effectiveness of a “diy crafting table” hinges upon thoughtful planning and meticulous execution. The investment in time and resources to create such a workspace offers tangible benefits in terms of organization, efficiency, and user satisfaction. The knowledge imparted herein serves as a foundation for realizing the full potential of customized crafting environments, enabling individuals to pursue their creative endeavors with enhanced focus and comfort. The building process should not be taken lightly and care and attention should be devoted to the process.


