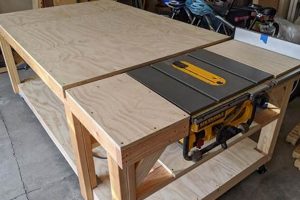
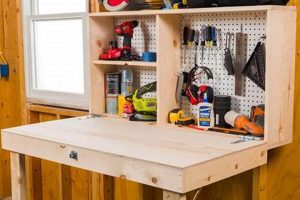
A self-constructed workspace designed specifically for sewing activities can range from a repurposed surface to a purpose-built piece of furniture. Such a construction offers a customized solution to the needs of a sewing enthusiast. For instance, a discarded door might be transformed into a spacious area for pattern cutting and fabric manipulation, supported by sturdy legs or sawhorses.
The advantage of creating such a piece lies in its adaptability to individual space requirements, ergonomic preferences, and budget constraints. Historically, resourceful individuals have modified existing furniture or built structures from scratch to accommodate their crafting pursuits. This approach fosters creativity, resourcefulness, and ownership over the workspace. Furthermore, it can significantly reduce the financial investment compared to purchasing a commercially manufactured alternative.
The following sections will delve into specific aspects of design, materials, construction techniques, and essential considerations for creating a functional and personalized area tailored to sewing projects.
Practical Guidance for a Self-Constructed Sewing Workspace
The following guidance offers critical considerations for designing and executing a self-constructed sewing area, emphasizing functionality and durability.
Tip 1: Space Assessment is Paramount. Prior to construction, meticulously evaluate the available space. Account for the dimensions of the sewing machine, fabric storage, cutting area, and ergonomic reach. This assessment dictates the overall dimensions and layout.
Tip 2: Material Selection Affects Longevity. Choose materials based on durability, stability, and ease of maintenance. Solid wood or high-density plywood provides a robust surface. Consider laminate or sealant for spill protection.
Tip 3: Ergonomics Improves Workflow. Determine the appropriate height of the surface to promote comfortable posture during extended sewing sessions. Adjustability options, such as adjustable legs, are valuable for customization.
Tip 4: Integrated Storage Streamlines Organization. Incorporate drawers, shelves, or cubbies into the structure to house sewing supplies, tools, and works-in-progress. Categorize storage solutions for efficiency.
Tip 5: Surface Stability is Essential. Employ robust joining techniques and sturdy supports to prevent wobbling or shifting during use. Reinforce corners and joints for long-term structural integrity.
Tip 6: Lighting Enhances Precision. Plan for adequate lighting. Task lighting, such as an adjustable arm lamp, focuses illumination on the sewing area. Natural light supplementation is also beneficial.
Tip 7: Cord Management Promotes Safety. Integrate cable management solutions, such as grommets or channels, to organize power cords and prevent tripping hazards. Ensure all electrical connections meet safety standards.
By adhering to these practical guidelines, individuals can construct a personalized sewing area that optimizes workflow, enhances comfort, and contributes to a productive and enjoyable sewing experience.
The subsequent section will address common challenges and potential pitfalls encountered during the creation of a customized sewing surface, offering strategies for mitigation.
1. Customized dimensions
The implementation of tailored measurements constitutes a core advantage in self-constructed sewing workspaces. The ability to adapt the structure to fit specific spatial requirements, ergonomic needs, and project types distinguishes it from mass-produced alternatives.
- Surface Area Optimization
The footprint of the work surface can be precisely configured to accommodate pattern cutting, fabric manipulation, and machine placement. Large-scale projects, such as quilting, necessitate a significantly larger surface area compared to smaller garment construction. Customization allows maximizing usable space while minimizing spatial intrusion.
- Height Adjustability for Ergonomics
The vertical dimension of the surface is critical for maintaining comfortable posture. Sewing activities often involve prolonged periods of seated work, increasing the risk of musculoskeletal strain. An adjustable height mechanism, or precise measurement during construction, enables the optimization of surface height to individual anthropometric data.
- Depth and Reach Considerations
The depth of the surface impacts the accessibility of materials and tools. A deeper surface accommodates larger fabric rolls and provides ample space for machine accessories. However, excessive depth can compromise reach and necessitate excessive stretching. Customization allows balancing accessibility and comfort.
- Integration with Existing Furniture
A self-constructed sewing surface can be designed to seamlessly integrate with existing furniture and storage solutions within the workspace. This integration promotes efficient space utilization and a cohesive aesthetic. For instance, a purpose-built surface might extend from an existing desk or align with the height of adjacent shelving.
The integration of customized dimensions into the creation of a sewing area exemplifies the adaptability and personalization inherent in the self-construction approach. By tailoring the measurements to specific user needs and spatial constraints, an optimized and ergonomic workspace is achievable, promoting both productivity and comfort.
2. Ergonomic considerations
The incorporation of ergonomic principles into the design and construction of a self-made sewing area is paramount for promoting physical well-being and maximizing workflow efficiency. A focus on posture, reach, and repetitive movements can mitigate the risk of musculoskeletal disorders associated with prolonged sewing activities.
- Surface Height Optimization
The height of the sewing area surface directly impacts posture and strain on the back, neck, and shoulders. A surface that is too low necessitates excessive bending, while a surface that is too high causes shoulder elevation and tension. Determining the optimal surface height, typically aligning with elbow height while seated, is crucial. Adjustable legs or a customized design should accommodate individual anthropometric measurements.
- Seating Selection and Posture Support
The choice of seating significantly influences spinal alignment and comfort. A chair with adjustable height, lumbar support, and armrests promotes proper posture and reduces pressure on the lower back. Encouraging frequent changes in posture and incorporating short breaks for stretching can further mitigate discomfort.
- Lighting Placement and Intensity
Adequate illumination is essential for minimizing eye strain and promoting visual accuracy during detail-oriented sewing tasks. Task lighting, positioned strategically to eliminate shadows and glare, provides focused illumination on the work area. Adjustable lamps allow for customization of light intensity and direction, adapting to specific project requirements and individual visual needs.
- Tool and Material Accessibility
Efficient organization and placement of sewing tools and materials reduce unnecessary reaching, bending, and twisting movements. Frequently used items should be positioned within easy reach, minimizing strain on the upper extremities. Utilizing storage solutions, such as drawer dividers and tiered shelving, promotes accessibility and reduces clutter.
Integrating these ergonomic considerations into the creation of a self-constructed sewing workspace represents a proactive approach to mitigating physical strain and promoting a comfortable and productive sewing environment. The adaptability inherent in fabrication allows for the precise tailoring of dimensions and features to individual needs, thereby enhancing long-term well-being.
3. Integrated Storage
The strategic inclusion of integrated storage in a self-constructed sewing surface directly impacts its functionality and usability. In the context of crafting a workspace, storage provisions are not merely ancillary additions, but rather integral components that determine the efficiency and organization of the entire unit. The absence of planned storage within a sewing zone often results in cluttered workspaces, diminished productivity, and increased time spent searching for materials and tools. Conversely, the implementation of well-designed storage solutions directly addresses these inefficiencies.
For example, consider a surface designed with incorporated drawers of varying depths. The shallower drawers may house smaller implements like bobbins, needles, and measuring tapes, while deeper drawers can accommodate fabric scraps, patterns, and larger tools like rotary cutters. Furthermore, shelves built directly into the table’s structure can house bolts of fabric, thereby maintaining a clear surface area for actual sewing operations. Another example is a sewing table with hinged extensions that reveal hidden storage compartments when lifted, offering a discreet way to store larger sewing machines or bulky equipment when not in use. This level of integration maximizes available space and promotes a streamlined workflow.
Effective integrated storage within a sewing surface necessitates a thorough understanding of the user’s needs, available space, and organizational preferences. Challenges in implementing these solutions may include spatial constraints, material costs, and the complexity of the construction process. However, the benefits of a well-organized and clutter-free workspace significantly outweigh these challenges, contributing to a more productive and enjoyable sewing experience. Ultimately, the intentional design of integrated storage is a crucial element in realizing the full potential of a self-constructed sewing area.
4. Material durability
The longevity and functionality of a self-constructed sewing surface are intrinsically linked to the durability of the materials employed in its construction. Substandard material selection can lead to premature structural failure, compromising the usability and lifespan of the workspace. For instance, employing low-density particleboard for the primary surface may result in sagging or warping under the weight of sewing machines and equipment, necessitating costly repairs or replacement. Conversely, utilizing solid hardwood or high-grade plywood provides enhanced structural integrity, resisting deformation and wear over extended periods. The choice of materials, therefore, directly dictates the long-term viability of the structure.
Beyond structural integrity, material durability extends to surface resistance against common sewing-related incidents. Spilled liquids, scratches from sharp tools, and prolonged exposure to sunlight can degrade the appearance and functionality of the surface. Application of durable finishes, such as polyurethane or epoxy resin, can mitigate these effects, providing a protective barrier against moisture, abrasion, and UV radiation. Furthermore, the selection of hardware, such as hinges and drawer slides, should prioritize corrosion resistance and load-bearing capacity to ensure smooth and reliable operation over time. Proper material selection and protective measures minimize maintenance requirements and extend the lifespan of the customized sewing surface.
In conclusion, material durability is a critical factor in determining the long-term value and utility of a self-built sewing station. Careful consideration of material properties, coupled with appropriate protective treatments, is essential for creating a robust and functional workspace that withstands the rigors of regular sewing activities. Ignoring this consideration may lead to costly repairs or premature replacement, negating the economic and personalized benefits of a custom-built solution. Ultimately, a durable sewing area ensures continued productivity and enjoyment for the sewing enthusiast.
5. Workspace lighting
Adequate illumination is a critical component of a functional self-constructed sewing area. The relationship between these two aspects is causative: insufficient lighting directly impedes the precision and efficiency of sewing tasks. A dimly lit workspace forces the user to strain their eyes, leading to fatigue, errors in stitching, and potential injuries from mishandling sharp tools. Conversely, strategically planned lighting enhances visibility, reduces eye strain, and promotes a more productive and comfortable sewing experience. A practical example is the addition of adjustable task lighting to a homemade sewing setup, allowing the user to direct light precisely where it is needed, such as when threading a needle or examining intricate stitchwork. This level of control is frequently absent in commercially manufactured sewing tables, thus underscoring the importance of customized lighting solutions in the self-construction process.
Furthermore, the integration of diverse lighting types contributes to a well-illuminated sewing environment. Ambient lighting, such as overhead fixtures, provides general illumination, while focused task lighting addresses specific areas of need. Color temperature is also a significant consideration. Natural daylight-balanced bulbs minimize color distortion, enabling accurate fabric matching and stitch assessment. In contrast, warmer or cooler light temperatures can skew color perception, leading to errors in fabric selection and construction. The ability to tailor these parameters is particularly beneficial when constructing a dedicated workspace, as it allows the user to optimize the lighting conditions for their specific visual needs and the types of projects they typically undertake. For instance, quilters often benefit from brighter, cooler light to discern subtle variations in fabric colors, while garment makers may prefer a softer, warmer light to enhance the texture of fabrics.
Effective workspace lighting is not merely an aesthetic consideration but a fundamental element influencing the overall success and enjoyment of sewing activities. The challenges in achieving optimal illumination include balancing ambient and task lighting, selecting appropriate color temperatures, and minimizing glare. However, by prioritizing these aspects during the design and construction of a do-it-yourself sewing area, users can create a visually comfortable and ergonomically sound environment that enhances precision, reduces fatigue, and promotes a more fulfilling sewing experience. The integration of tailored lighting solutions reinforces the value of customization inherent in self-constructed sewing surfaces.
Frequently Asked Questions About Self-Constructed Sewing Areas
The following section addresses common inquiries regarding the design, construction, and functionality of personalized sewing workspaces.
Question 1: What are the primary advantages of a self-constructed sewing area compared to commercially available alternatives?
A self-constructed sewing area provides customization options not typically found in manufactured products. This includes tailored dimensions, integrated storage solutions, and ergonomic adjustments specific to the user’s needs and workspace constraints.
Question 2: What are the essential tools required for constructing a basic sewing table?
Essential tools include a measuring tape, saw (circular or hand saw), drill, screwdriver, sandpaper, clamps, and safety glasses. Depending on the design complexity, additional tools such as a router or jigsaw may be necessary.
Question 3: What types of materials are suitable for building a durable and stable sewing surface?
Solid wood, high-density plywood, and MDF (medium-density fiberboard) are commonly used materials. Solid wood offers superior durability, while plywood and MDF provide a more cost-effective alternative with sufficient stability for most applications. The choice depends on budget and desired lifespan.
Question 4: How can ergonomic principles be effectively incorporated into the design of a sewing surface?
Ergonomic design focuses on optimizing surface height, seating, and lighting. The surface should be positioned at a comfortable working height, typically aligning with elbow height while seated. A supportive chair and adequate task lighting are also crucial for reducing strain and fatigue.
Question 5: What are the common challenges encountered during the creation of a custom sewing space, and how can they be mitigated?
Common challenges include inaccurate measurements, material selection errors, and structural instability. Mitigation strategies include meticulous planning, precise cutting, utilizing robust joining techniques, and reinforcing stress points.
Question 6: How should lighting be optimized to reduce eye strain and enhance visibility during sewing activities?
Optimal lighting involves a combination of ambient and task lighting. Task lighting should be adjustable and positioned to minimize shadows and glare. Natural daylight-balanced bulbs are recommended for accurate color perception.
Careful consideration of these questions prior to and during the design process can help ensure the successful creation of a functional and personalized sewing surface.
The subsequent section will examine specific design strategies and construction techniques for creating a customized sewing area.
Conclusion
This exploration of the “diy sewing table” concept has underscored the significant advantages of a customized approach to workspace design. The ability to tailor dimensions, integrate storage, and optimize ergonomics presents a compelling alternative to commercially available options. A thoughtfully planned and meticulously constructed sewing area directly contributes to enhanced productivity, improved comfort, and a more fulfilling sewing experience.
The creation of a personalized sewing surface represents a tangible investment in the craft. By embracing the principles of self-construction, individuals can cultivate workspaces that not only meet their immediate needs but also evolve alongside their growing skills and expanding creative endeavors. The commitment to thoughtful design and quality construction ensures a lasting and valuable asset for the dedicated sewing enthusiast.


