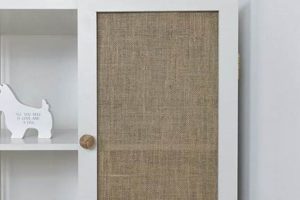
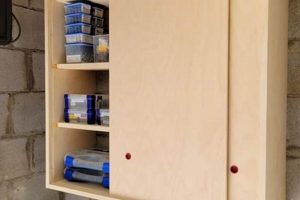
Cabinet fronts, often constructed with simplified methods and readily available materials, allow individuals to replace or upgrade existing cabinetry without professional assistance. These projects frequently utilize techniques such as pre-cut lumber, iron-on edging, and simple hardware installation for straightforward assembly. A practical instance includes using plywood sheets and applying a decorative laminate for an aesthetically pleasing, cost-effective alternative to custom-built units.
The utilization of simplified cabinet components offers numerous advantages, including cost reduction, personalization of interior spaces, and the fulfillment of custom sizing needs not met by standard options. Historically, crafting furniture was a specialized skill, but the advent of readily available materials and simplified construction methods has democratized the process, allowing for greater accessibility and adaptability for homeowners. This approach fosters self-sufficiency and offers a tangible way to enhance the value and appeal of residential properties.
The subsequent sections will explore various design options, material considerations, and construction techniques involved in creating your own updated cabinet faces. Further discussion will address surface finishing, hardware selection, and installation methods to ensure a professional and lasting result.
Essential Construction Guidelines
The following recommendations are designed to optimize the creation process, ensuring durability and aesthetic appeal.
Tip 1: Precise Measurement is Paramount: Prior to material acquisition, meticulous measurements of existing frames are essential. Inaccurate dimensions can result in misaligned structures and necessitate costly revisions. Double-check all figures and account for any potential inconsistencies in the existing cabinetry.
Tip 2: Material Selection for Longevity: Opt for high-quality materials, such as cabinet-grade plywood or hardwood, to ensure structural integrity and resistance to warping or damage. Cost-effective options exist, but prioritizing durability will extend the lifespan of the finished product.
Tip 3: Employ Accurate Cutting Techniques: Utilizing a table saw or circular saw with a guide rail enables precise, clean cuts. Employing these techniques minimizes splintering and ensures a professional finish. In the absence of power tools, hand saws can be used with care, but may require more extensive sanding.
Tip 4: Secure and Flush Joinery: Employ wood glue and screws or nails for robust joinery. Ensure all connections are flush to minimize the need for extensive filling and sanding. Clamps are indispensable for maintaining alignment during the drying process.
Tip 5: Proper Surface Preparation: Sand all surfaces thoroughly with progressively finer grits of sandpaper. This creates a smooth, uniform surface that promotes optimal adhesion of paint, stain, or other finishes. Dust removal is crucial prior to applying any coating.
Tip 6: Consistent Finish Application: Apply finishes in thin, even coats to prevent drips, runs, and uneven coverage. Multiple thin coats are preferable to a single thick coat. Allow adequate drying time between coats, as specified by the manufacturer’s instructions.
Tip 7: Strategic Hardware Placement: Use a template to ensure consistent and accurate hardware placement. This promotes a professional appearance and ensures uniform functionality across all installations. Consider the ergonomics of handle and knob placement for ease of use.
Adhering to these guidelines maximizes the probability of a successful outcome, yielding cabinet faces that are both visually appealing and structurally sound.
The subsequent sections will delve into troubleshooting common issues and provide guidance on long-term maintenance.
1. Precise Measurements
Accurate dimensional data is paramount for the successful creation of replacement cabinet fronts. Deviations from specified measurements can result in ill-fitting components, rendering the project unfeasible and incurring avoidable expenses. The subsequent discussion details critical elements regarding the role of dimensional accuracy in this process.
- Frame Opening Tolerances
Cabinet frames are rarely perfectly square or uniformly sized. Accurate measurements of the opening, accounting for any deviations, are crucial. For example, a frame that is slightly wider at the top than the bottom necessitates a corresponding adjustment in the door dimensions to ensure proper closure and alignment. Failure to do so results in gaps, binding, or an inability to latch the door.
- Hardware Placement Considerations
Precise measurements are essential for accurate hardware placement, including hinges, knobs, and pulls. Inconsistent placement can lead to misalignment, creating functional problems and detracting from the aesthetic appeal. For instance, hinges placed even slightly out of alignment can cause the door to swing improperly, potentially damaging the frame or other adjacent structures. Templates and measuring tools are indispensable for mitigating these errors.
- Material Thickness Compensation
When determining the final dimensions, the thickness of the chosen material must be factored into the calculations. For inset doors, a precise allowance must be made for the material thickness to ensure a flush fit with the frame. Failure to compensate results in doors that either protrude from or recede into the frame, compromising the intended design aesthetic and potentially impeding functionality.
- Reveal and Overlap Accuracy
The desired reveal, or the amount of frame visible around the door, must be consistently maintained. Accurate measurements enable the creation of uniform reveals, contributing to a professional and refined appearance. For example, inconsistencies in the reveal can create visual asymmetry and indicate a lack of precision, detracting from the overall quality of the project. Careful attention to detail in this area is essential for achieving a polished outcome.
In summation, the integration of precise measurements into every stage of the cabinet replacement process directly impacts the final result. Accuracy fosters a seamless blend of form and function, facilitating a transformation that enhances both the aesthetic and utilitarian value of the cabinetry.
2. Material Cost
Material expenditure represents a pivotal consideration in projects focused on simplified cabinet modifications, significantly influencing project feasibility and overall scope. Effective management of expenses necessitates a comprehensive understanding of material options, associated costs, and potential trade-offs between cost and quality.
- Plywood vs. Solid Wood
Plywood, particularly cabinet-grade varieties, offers a cost-effective alternative to solid wood. While solid wood presents superior aesthetics and durability, its higher price point may be prohibitive for budget-conscious projects. Plywood, when properly sealed and finished, can provide acceptable performance at a reduced financial burden. An example would be using oak plywood instead of solid oak, reducing material costs by as much as 50%.
- Veneer vs. Laminate
Surface finishing options, such as veneer and laminate, impact both the aesthetic appeal and overall project cost. Veneer, a thin layer of real wood applied to a substrate, offers a more natural appearance but at a higher price compared to laminate, a synthetic material with printed wood grain patterns. Laminate provides a cost-effective and durable surface, making it a viable option for simplified cabinetry renovations. For instance, a melamine laminate may cost significantly less than a high-quality wood veneer.
- Hardware Selection
Hardware, including hinges, knobs, and pulls, constitutes a significant portion of the overall material expenses. Budget options, such as basic metal hinges and standard pulls, are available, but may compromise durability or aesthetic appeal. Investing in higher-quality hardware can improve the lifespan and functionality of the cabinet doors, but this choice increases initial material costs. A homeowner may choose budget-friendly hinges initially, but find they need replacing sooner, incurring additional costs and labor.
- Waste Minimization Strategies
Effective material utilization minimizes waste and reduces overall project expenses. Careful planning, precise cutting techniques, and strategic material sourcing can significantly decrease the amount of unusable material. For example, optimizing cutting layouts to maximize the use of plywood sheets or repurposing salvaged lumber for smaller components helps reduce expenses and promotes sustainability.
In essence, a strategic approach to material selection and utilization is essential for realizing simplified cabinet modifications. Balancing material cost with desired quality, durability, and aesthetic appeal facilitates cost-effective transformations without compromising the integrity or longevity of the finished product. This optimization enables wider accessibility to personalized cabinet modifications, emphasizing the practicality and attainability of enhancing residential spaces.
3. Simplified Joinery
The application of simplified joinery methods significantly influences the feasibility and accessibility of cabinet door construction for the do-it-yourself enthusiast. By employing techniques that require minimal specialized tools and expertise, the barrier to entry for cabinet modification projects is substantially reduced.
- Pocket Hole Joinery
Pocket hole joinery involves drilling angled holes into one workpiece and then using screws to attach it to another. This method eliminates the need for complex cuts and clamping, streamlining the assembly process. The resulting joint is strong and relatively easy to conceal with wood plugs or filler. In the context of cabinet door construction, pocket hole joinery can be used to assemble frames and attach panels, greatly simplifying the building process. An example would be attaching the rails and stiles of a door frame using pocket holes, creating a strong and aesthetically pleasing joint.
- Butt Joints with Fasteners
Butt joints, where two pieces of wood are simply butted together, represent one of the most basic forms of joinery. When reinforced with screws, nails, or dowels, butt joints can provide sufficient strength for many cabinet door applications, especially when combined with glue. This approach eliminates the need for intricate cuts or specialized tools. Using butt joints is common in creating flat panel doors where the panel is simply attached to the frame via glue and screws.
- Iron-on Edge Banding
Iron-on edge banding provides a simplified method for finishing the exposed edges of plywood or other composite materials. This eliminates the need for creating complex edge profiles or applying traditional wood veneer. The edge banding is simply applied with a household iron, creating a clean and professional-looking edge. It simplifies the construction of cabinet doors by covering up the exposed plies of the plywood, resulting in a clean and finished aesthetic.
- Pre-fabricated Components
The use of pre-fabricated components, such as pre-cut panels, frames, or decorative moldings, further simplifies the construction process. These components eliminate the need for precise cutting and shaping, allowing individuals to focus on assembly and finishing. Pre-fabricated shaker-style door fronts, for instance, can be purchased and simply installed, avoiding the complexities of creating the frame and panel from scratch. These components allows DIY enthusiasts to skip the complex steps and move to assembly and finishing.
The application of these simplified joinery techniques democratizes the process of cabinet door construction, allowing individuals with limited experience and resources to create customized cabinet solutions. By minimizing the technical demands and tool requirements, these methods make cabinet modifications accessible to a wider audience, fostering creativity and self-sufficiency in home improvement projects. This approach expands accessibility to personalized cabinet modifications, highlighting the practicality and achievability of enhancing residential spaces.
4. Surface Finishing
Surface finishing constitutes a critical phase in the creation of accessible cabinet fronts, directly influencing their aesthetic appeal, durability, and longevity. The selection and application of appropriate finishes determine the resistance of these doors to moisture, wear, and staining, thereby impacting their long-term performance. Incorrectly applied or inappropriate finishes can result in premature degradation, necessitating costly repairs or replacements, negating the economic benefits of undertaking a simplified project. For instance, cabinet fronts intended for use in kitchens or bathrooms require moisture-resistant finishes, such as polyurethane or epoxy-based coatings, to prevent water damage and warping.
The process of surface finishing encompasses several distinct stages, including sanding, priming, and the application of topcoats. Each stage contributes to the overall quality and appearance of the completed cabinet fronts. Proper sanding ensures a smooth, uniform surface, promoting optimal adhesion of subsequent coats. Priming seals the material, preventing absorption of the topcoat and enhancing its durability. The selection of the topcoat depends on the desired aesthetic and performance characteristics. Examples include paint for color customization, stain for highlighting the wood grain, or varnish for a clear protective layer. A poorly executed finish, such as uneven paint application or inadequate sealing, can detract from the overall appearance and reduce the lifespan of the cabinet fronts.
In summary, surface finishing is an indispensable element in the creation of easily constructed cabinet fronts. A meticulous approach to surface preparation and finish application is essential for achieving durable, aesthetically pleasing, and long-lasting results. The understanding of appropriate materials and methods enables homeowners to create cost-effective and personalized cabinet solutions that enhance the value and appeal of their living spaces. The balance between effort expended during surface finishing and the resultant longevity of the product underlines the practical significance of this understanding.
5. Hardware Installation
The effective installation of hardware is integral to the functionality and aesthetic appeal of cabinet replacements. The selection and precise fitting of hinges, knobs, pulls, and other fixtures determine ease of use, structural integrity, and the overall perceived quality of the finished product. Improperly installed hardware can result in doors that do not close properly, loosen over time, or detract from the visual harmony of the cabinet set. For instance, hinges that are not aligned correctly will cause doors to bind or sag, while pulls or knobs that are not centered will disrupt the visual balance.
Templates and measuring tools are invaluable in achieving consistent and accurate hardware placement. A template, often constructed from cardboard or plastic, serves as a guide for drilling pilot holes and ensuring uniform spacing. Measuring tools, such as levels and combination squares, aid in maintaining alignment and preventing skewed installations. The absence of these tools increases the likelihood of errors, which can necessitate time-consuming corrections or replacements. An example would be the installation of soft-close hinges, where precise alignment is crucial for the damping mechanism to function correctly. Deviations from the specified installation parameters will render the soft-close feature ineffective.
Hardware installation is a crucial component of the replacement process. Proper installation contributes significantly to the user experience, the lifespan of the cabinet doors, and the overall visual impact of the kitchen or other space. Accurate execution of hardware installation ensures that the finished product functions smoothly, looks professional, and withstands the rigors of daily use.
Frequently Asked Questions
The following section addresses common inquiries and misconceptions regarding the fabrication of accessible cabinet fronts.
Question 1: What tools are absolutely essential for creating cabinet doors?
While specialized equipment enhances efficiency, the bare minimum includes a measuring tape, a saw (circular or hand saw), a drill, a screwdriver, sandpaper, and clamps.
Question 2: Which material offers the best balance of cost and durability?
Cabinet-grade plywood generally provides an optimal combination of affordability and structural integrity. It is less prone to warping than solid wood, but requires edge banding for a finished look.
Question 3: How can one ensure accurate measurements for cabinet door replacements?
Multiple measurements of the cabinet opening are recommended, taking into account any irregularities or inconsistencies. Furthermore, subtracting appropriate allowances for hardware clearance is crucial.
Question 4: Is professional assistance required for surface finishing?
While professional finishing yields superior results, careful sanding, priming, and application of quality paint or stain can achieve a satisfactory outcome for less experienced individuals.
Question 5: What is the best method for concealing imperfections in DIY cabinet doors?
Wood filler can be used to fill gaps and blemishes. Sanding the filler flush with the surrounding surface ensures a smooth transition before applying the finish.
Question 6: How does one prevent sagging in self-made cabinet doors?
Employing robust joinery techniques, such as pocket screws or mortise-and-tenon joints, reinforces structural integrity and minimizes the risk of sagging over time. Furthermore, using appropriately sized hinges is essential.
In summary, the construction of simplified cabinet fronts requires careful planning, accurate execution, and informed material selection. While professional expertise offers certain advantages, many aspects of the process are accessible to individuals with basic woodworking skills.
The subsequent section will explore troubleshooting techniques for common issues encountered during construction and installation.
Concluding Remarks
The preceding discussion has illuminated the practical aspects of creating cabinet replacements using simplified methods. Through careful measurement, cost-conscious material choices, accessible joinery techniques, strategic surface finishing, and precise hardware installation, individuals can achieve functional and aesthetically pleasing results without extensive professional assistance. The emphasis on accuracy, material knowledge, and methodical execution serves as a foundation for successful project completion.
The capacity to construct easy diy cabinet doors offers a means of personalizing living spaces and enhancing property value. While challenges may arise, a commitment to detail and a willingness to learn mitigate potential pitfalls. The sustained application of acquired skills not only delivers immediate benefits but also cultivates a lasting aptitude for home improvement endeavors.


